

Getting Started with Enrollment Configurations
Enrollment configurations let you enroll mobile devices fast and place them in the right business unit, folder and groups. A device that enrolls through a specific enrollment configuration is sorted and ready for management as soon as it’s enrolled.
You manage enrollment configurations under System Administration → Enrollment Configurations. Right-click an enrollment configuration to find New…, Clone…, Delete, Scheduling… and Properties.
Requirements
Section titled “Requirements”Technical requirements:
iOS-specific requirements:
Simple device enrollment: the default configuration
Section titled “Simple device enrollment: the default configuration”CapaInstaller lets administrators and users enroll devices right out of the box.
Device enrollment is enabled by default through the enrollment configuration named Default. Open a web browser on the device and go to the Default enrollment URL:
https://<server>:443/cimdm/The default configuration uses Active Directory authentication. Devices enrolled with it aren’t added to any groups and don’t get any asset tags. They’re placed in the root of Computers and Devices in the default Configuration Management Point, together with your other unsorted devices and computers.
To use the other features of enrollment configurations, clone the default configuration and create a set of enrollment configurations that fit your organization’s enrollment needs.
Device enrollment: create your first enrollment configuration
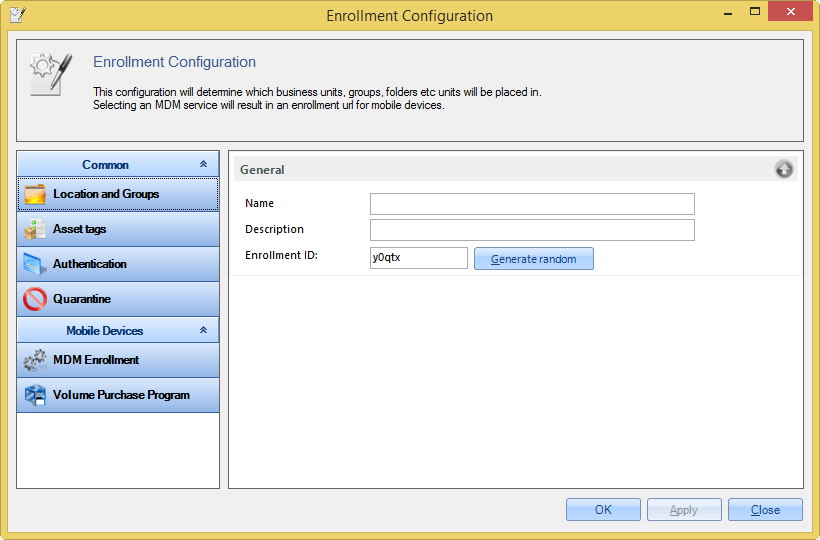
Section titled “Device enrollment: create your first enrollment configuration”When you open the configuration dialog, it contains only the General section. Here you specify a name, a description and an enrollment ID. The enrollment ID is part of the enrollment URL and is limited to 15 characters. Click Generate random to create a random ID. After the configuration is created, you can’t change the enrollment ID.
To add more sections to the configuration, click the buttons on the left side. To remove a section again, click the red x in the upper-right corner of the section.
Location and Groups
Section titled “Location and Groups”In the Location and Groups section, you choose where the devices are placed in your CapaInstaller management infrastructure during enrollment.
First, choose a Configuration Management Point (CMP) and a Business Unit (BU). Then you can select a unit folder in either the CMP or the BU.
Next, you can choose one or more groups in the CMP or BU that the devices become members of during enrollment.
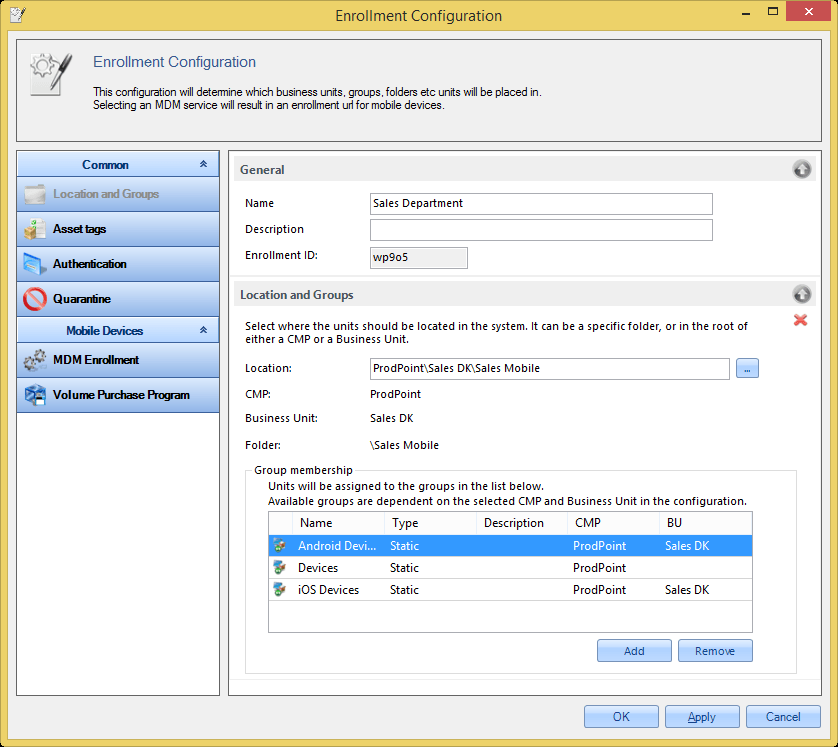
This lets you sort enrolling devices by company, location, department or any other structure your organization uses.
If you don’t configure this section, devices can still enroll. Like with the default enrollment configuration, they’re placed in the root of Computers and Devices in the default management point.
Asset tags
Section titled “Asset tags”The Asset tags section assigns asset tags to the enrolled devices. This gives you finer control of enrollment scenarios and helps customers who use CapaInstaller Asset Management identify and describe company devices.
You create the asset tags that you can choose here in Work with assets.
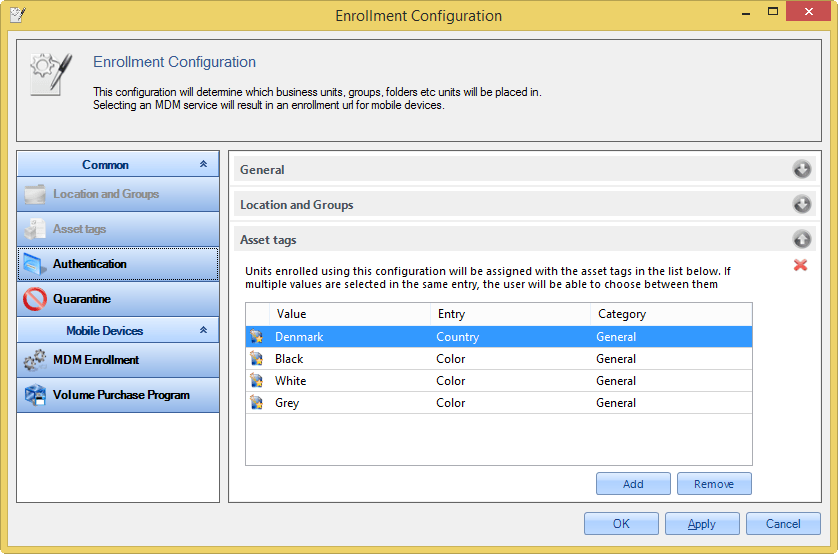
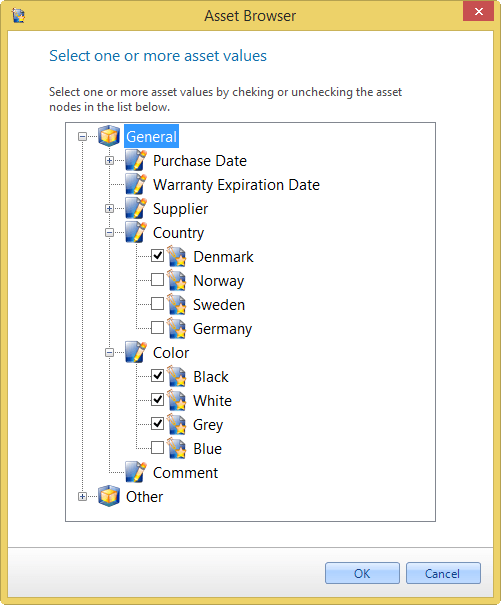
Click Add in the Asset tags section to open the Asset Browser dialog.
You can select multiple values in the same entry to let the enrolling user choose between them. Select only one value if you don’t want to give the user a choice.
The values that you or the enrolling user choose are assigned to the enrolled devices.
Authentication
Section titled “Authentication”The Authentication section secures enrollment with authentication and lets you link users to the enrolled devices.
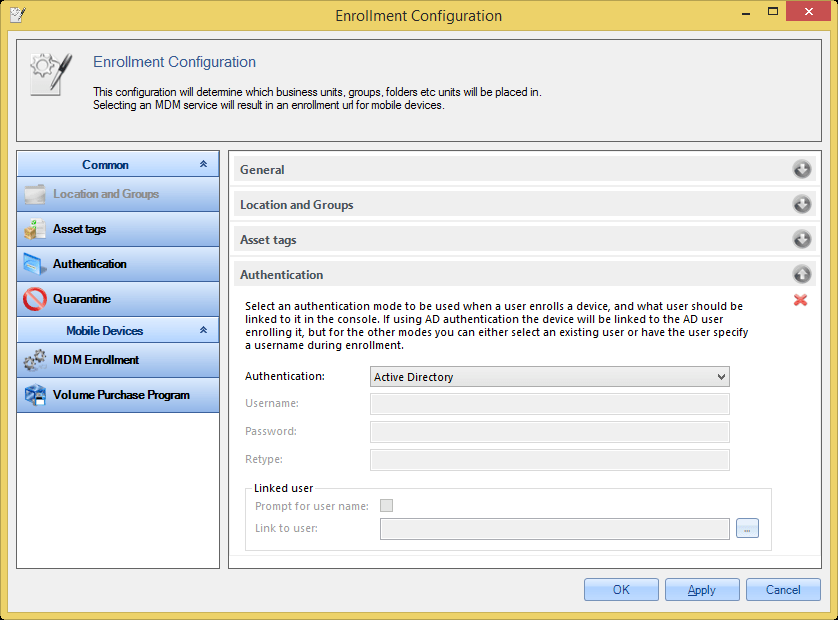
There are three authentication modes:
- Active Directory
- Simple
- None
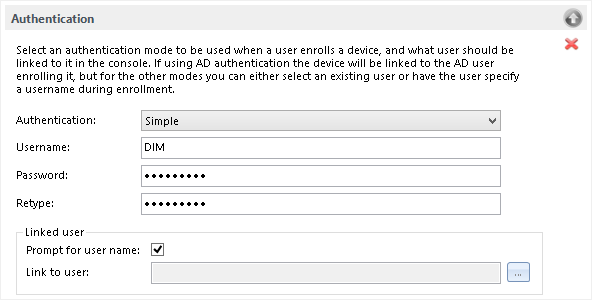
If you can’t authenticate through Active Directory, use Simple to set up a user name and password that the enrollment page asks for before the device is enrolled.
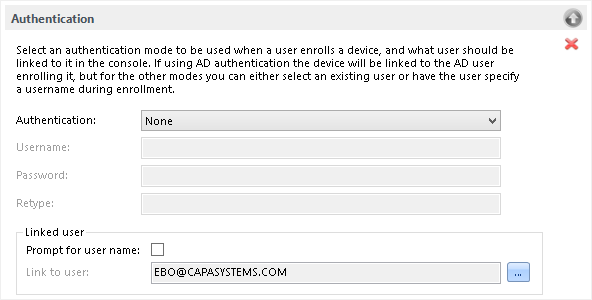
Linked user: Select an existing user to link the device to, or prompt for a user name on the enrollment page. This option is available for the Simple and None authentication modes. With Active Directory authentication, the AD user who enrolls the device is linked to the device.
This example uses simple authentication, and the user who enrolls a device is asked for a user name to link to the device:
This example uses no authentication, and all devices enrolled with it are linked to the same user:
Quarantine
Section titled “Quarantine”
When you add the Quarantine section, devices enrolled with this configuration are placed in quarantine right after enrollment. They wait for an administrator’s approval before the rest of the configuration options take effect. This lets you review every device that enrolls through the configuration’s URL.
You find the quarantined devices in Configuration Management under CMP → Views → Quarantined Units or CMP → Business Units → your BU → Views → Quarantined Units.
If devices enrolled with this configuration are in quarantine and you then change the CMP or BU of the configuration, the devices are moved from quarantine in the old CMP or BU to quarantine in the new one.
MDM Enrollment
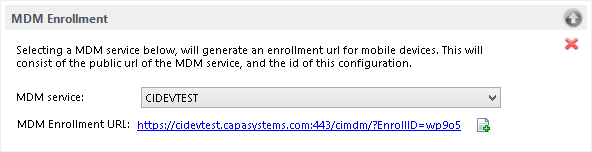
Section titled “MDM Enrollment”The MDM Enrollment section doesn’t control whether the configuration is active on your MDM service. It generates an enrollment URL from the public URL of the selected MDM service and the enrollment ID of the configuration.
Click the icon next to the MDM Enrollment URL to copy the URL to the clipboard. You can then send it to users by email or publish it on your intranet, so they can start enrolling their devices.
The Android Enrollment settings in this section apply to Android devices that enroll with the configuration:
- Choose whether devices install the CapaInstaller agent from Google Play (requires a Google account on the device) or from the MDM Server (No Google Account required on the device).
- Device Name (Optional): Select Prompt for device name to ask for a device name during enrollment. Default name is the preset value. Regular expression validates the name against your naming standard, and Example text shows the user an example of a valid name.
- If you have an Android Enterprise account, you can select it in Android Enterprise Account.
Volume Purchase Program
Section titled “Volume Purchase Program”In the Volume Purchase Program section, select one of your VPP accounts, or let the user choose one during enrollment with Prompt for VPP. Apple devices enrolled with this configuration receive an invitation to the selected VPP account. When the user on the device accepts the invitation, the Apple ID on the device is associated with the VPP account.
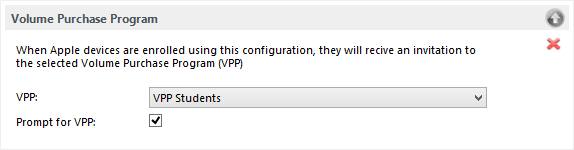
Combine this VPP setting with the group membership in Location and Groups to let users enroll a device and receive licensed apps without any further action from an administrator.
Example scenario:
- Devices become members of a group that contains licensed apps. The apps get their licenses from the VPP account selected in this configuration.
- When a device is enrolled, a VPP invitation is sent and the apps from the group are assigned.
- The first installation attempt of the licensed apps results in the status Needs license key.
- When the user accepts the invitation on the device, the user is associated with the VPP account. CapaInstaller checks periodically, assigns the needed license and tries the installation again.
End User Agreement
Section titled “End User Agreement”In the End User Agreement section, you choose which agreement text users see when they enroll devices with this configuration:
- User agreement: The user agreement from the MDM service configuration.
- Operator agreement: The operator agreement from the MDM service configuration.
- Custom: A text that you enter for this configuration.
Clone an enrollment configuration
Section titled “Clone an enrollment configuration”Use Clone… to create more enrollment configurations based on an existing one.
- Right-click the enrollment configuration that you want to use as the base, and select Clone….
- Change the values that you want to change.
- Give the configuration a new name.
- Click Ok.
The new enrollment configuration appears under System Administration → Enrollment Configurations.