OSDClient update preparation
This guide describes the steps required to upgrade to the OSDClient.
Requirements
Section titled “Requirements”Before you continue, make sure the OS Deployment server meets the OS Deployment requirements. The server needs the Windows ADK and the Windows PE add-on for the ADK in matching versions.
Enable OSDClient
Section titled “Enable OSDClient”How to enable the OSDClient to replace OSDGUI...
-
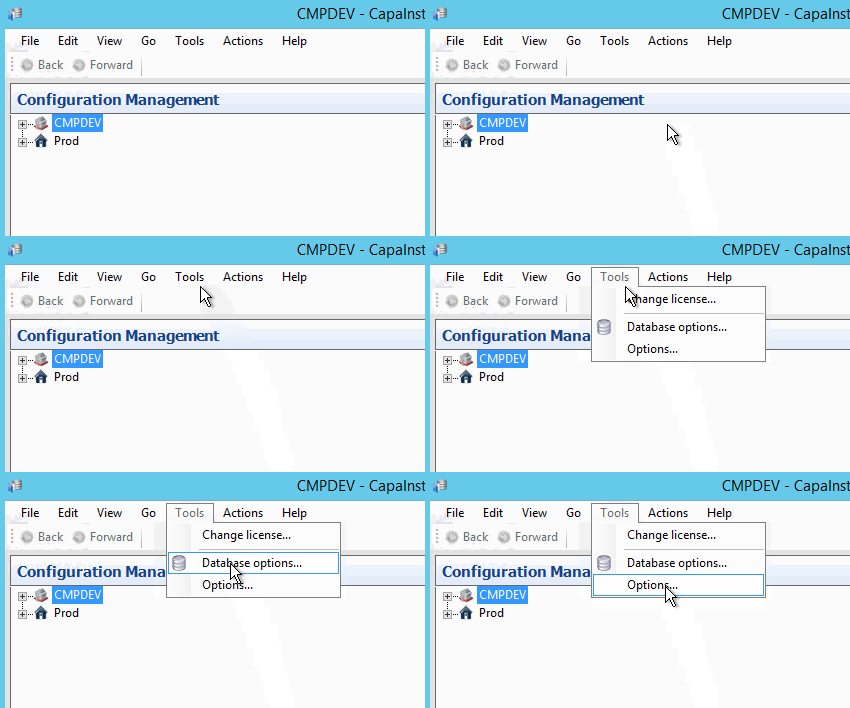
Navigate to the OS Deployment options dialog: select Tools → Options in the top menu.
-
Select Use OSDClient for Legacy clients.
OS Deployment options
Detailed description of the configurable options...
- Mount folder — the folder to temporarily mount the Windows PE image in when the OS Deployment Point is configured.
- Remove folders after unmount — remove the temporary mount folders after unmount.
- Use OSDClient for legacy clients — use OSDClient to handle deployment of legacy clients, replacing OSDGUI.
- WAIK or ADK files — the path to the WAIK and ADK files.
- ADK files — the path to the ADK files used for OSDClient boot on UEFI and legacy clients.
- Administrator — the user or group that can manage the solution. Specify a domain/AD security group.
- Client log folder — the folder on the backend server that stores client log files.
Create new boot files for your platforms
Section titled “Create new boot files for your platforms”How to create a boot image...
-
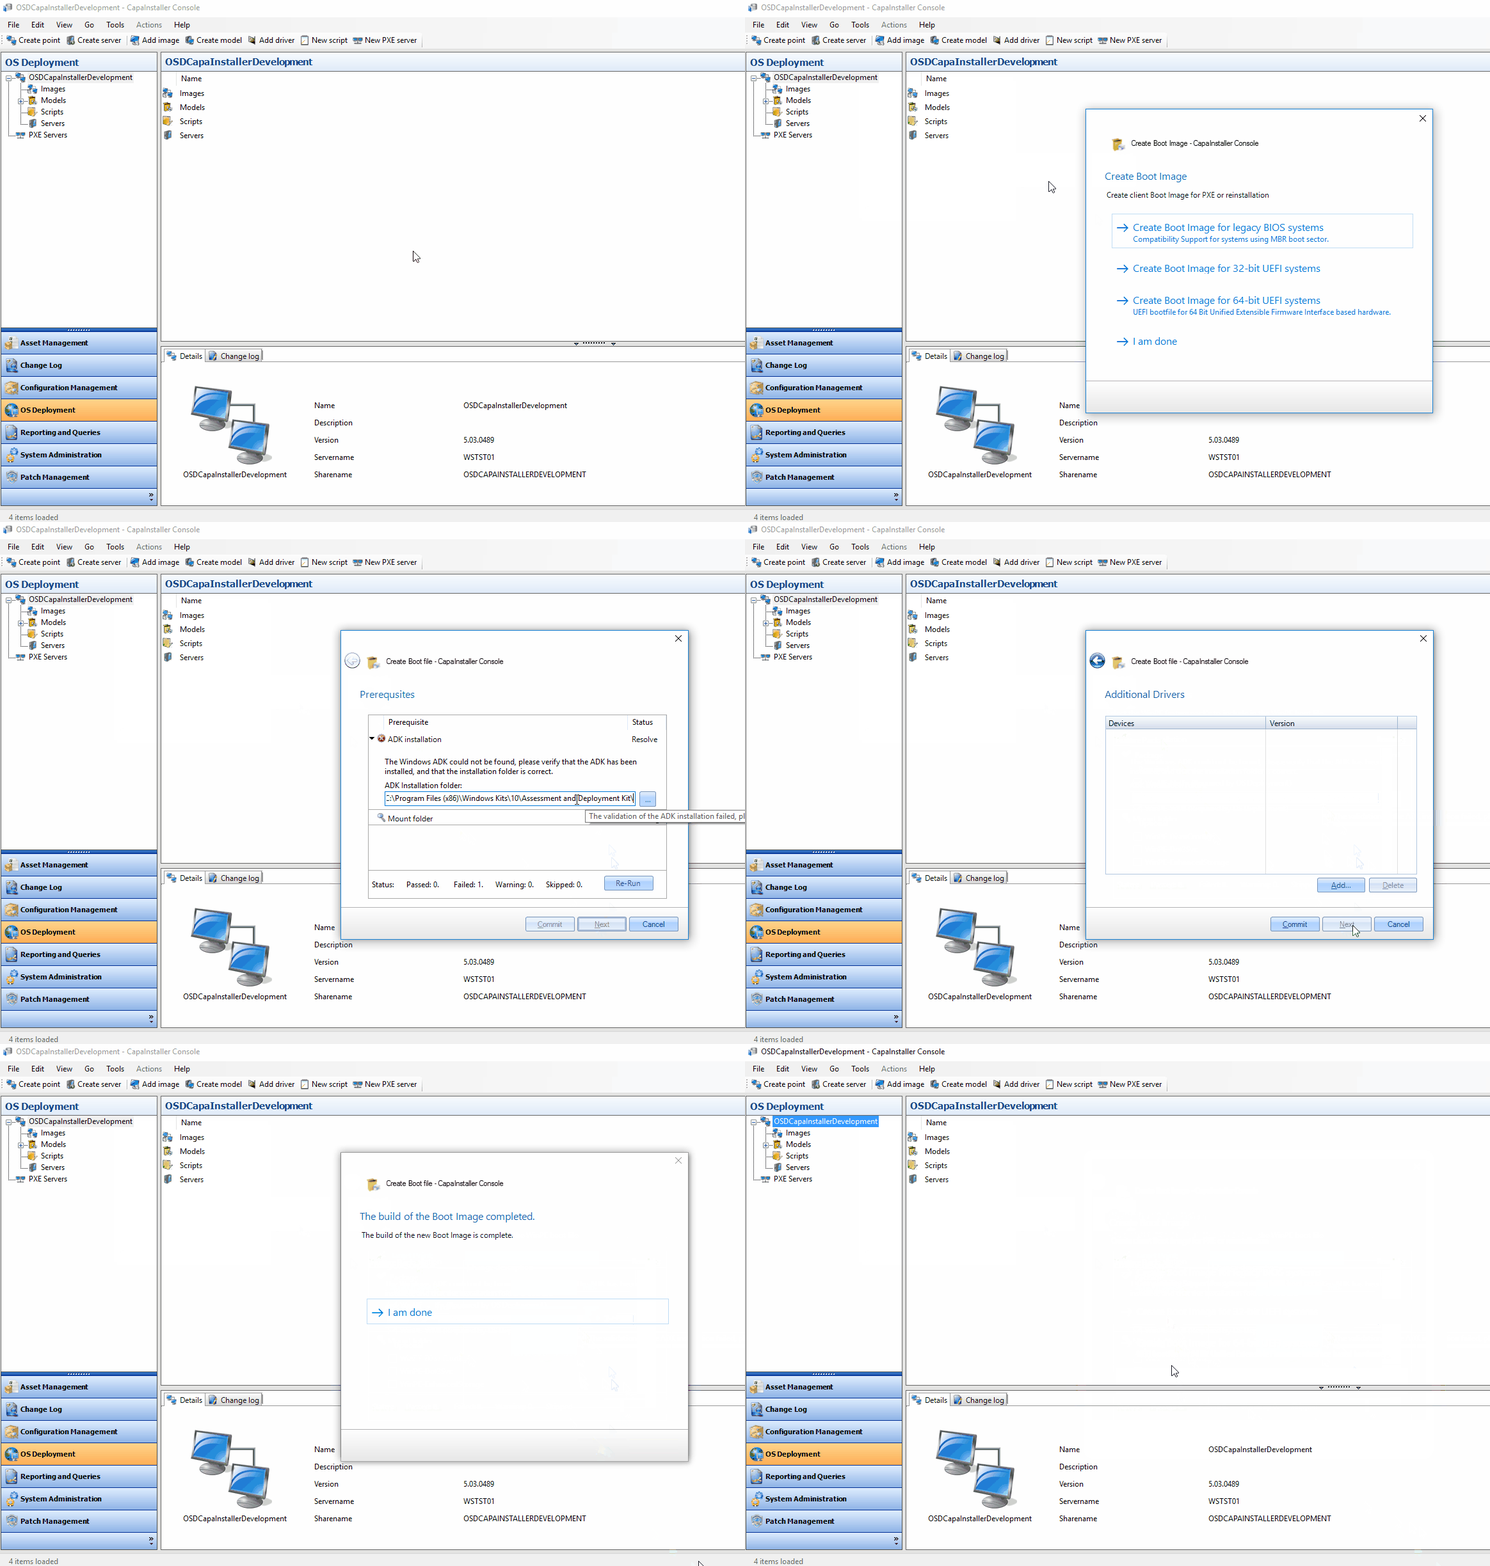
Right-click the OSD point and select Boot Image → Create Boot File….
-
Choose Create Boot Image for 32-bit UEFI systems or Create Boot Image for 64-bit UEFI systems.