

Working with Self Service Portal
This guide describes the first steps in getting started with CapaInstaller Self Service.
It outlines how to install, set up authentication, and create the first configuration for devices and users.
Installing
Section titled “Installing”Follow the below steps to install the CapaInstaller Self Service Portal
Deploy a Back-end Service
Section titled “Deploy a Back-end Service”To be able to communicate with CapaInstaller services and to authenticate against an Active Directory, the Self Service Portal relies on the CapaInstaller Back-end Service.
If you already have a Back-end Service Deployed for other purposes, skip this step.
To save time and effort, mark and copy the Back-end service public URL to the clipboard. You will need to enter this URL later when installing the Self Service Portal.
Read more
Section titled “Read more”- How to Deploy the Back-end Service
Enable the Web Server
Section titled “Enable the Web Server ”Requirements:
- IIS 7.5 or above
- .NET Framework 4.6.2 or later
Enable the Web Server (IIS) role on the Windows Server that is set to host the Self Service Portal site. This server’s DNS name will be the base URL for access to the Self Service Portal.
Read more
Section titled “Read more”Execute the Windows Installer package
Section titled “Execute the Windows Installer package”Execute the Windows Installer package (CapaInstaller Self Service Portal**.msi)** for the Self Service Portal.
Locate the file in the share of the root configuration management point e.g. “…\CMPDEV\Resources\Self Service Portal\CapaInstaller Self Service Portal.msi”
Follow the steps in the guided Setup and enter the URL to the relevant Back-end service, when asked. The setup installs the portal as the SelfServicePortal application in the Default Web Site in IIS.
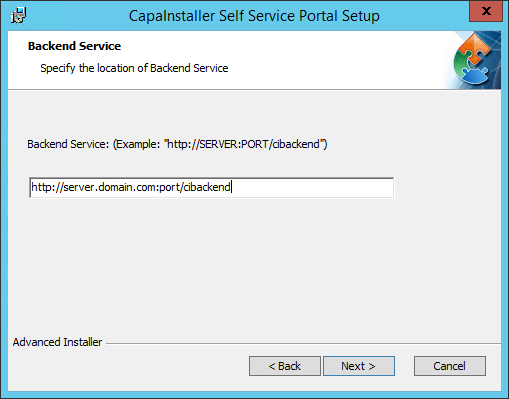
Setting up IIS
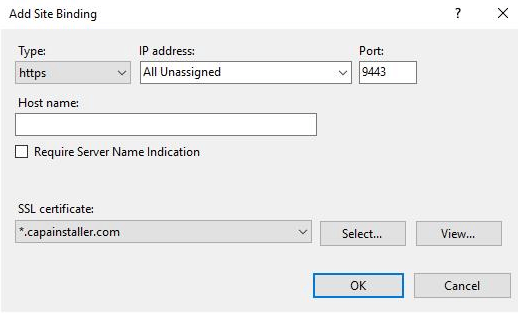
Section titled “Setting up IIS”Self Service Portal use SSL port 9443
Type: https
The IP address: All Unassigned
Port 9443
Hostname: (nothing)
SSL certificate: wildcard cert
Setting up access
Section titled “Setting up access”To enable automatic access for devices and users without the need for login/password the below options should be configured
Specify the URL
-
Specify the URL for the Self Service Portal
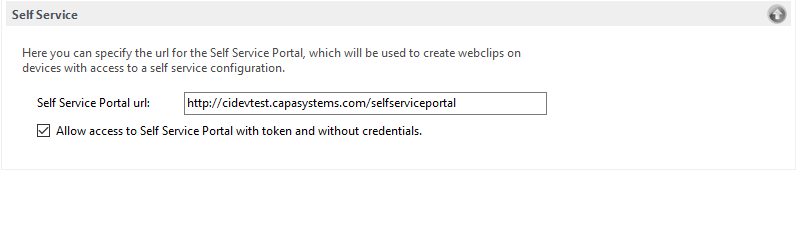
Enabling device access with token in options
- In the top menu, select Tools → Options → System Administration.
- Expand the Self Service Portal section.
- Select Allow access to Self Service Portal with token.
Set up authentication link distribution.
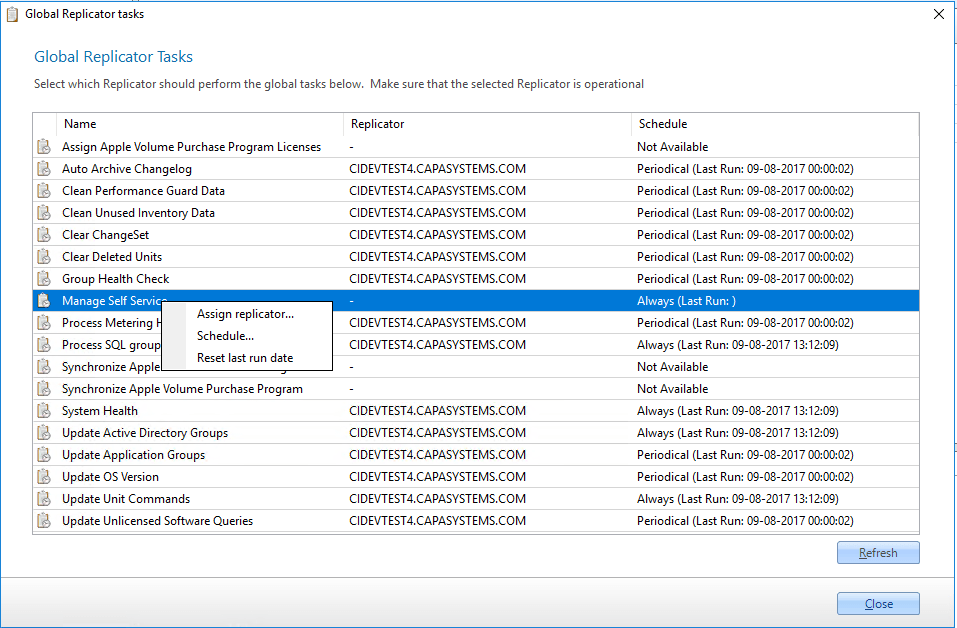
To distribute and maintain the correct authentication links, a replicator must be assigned to the global task “Manage Self Service” and a Schedule for this task created.
- Select the Global Tasks button in the toolbar
- Right-click the Manage Self Service task on the list.
- Assign a replicator
- Create a schedule
Read more
- How to configure System Administration options
- How to Assign replicator to a global task
- How to use Scheduling
Adding a Self Service Configuration
Section titled “Adding a Self Service Configuration”- Locate Self Service Configurations in Groups > System Groups in Configuration Management
- Click on Create
- Enter a name for the configuration
- Select the applications that will be available via this configuration
The Self Service configuration is now ready. Users and devices can now be linked to the configuration using the buffer.