Images
Introduction
Section titled “Introduction”The following is a description of the process involved in adding and promoting previously captured image to CapaInstaller OSD.
The images supported are based on the Windows Image format (.wim)
 Adding a captured Image
Section titled “Adding a captured Image”- Right click on Images in the root Point and select Add Windows Image
- Browse for the imagefile in your Captures folder
- The folder is by default located in your root OSD Point
- If you wish to use the filename as a Imagename or Description, you can mark the name and copy to clipboard
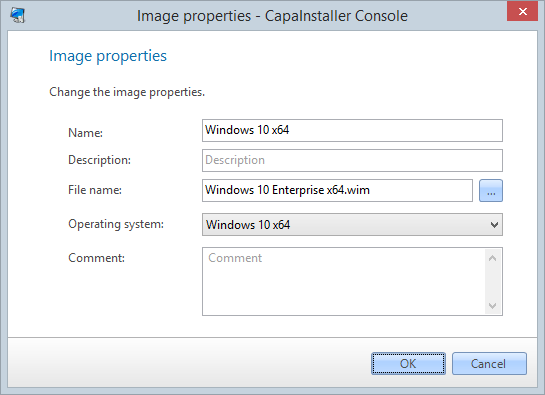
- Specify the name of the image and an optional Decription of the image.
- Select what Operating System the file is Captured from
- Click OK and wait a couple of minutes for the addition to complete. Transfer speeds are dependent on network and disk speeds.
Image properties
Section titled “Image properties”Right-clicking on an image gives you the following options:
-
Promote
Section titled “Promote”
Lets you promote the items on the CapaInstaller OS Deployment Point to a child point. This can only be done if a child point has been created.
Click Next to promote the image to the child Deployment Point. 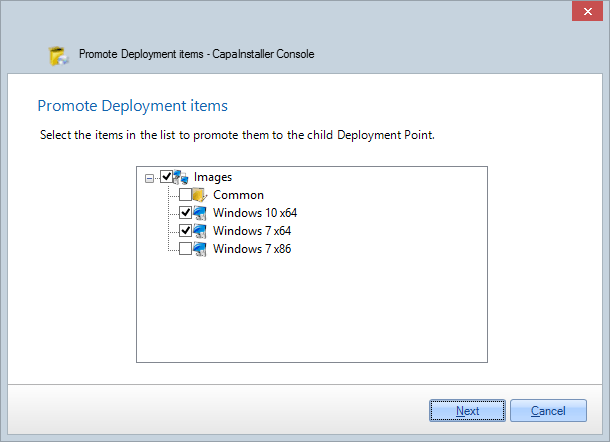
-
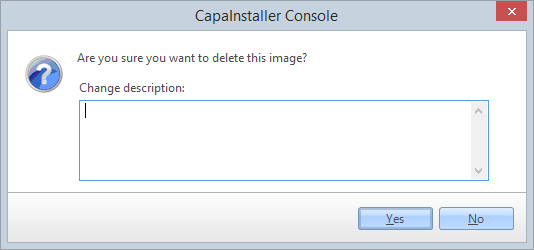
Delete
Section titled “Delete”
Lets you delete the image. You are asked to confirm this.
-
Properties
Section titled “Properties”
Displays the properties for the image. For a detailed description of the individual fields, see above.