

Create a reinstall group
A reinstallation group holds the OS Deployment settings and the schedule used to reinstall the computers in the group.
Create the group
Section titled “Create the group”-
In Configuration Management, expand your Configuration Management Point, then Groups → System Groups.
-
Right-click Reinstallation Groups (or a folder under it) and select Create group….
-
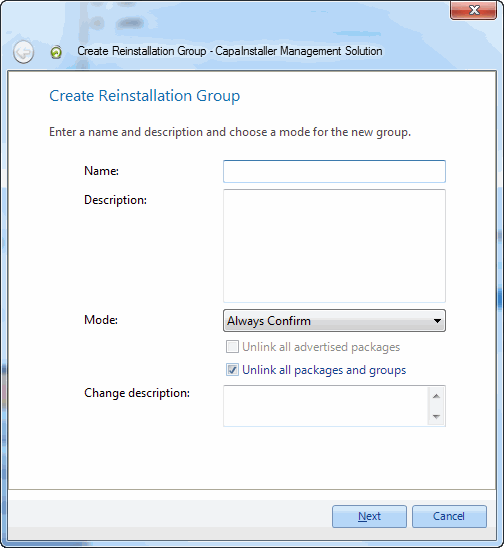
On the first page, enter a Name and, optionally, a Description.
-
In Mode, choose whether the user must confirm the reinstallation:
- Always Confirm
- Confirm Only If User Logged On
- Silent
-
Choose what happens to the computer’s assignments when it’s reinstalled:
- Unlink all advertised packages unlinks the installed packages that were published to a catalog from the computer.
- Unlink all packages and groups removes all package and group links from the computer. When you select this option, Unlink all advertised packages is unavailable.
-
Optional: enter a Change description. If your system requires a change description, you must enter one. Click Next.
-
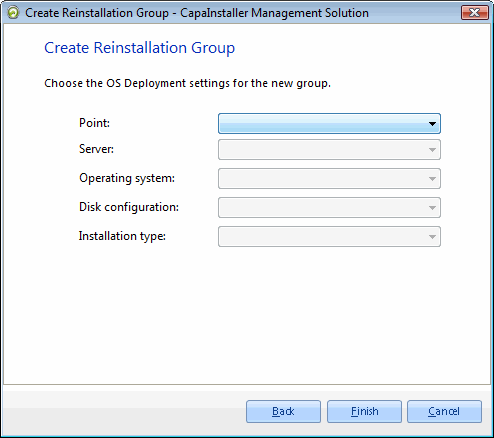
On the OS Deployment page, select the Point, Server, Operating system and Disk configuration. Installation type is optional.
-
Click Finish.
-
Choose what to do next: I am done, Create another group at the same location, or Create a schedule for the new group.
The group appears under Reinstallation Groups. Computers you add to the group are reinstalled according to the group’s schedule. A computer can only be a member of one reinstallation group. If you add it to another one, the console asks you to confirm, and the link to its current reinstallation group is removed.