

Create / Edit a Deployment Template
You create and maintain deployment templates in the CapaOne portal. The images and disk configurations that you can select come from your CapaInstaller installation, so synchronize with CapaOne first. See Synchronize between CapaOne and CMS Installation.
Open the CapaOne portal
Section titled “Open the CapaOne portal”In the OS Deployment tree, right-click the OS Point and select Open CapaOne…. The menu item is only shown when deployment templates are enabled.
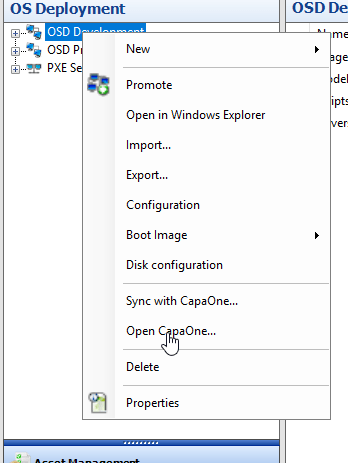
Create or modify a deployment template
Section titled “Create or modify a deployment template”On the Deployment Templates page, select + to create a template, or select the edit icon next to an existing template.
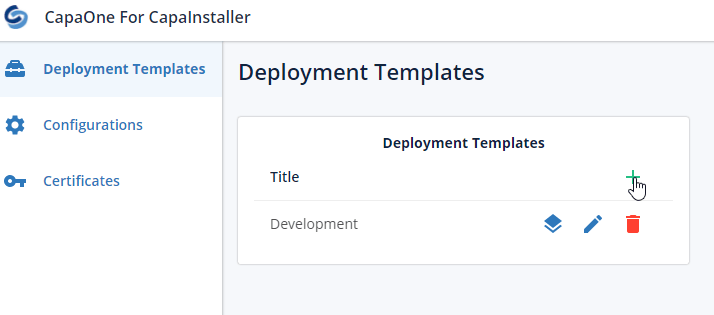
Enter a name in Config Name, and then select and fill in the sections that the template should configure.
Operating System
Section titled “Operating System”Select the Image and the Disk Config. If you leave one of them empty, the user selects it in the OSD GUI during installation. You can also enable the local administrator user and enter its password, and enter a license key.
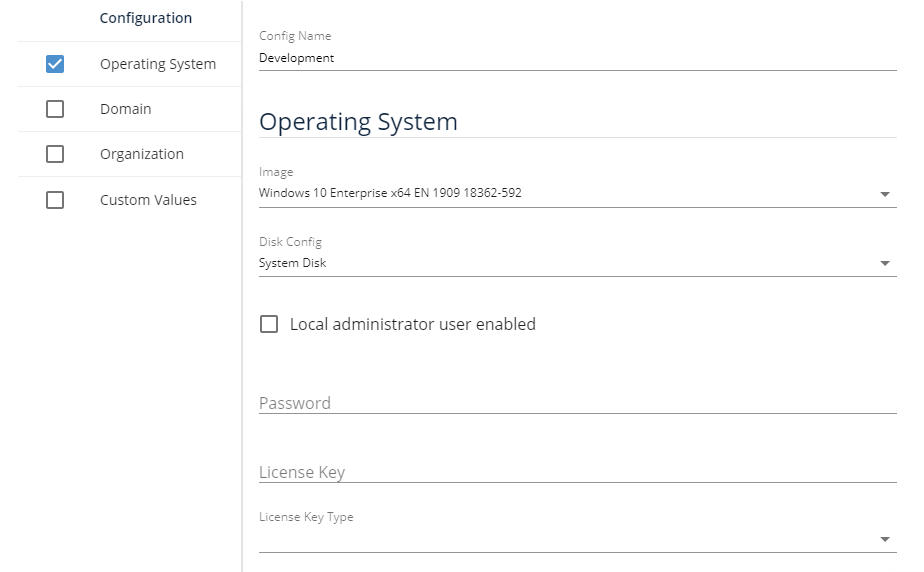
Domain
Section titled “Domain”Enter the domain to join or a workgroup name, the domain account used to join the domain, and the OU for the computer object.
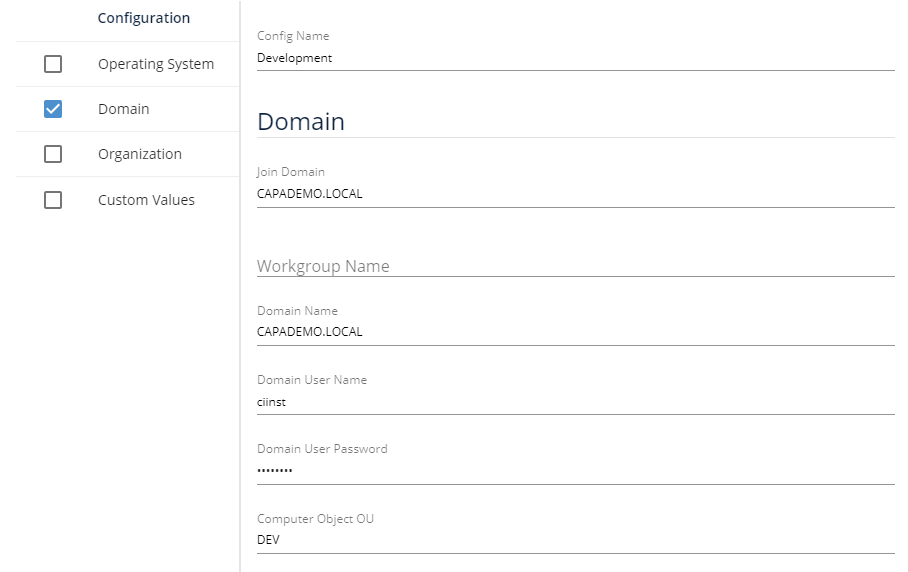
Organization
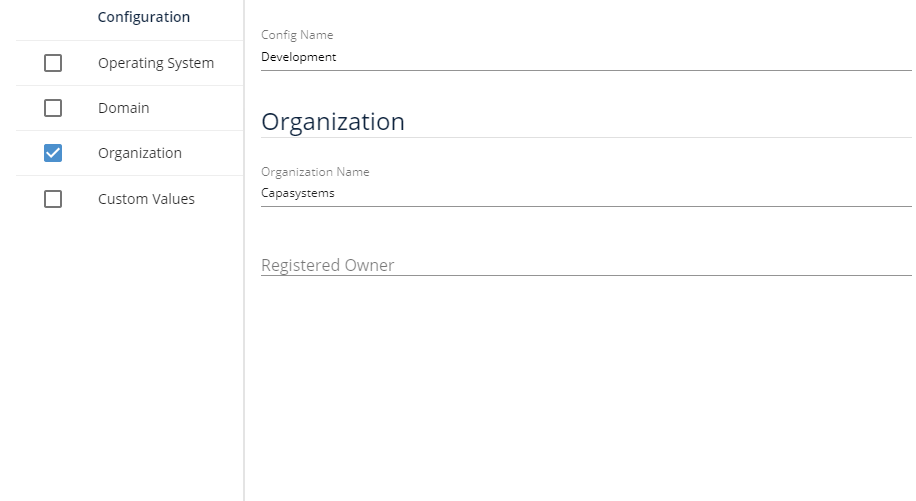
Section titled “Organization”Enter the organization name and the registered owner.
Custom Values
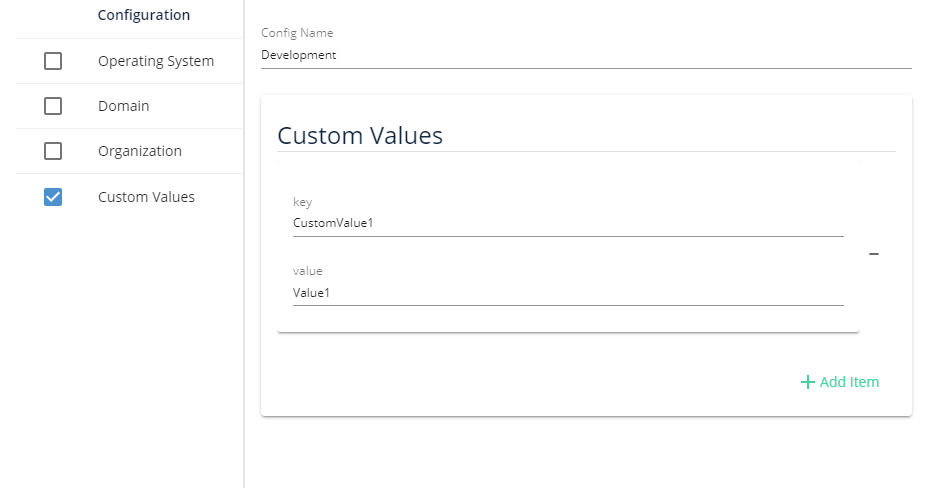
Section titled “Custom Values”Add key and value pairs. You can read custom values in OSD scripts and in package scripts with CMS_GetDeploymentTemplateVariable.
After you save the template, synchronize with CapaOne so the template becomes available in the CapaInstaller Console. Then assign it. See Assign Deployment Template.