

How to deploy CapaInstaller agent from InTune
The CapaInstaller Agent can be deployed from InTune with these steps.
Prerequisite
Section titled “Prerequisite”-
Create a folder on your computer called InTune CapaInstaller, with a sub folder called InTuneOutput and another sub folder called InTunePackageContent (See picture).
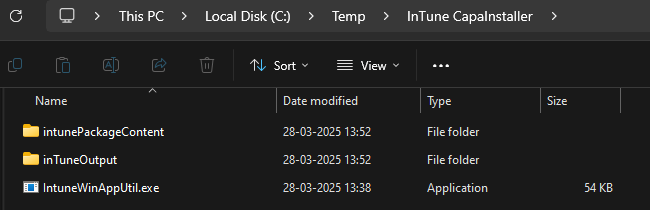
-
Download the Win32-Content-Prep-Tool: https://github.com/Microsoft/Microsoft-Win32-Content-Prep-Tool Place the IntuneWinAppUtil.exe In the InTune CapaInstaller folder.
-
You must be able to run a command prompt as administrator.
Instructions
Section titled “Instructions”-
Get the CapaInstaller Agent.xml file and the CapaInstallerAgentSetup.exe from your CapaInstaller server. Open a file explorer and browse to your CMP point → Resources → AgentInstaller (C:\CapaInstaller\CMP\Resources\AgentInstaller)
-
Copy the CapaInstaller Agent.xml file and the CapaInstallerAgentSetup.exe to the InTune CapaInstaller\InTunePackageContent folder.
-
Download this Powershell script: InstallCapaAgentinTuneContent.ps1 and copy it to the InTune CapaInstaller\InTunePackageContent folder.
-
You can edit the Powershell script and add a Installation Type like “InTune Joined”. This makes it easier to locate which agents are deployed from InTune.

-
Open a command prompt as administrator and browse to the InTune CapaInstaller folder, where the IntuneWinAppUtil.exe is placed.
-
Run this command: IntuneWinAppUtil.exe -c “C:\Temp\InTune CapaInstaller\intunePackageContent” -s CapaInstallerAgentSetup.exe -o “C:\Temp\InTune CapaInstaller\inTuneOutput” (Note you can always run IntuneWinAppUtil.exe /? to get the correct syntax)
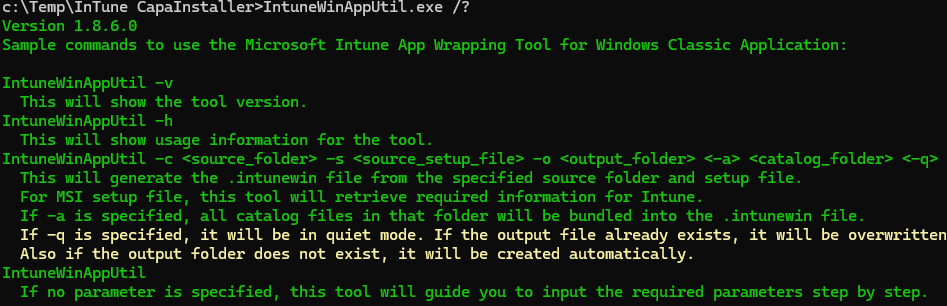
-
The InTune package should now been created.
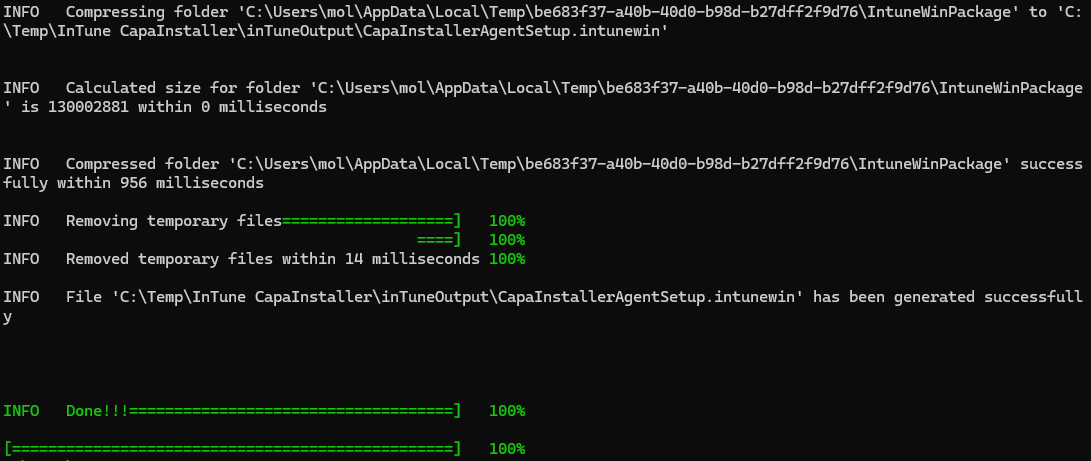
-
Go to the Microsoft Intune admin center.
-
Select Apps in the left menu.
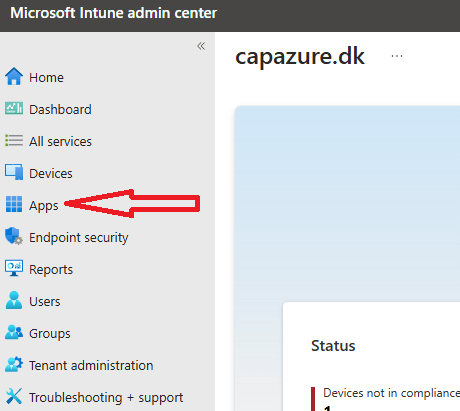
-
Select Windows.
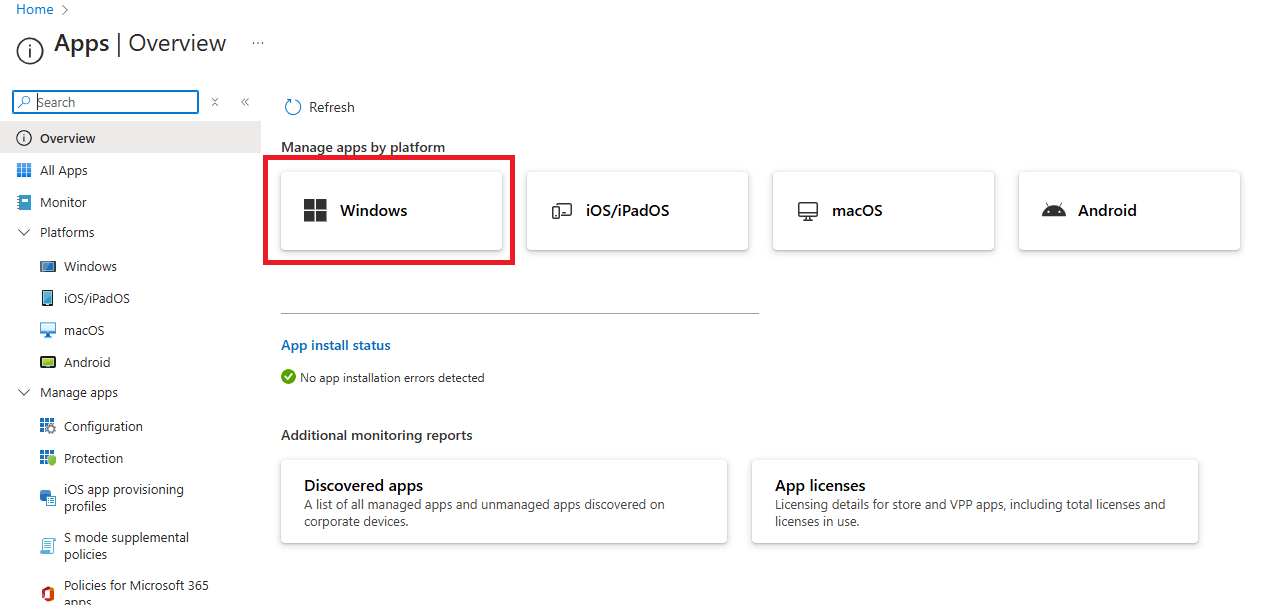
-
Select Create.
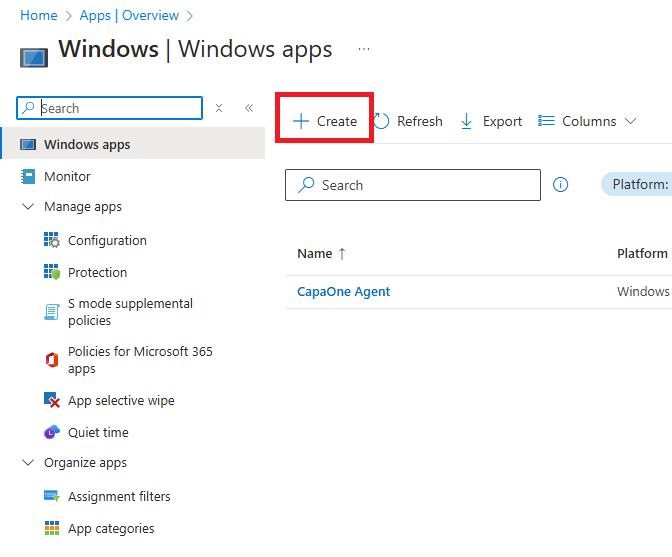
-
Select Windows App (Win32). and click on select.
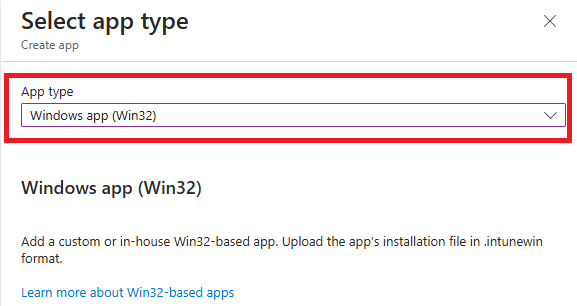
-
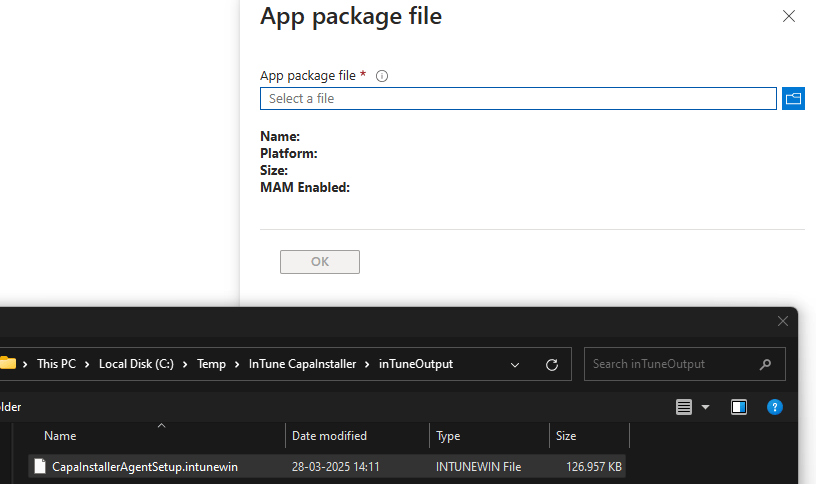
Select, Select app package file
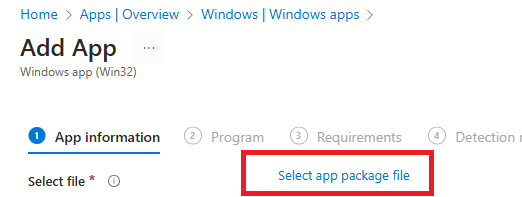
-
Select the CapaInstallerAgentSetup.intunewin file in the InTune CapaInstaller\InTuneOutput folder.
-
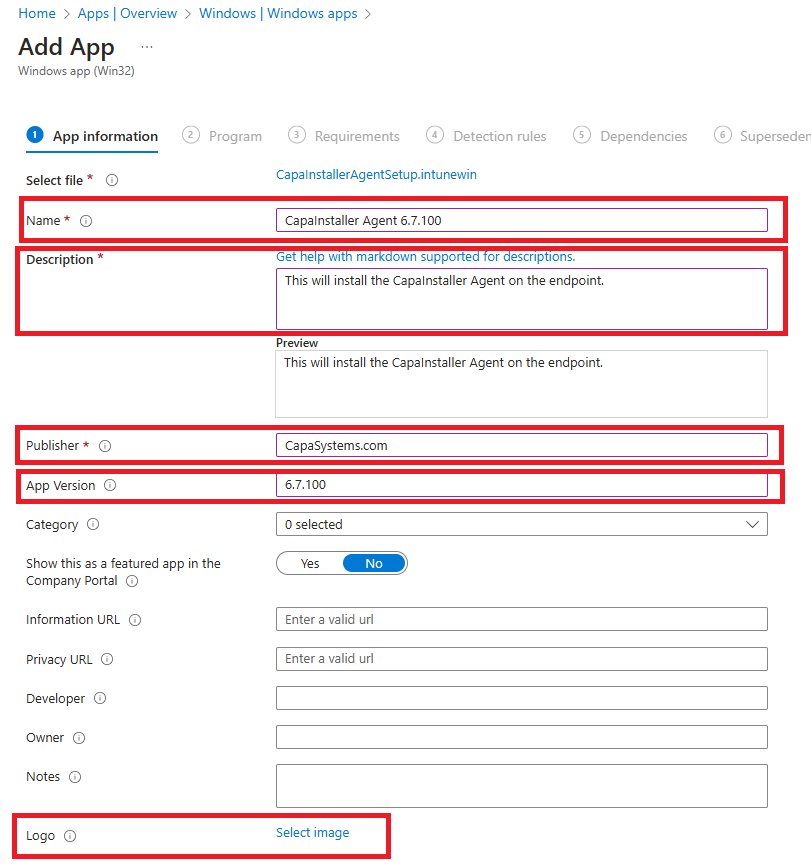
Set the following App information and click Next. The name and version are examples. Use the version of your CapaInstaller Agent.
- Name: CapaInstaller Agent 6.7.100
- Description: This will install the CapaInstaller Agent on the endpoint.
- Publisher: CapaSystems.com
- App Version: 6.7.100
- Logo: Select this logo bellow

-
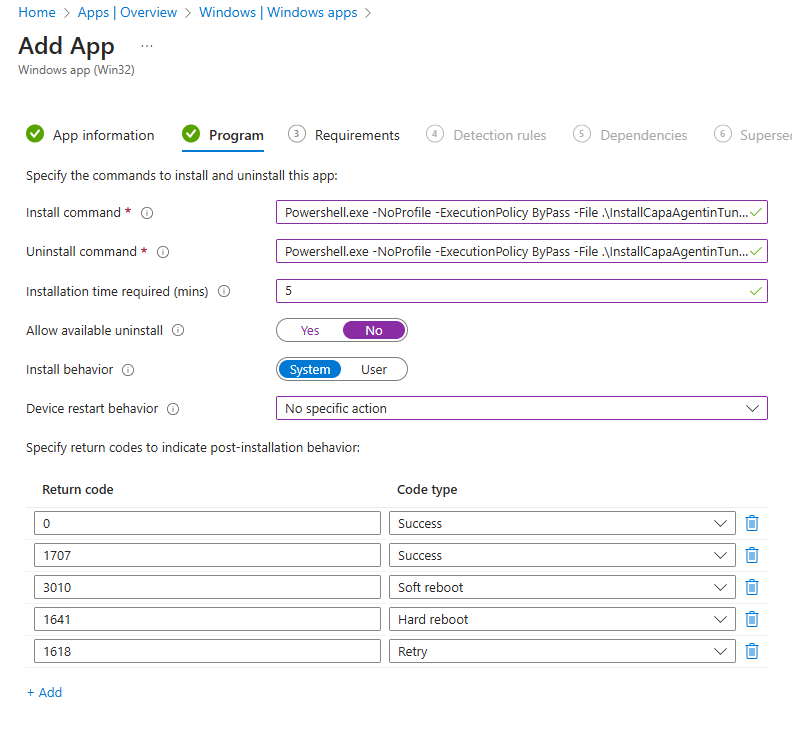
Set the following in the Program tab
- Install Command: Powershell.exe -NoProfile -ExecutionPolicy ByPass -File .\InstallCapaAgentinTuneContent.ps1
- UnInstall command: Powershell.exe -NoProfile -ExecutionPolicy ByPass -File .\InstallCapaAgentinTuneContent.ps1
- Installation time required (mins): 5
- Allow available uninstall: No
- Install Behavior: System
- Device restart behavior: No Specific action
-
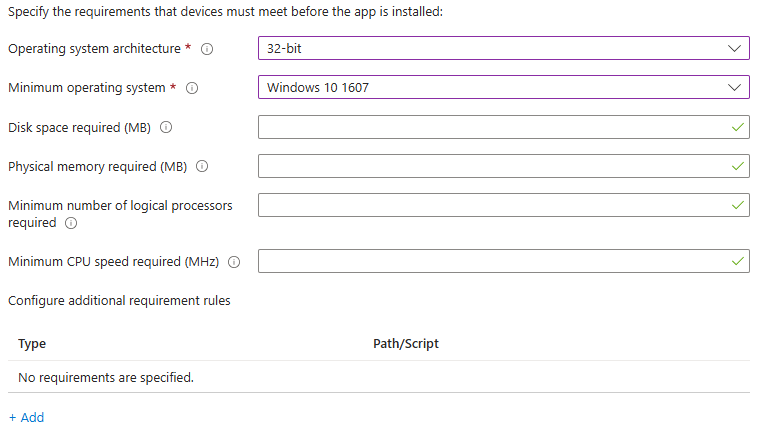
Set the following in the Requirements tab.
- Operating system architecture: 64-Bit
- Minimum operating system: Windows 10 - 1607
-
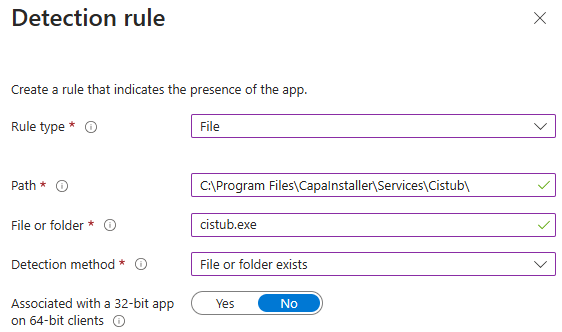
In the detection rule tab, select Manually configure detection rules and click on +Add.
- Rule type: File
- Path: C:\Program Files\CapaInstaller\Services\Cistub\
- File or folder: cistub.exe
- Detection method: File or folder exists
- Associated with a 32-bit app on 64-bit clients: No
-
In the Dependencies tab, click Next.
-
In the Supersedence tab, click Next.
-
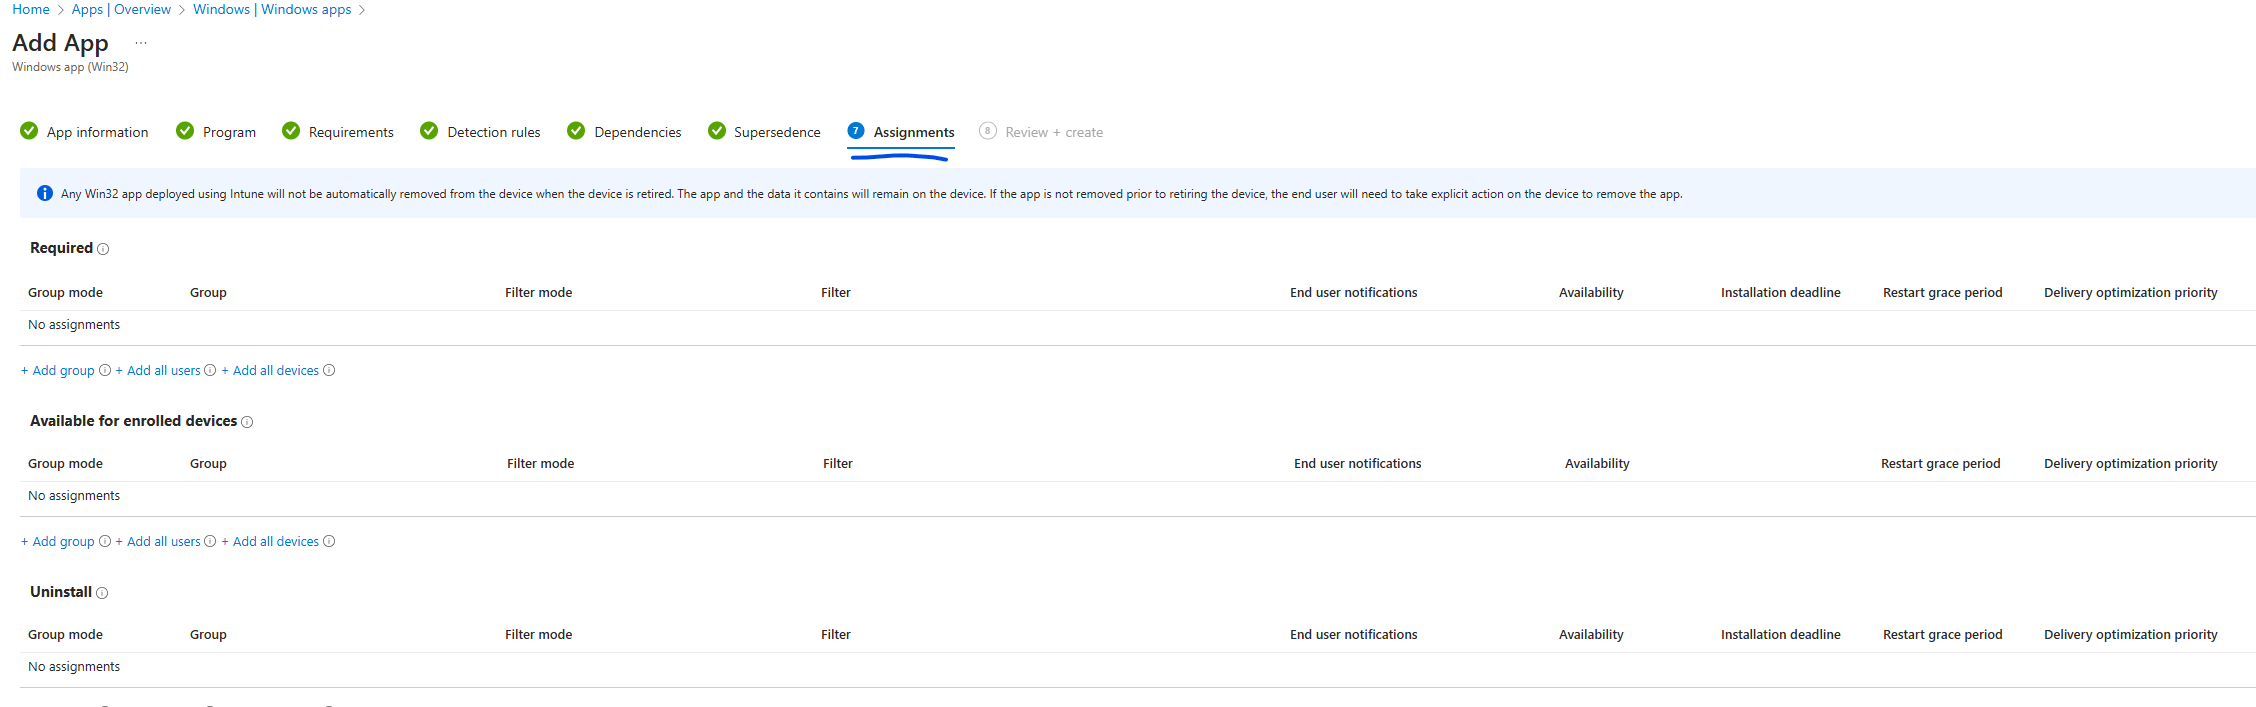
In the Assignments tab you can select what groups, users or devices, that the CapaInstaller agent should be deployed to.
-
In the Review + Create tab, check that the information you have provided is correct and end with Create.
The application should now be created in the windows → Apps