Enrolling a non-Supervised iOS device.
Device enrollment IOS version 12.1 and earlier
Section titled “Device enrollment IOS version 12.1 and earlier”Enrolling IOS Device via URL before version 12.2!
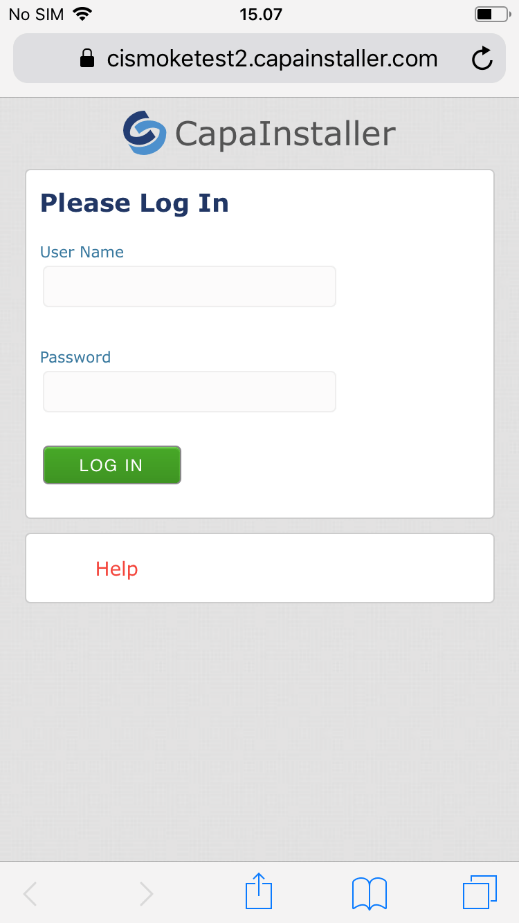
First, go into a browser.
Insert the URL from your console.
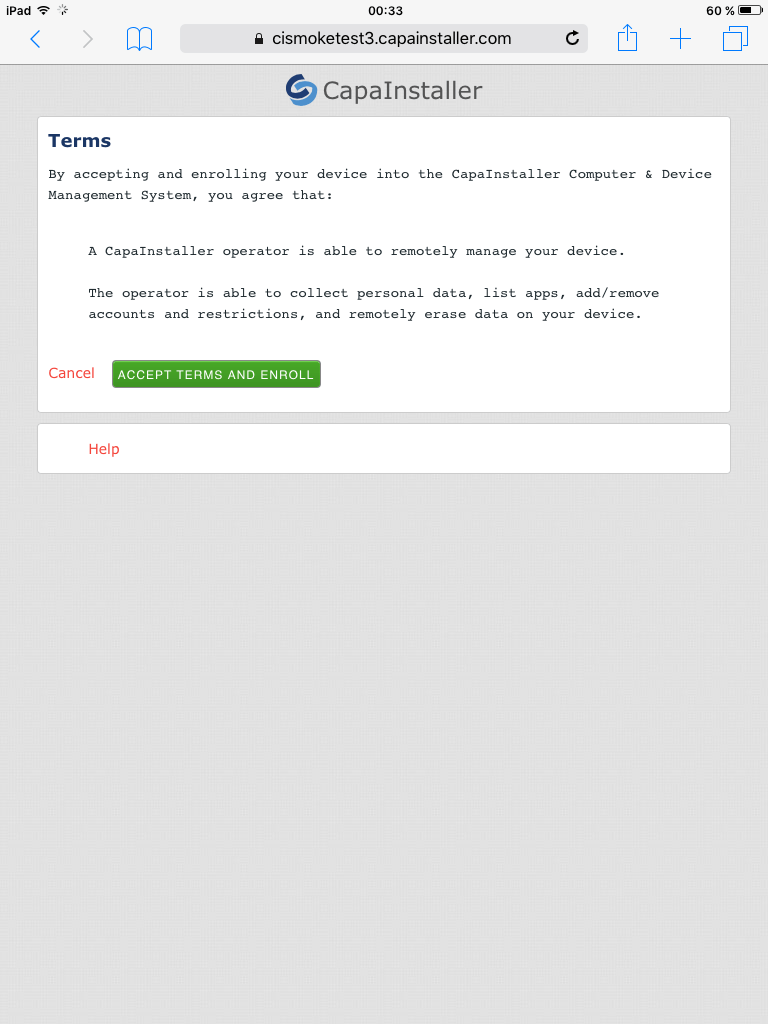
Now you need to login:

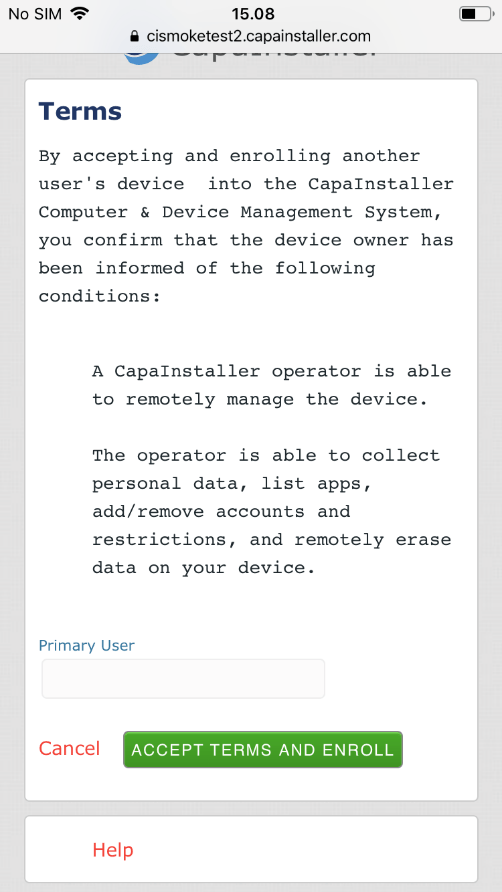
Click on the “ACCEPT TERMS AND ENROLL” tab:
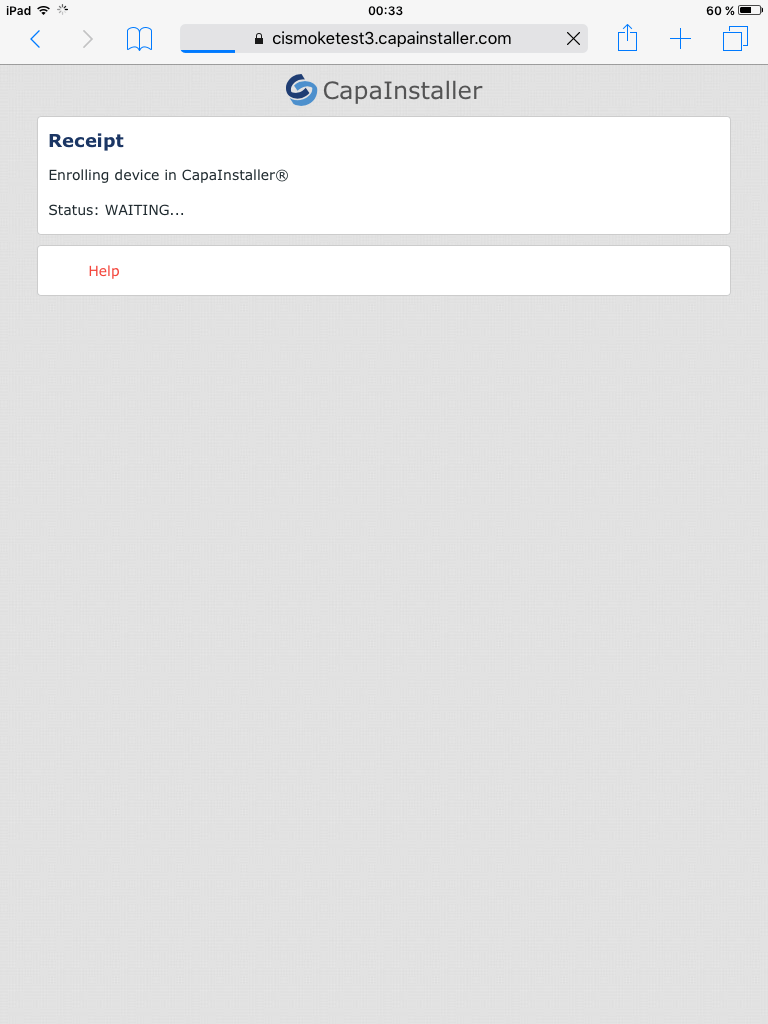
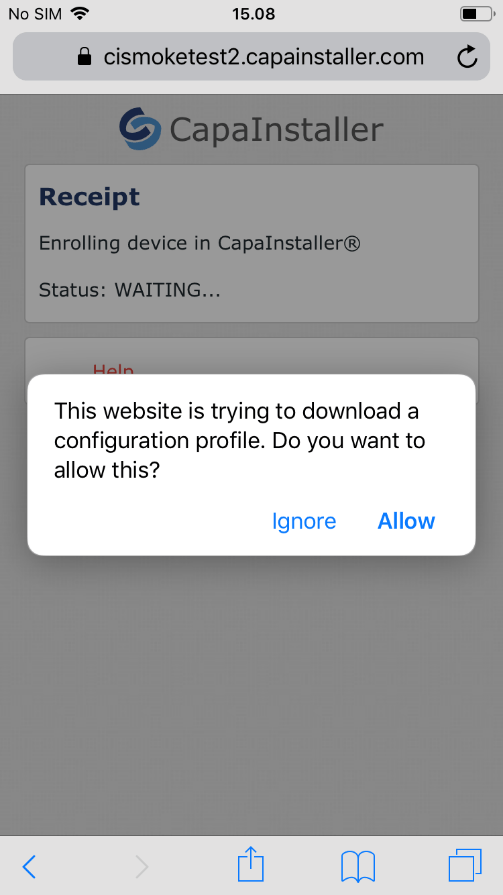
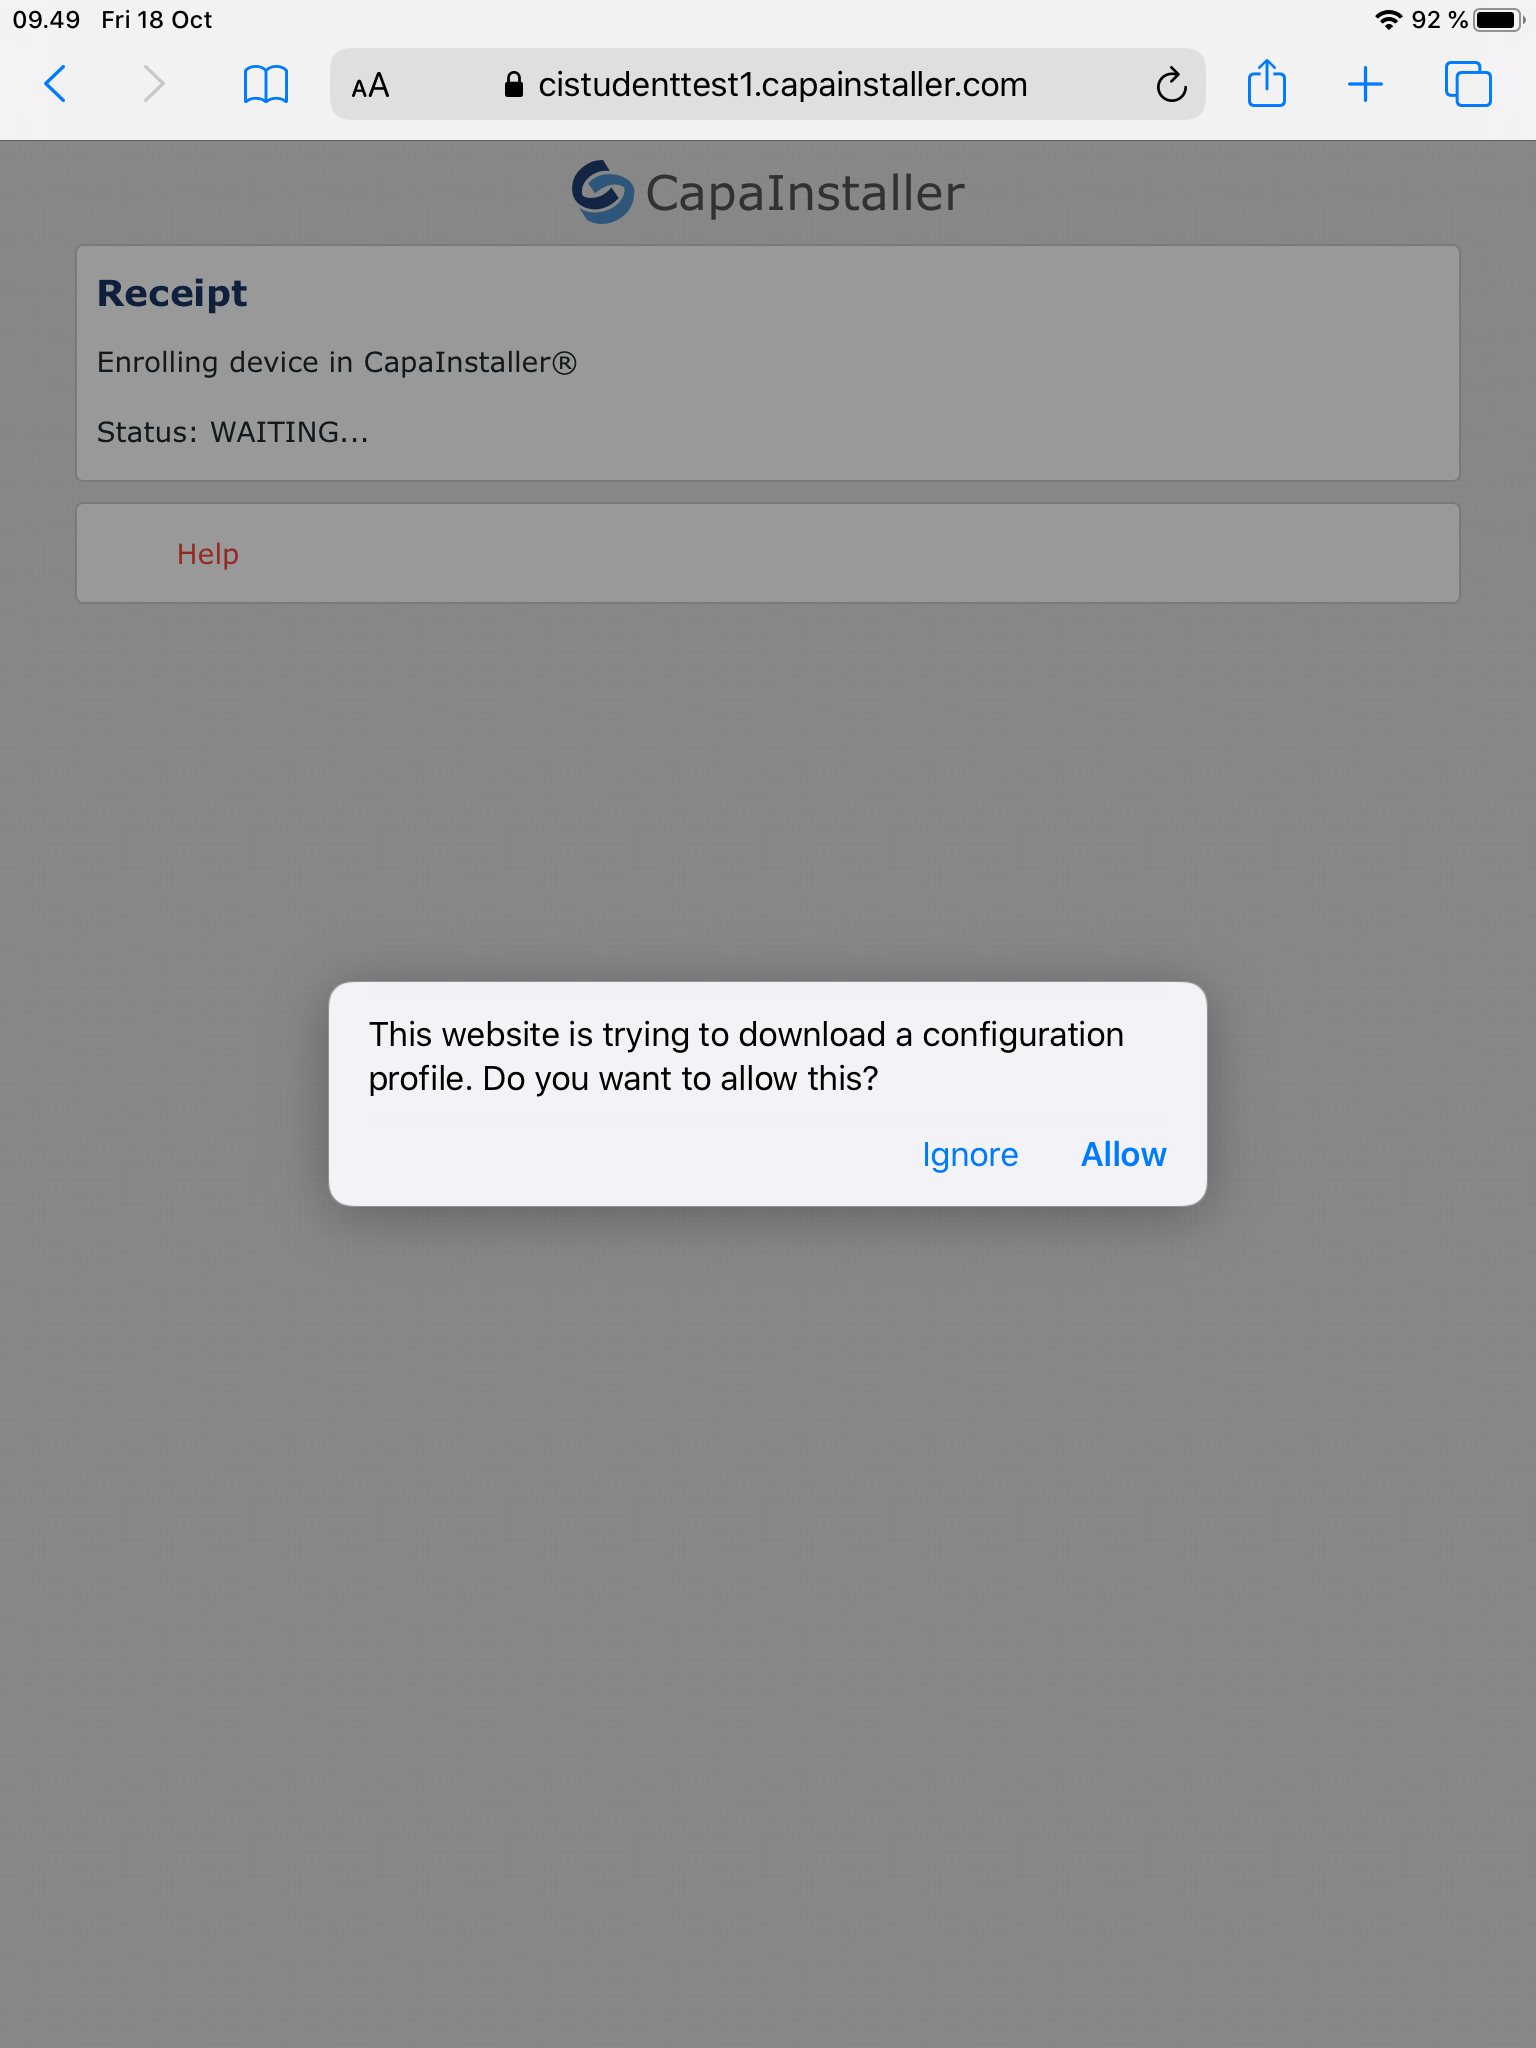
Now your status is waiting, and you will automatically come in settings:
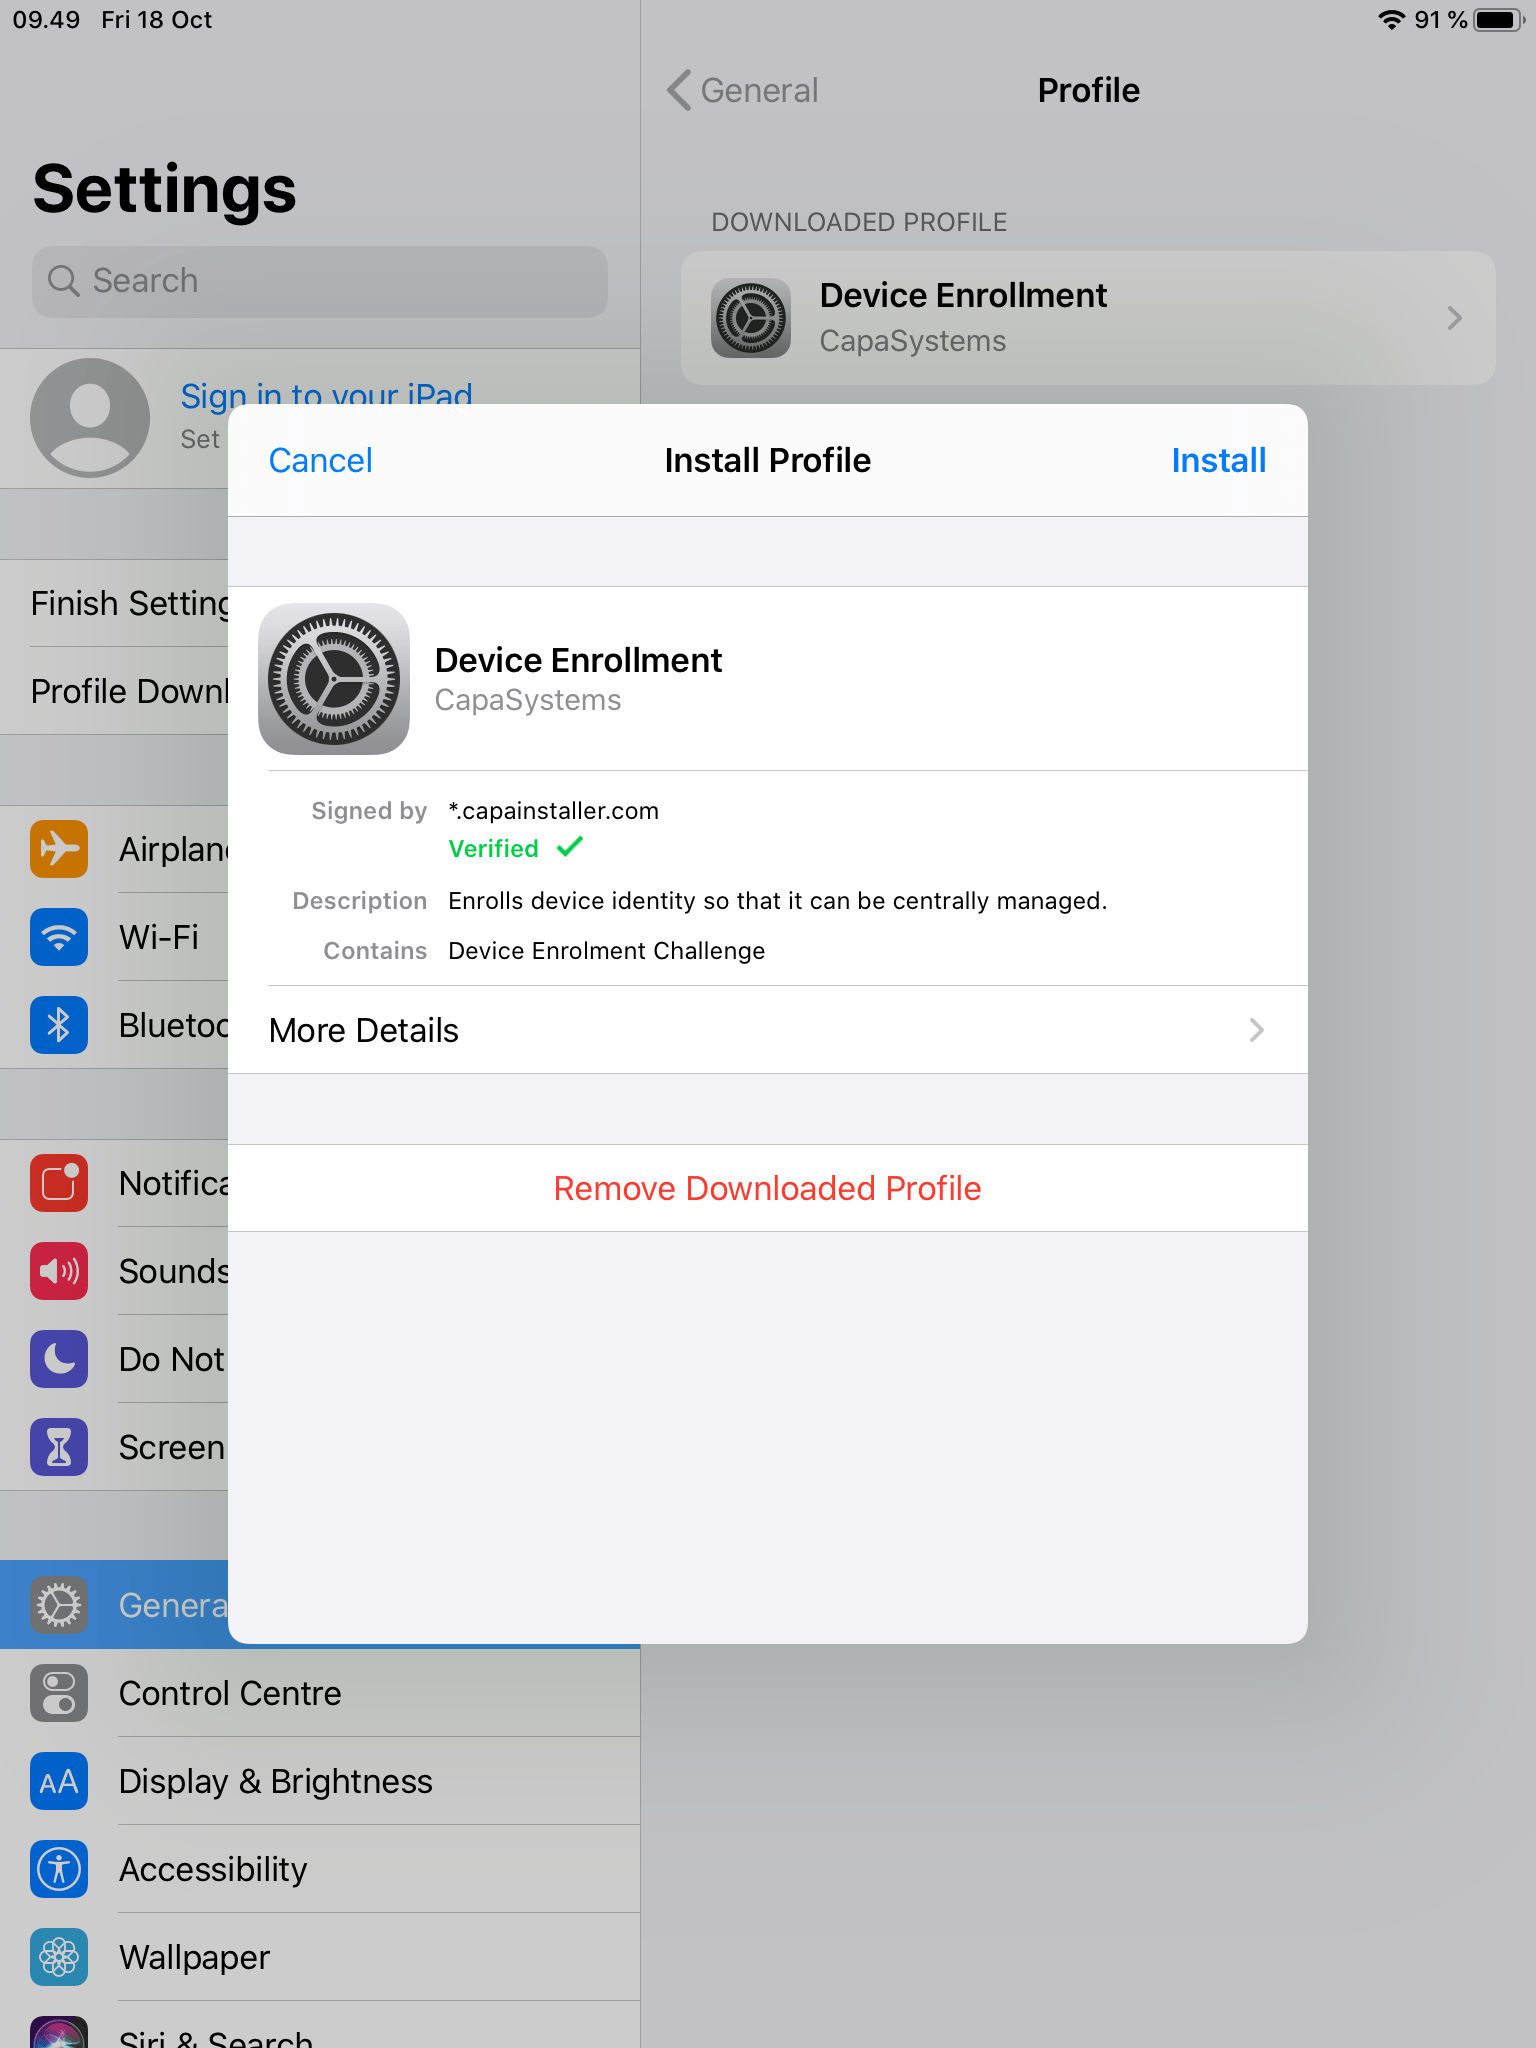
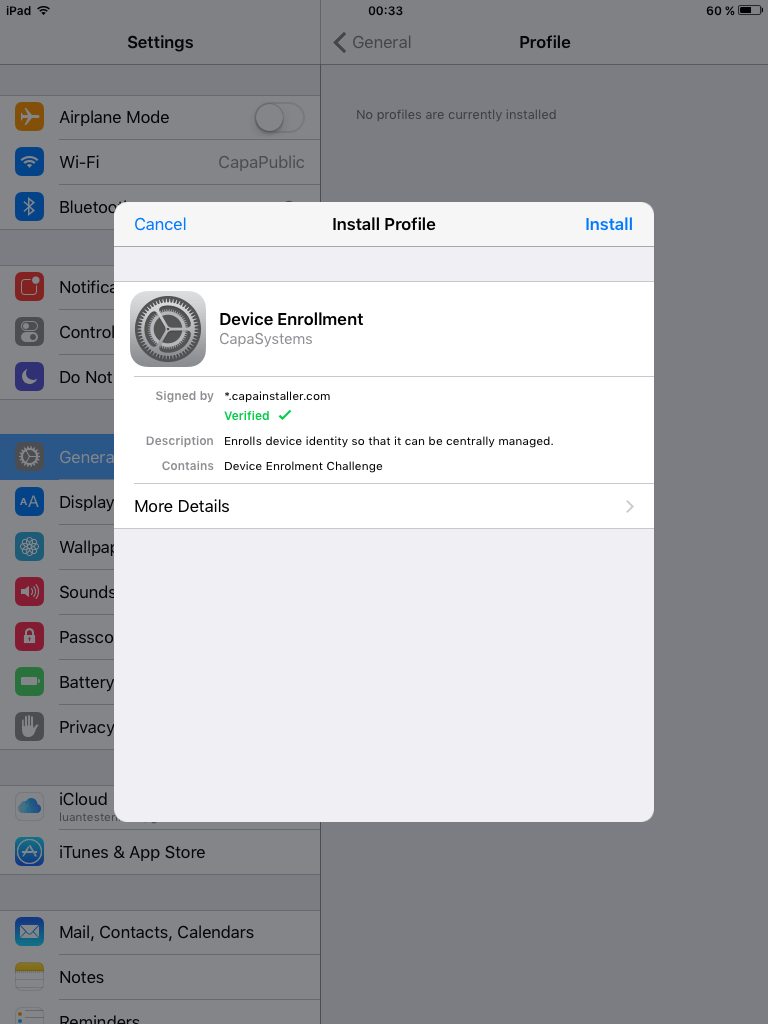
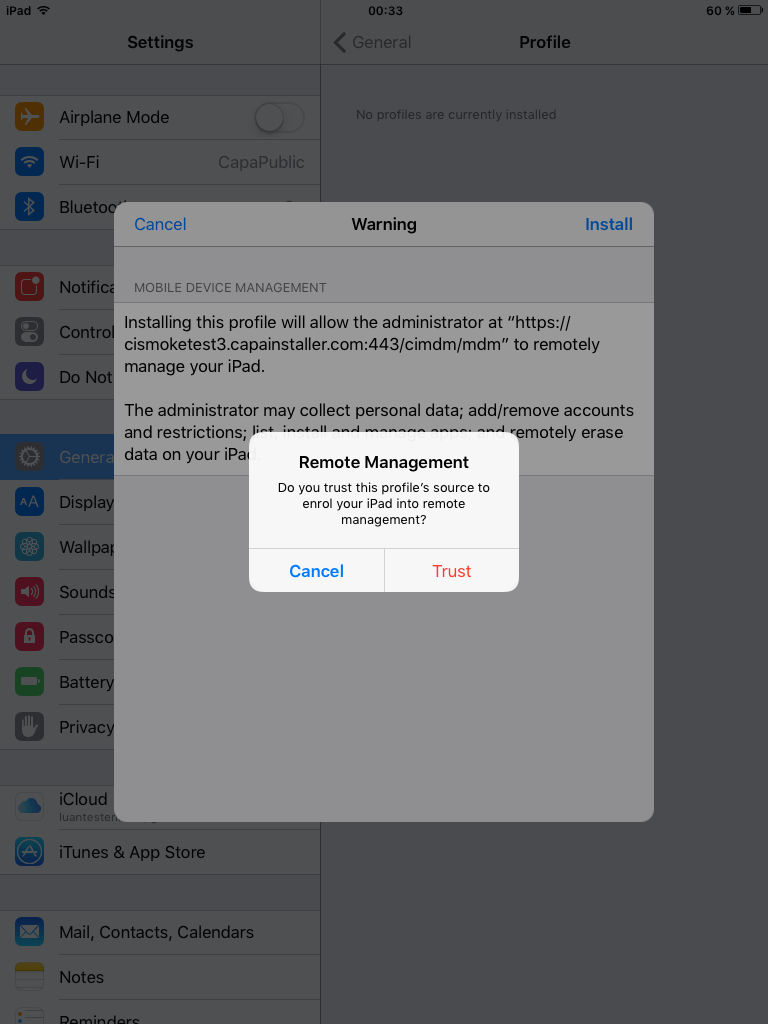
You have to click “install”, and you will be prompted to type your passcode. When you have done that, you need to click “install” two times more:
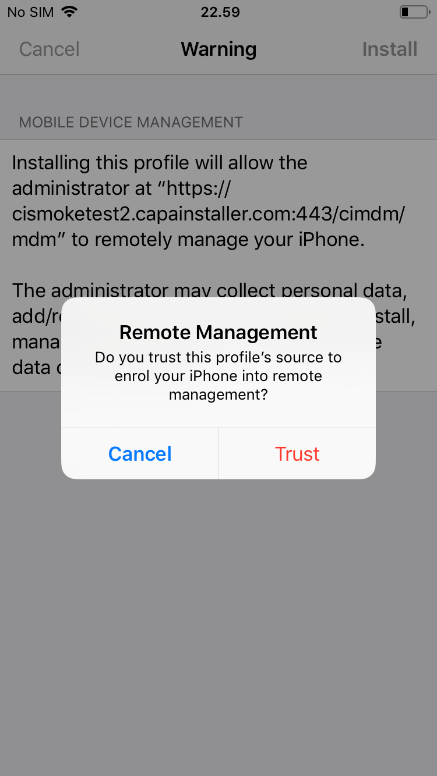
Click “Trust” tab:
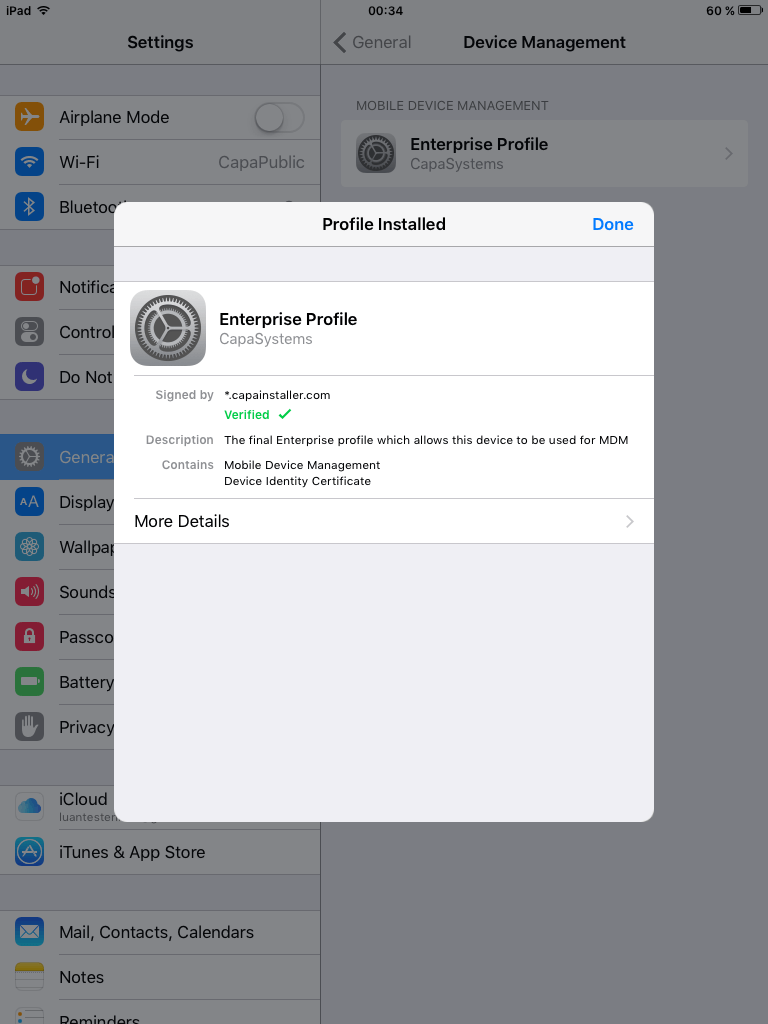
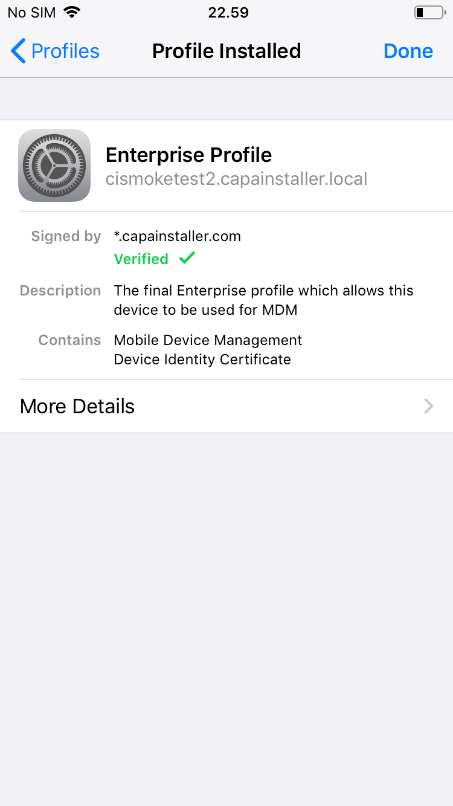
Click “Done”
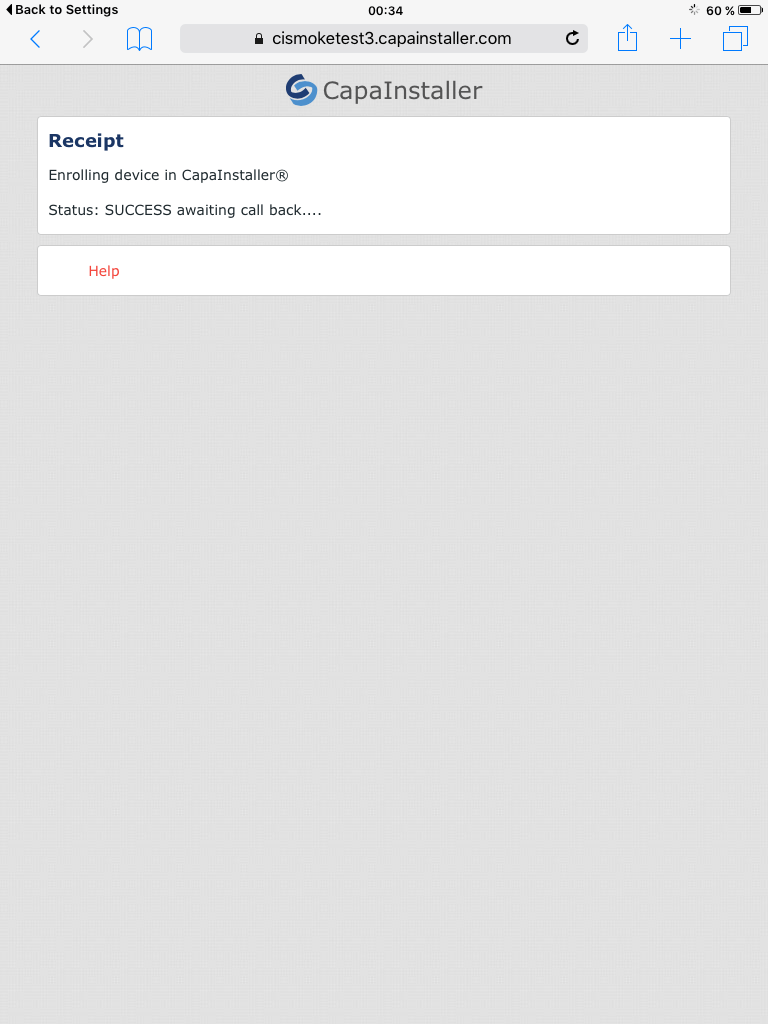
Now you will automatically get back to the browser, where you can see it is successfully:
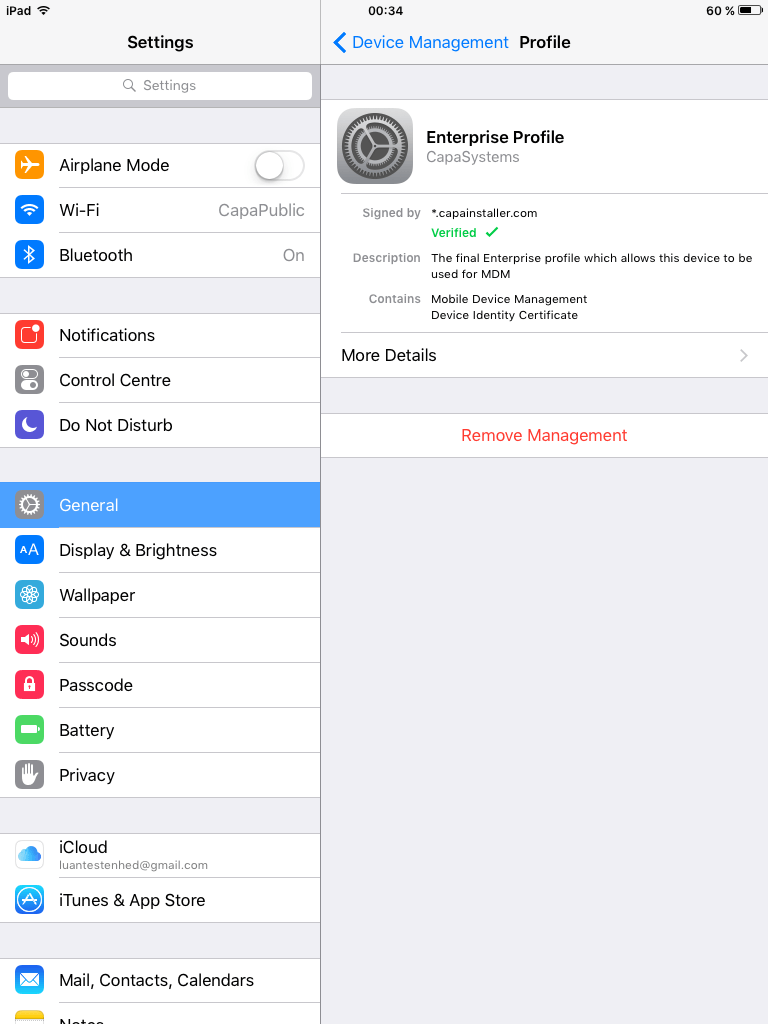
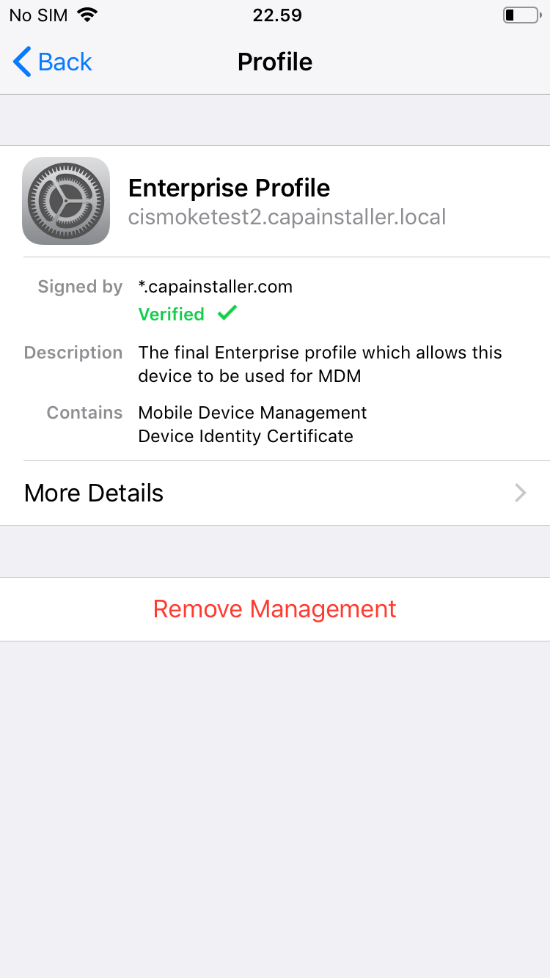
Now you are done, and you have enrolled an IOS device via URL before version 12.2, as you can see in settings under → General → Device Management → Enterprise Profile:
Device enrollment IOS version 12.2 and later
Section titled “Device enrollment IOS version 12.2 and later”After IOS 12.2
Enrolling IOS Device via URL after version 12.2!
First, go into a browser.
Insert the URL from your console.
Now you need to login:
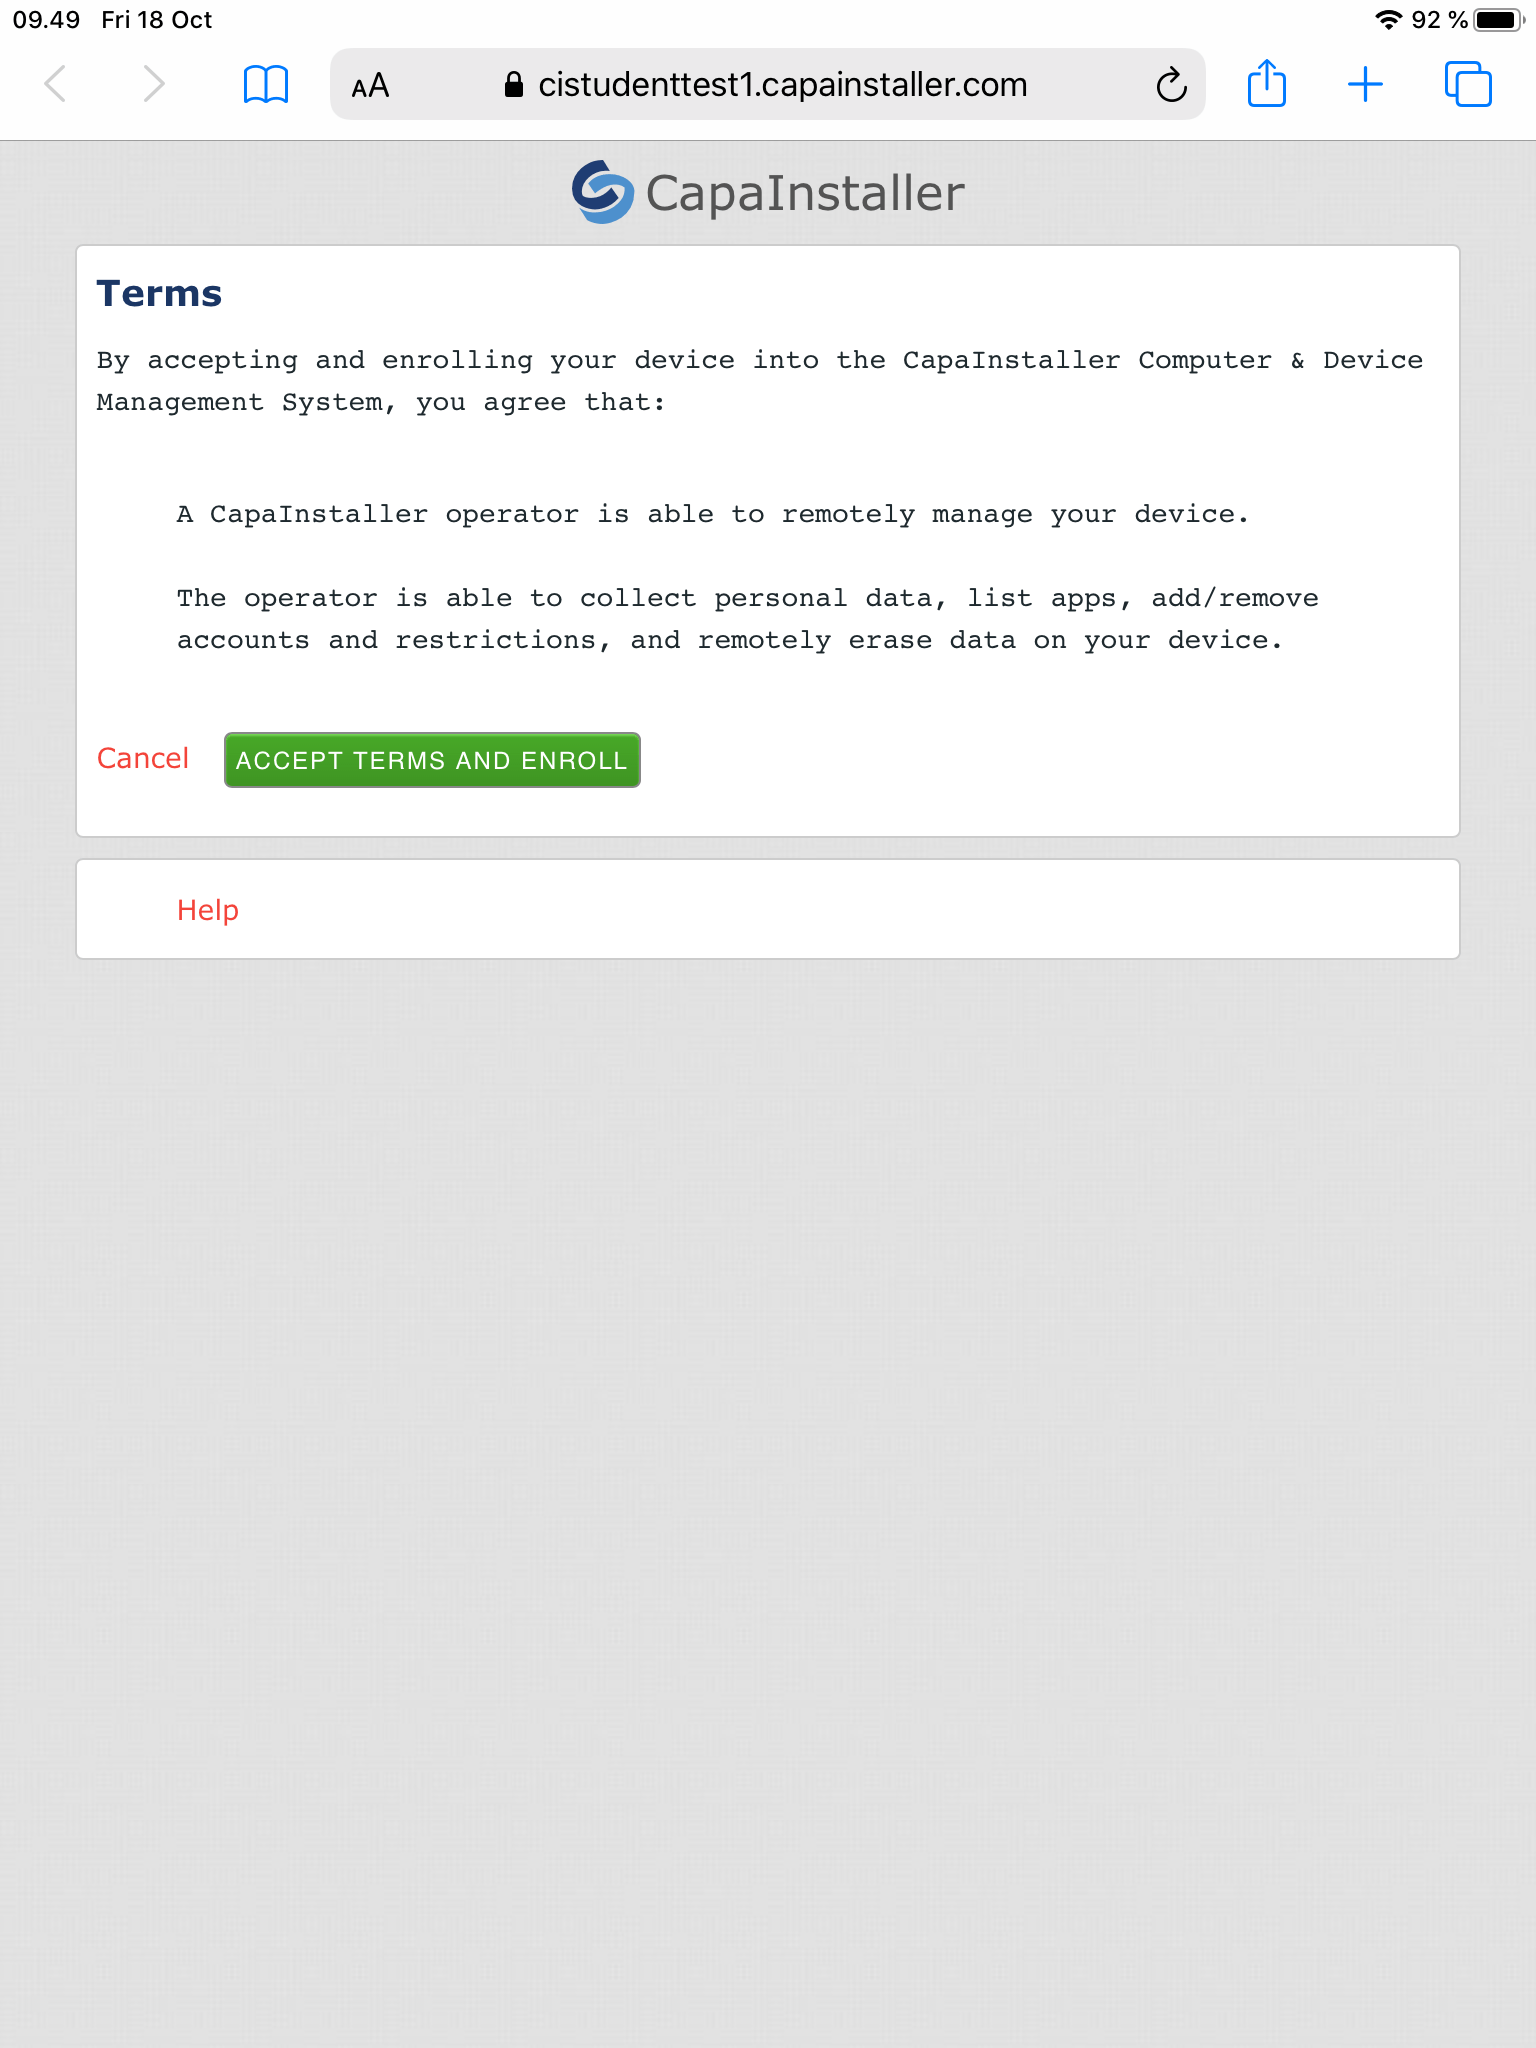
When you have logged in, it will look like this, and you just have to click “ACCEPT TERMS AND ENROLL”:
Click “Allow” and after that, you have to click “Close”:
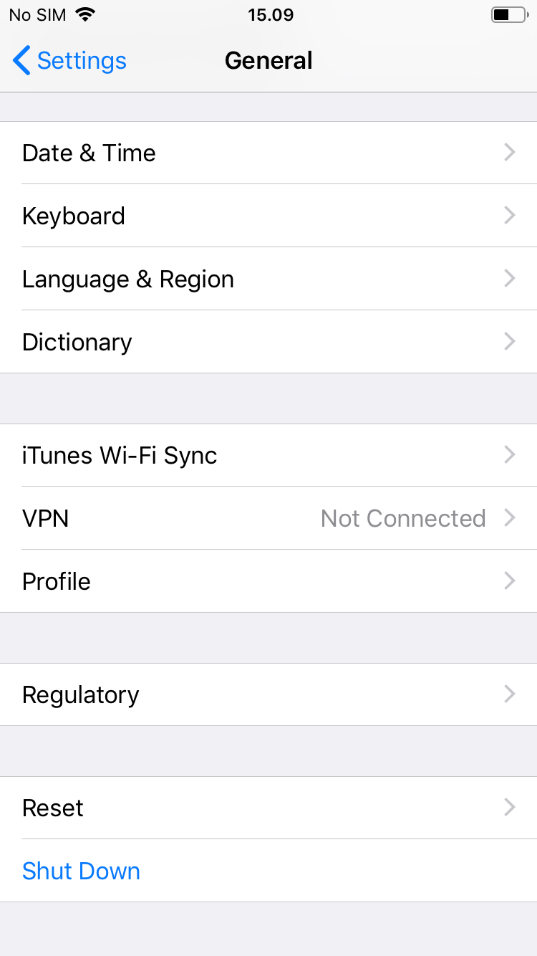
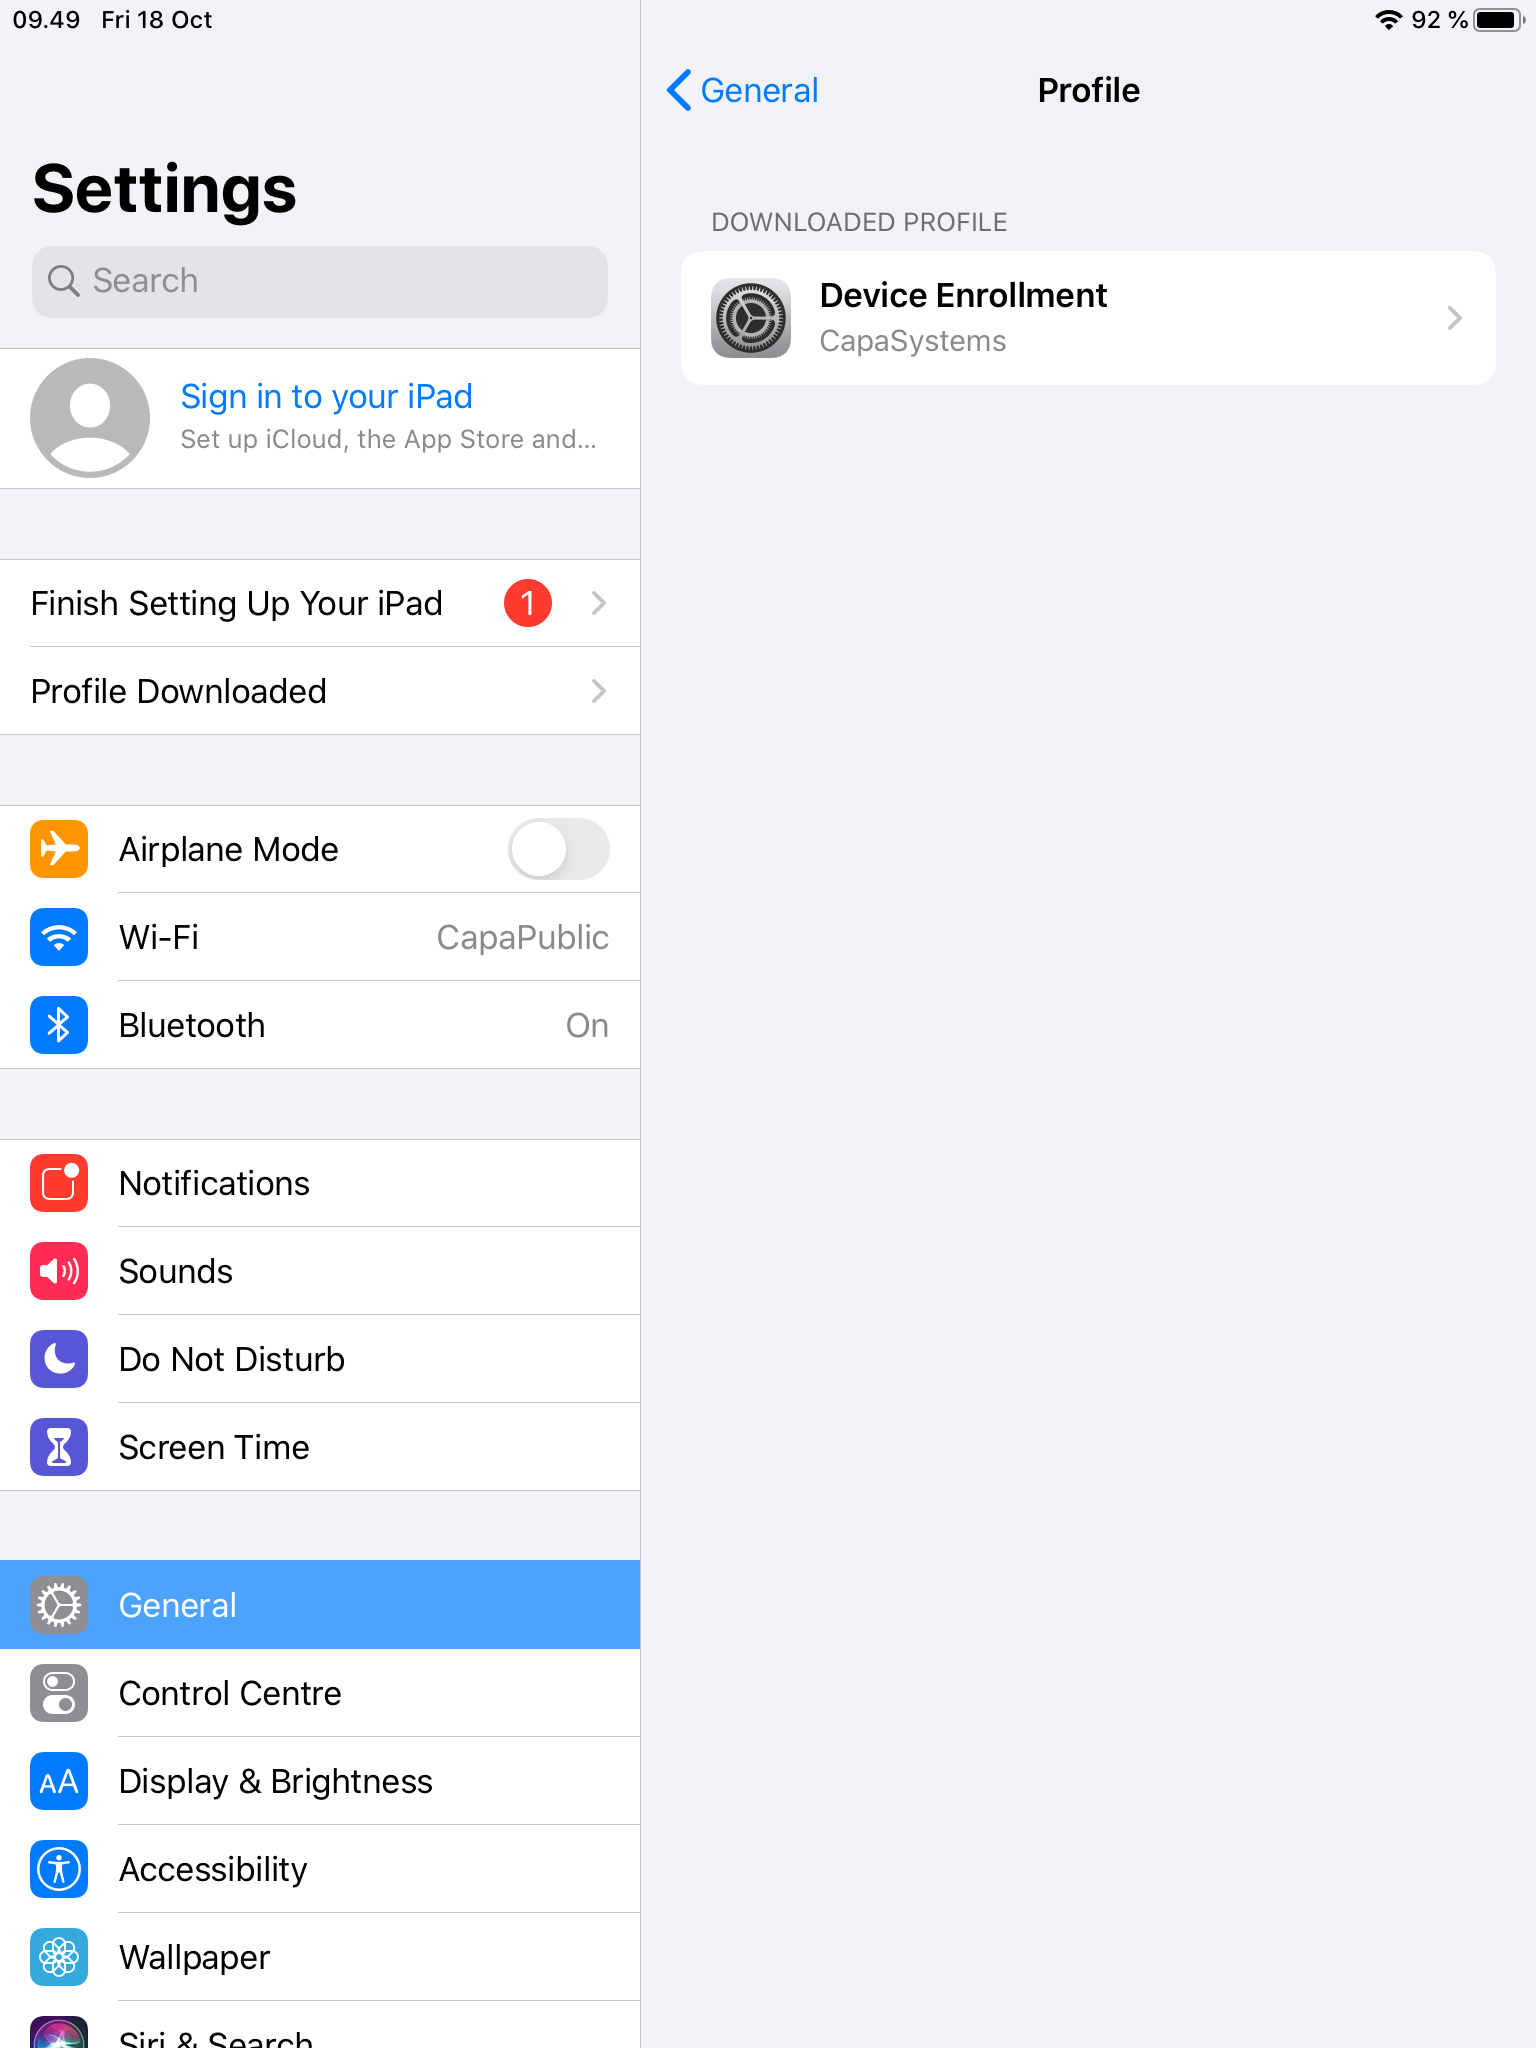
Now, go to settings. In settings you have to go into “general”:
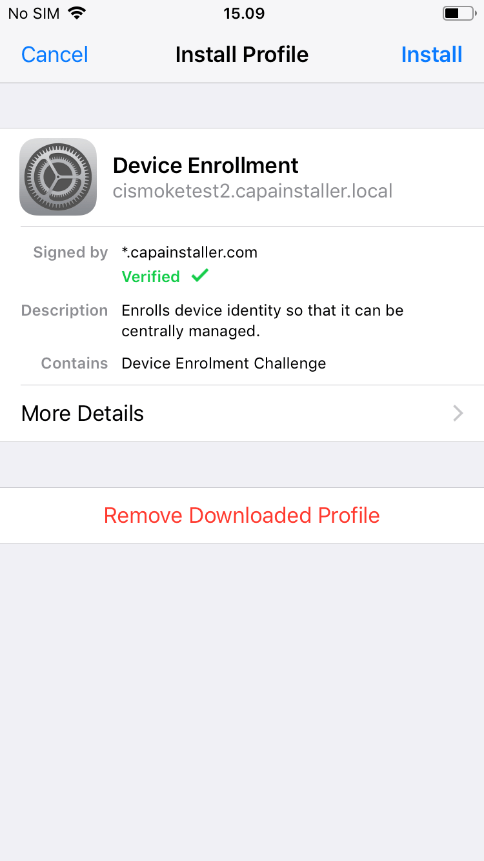
In general, click “profile”. In the profile, you just have to click the Device Enrollment tab.
Click on the “Install” tab, and you have to click “Install two times more:
Click “trust”:
Click “Done”:
Now you are done, and you have enrolled an IOS device via URL after version 12.2!
Device enrollment iPad OS version 13 and later (Via URL)
Section titled “Device enrollment iPad OS version 13 and later (Via URL)”Enrolling iPad OS Device via URL after version 13!
For some reason, Apple’s iPad OS devices report themselves as MacOS. A workaround for that is described below:
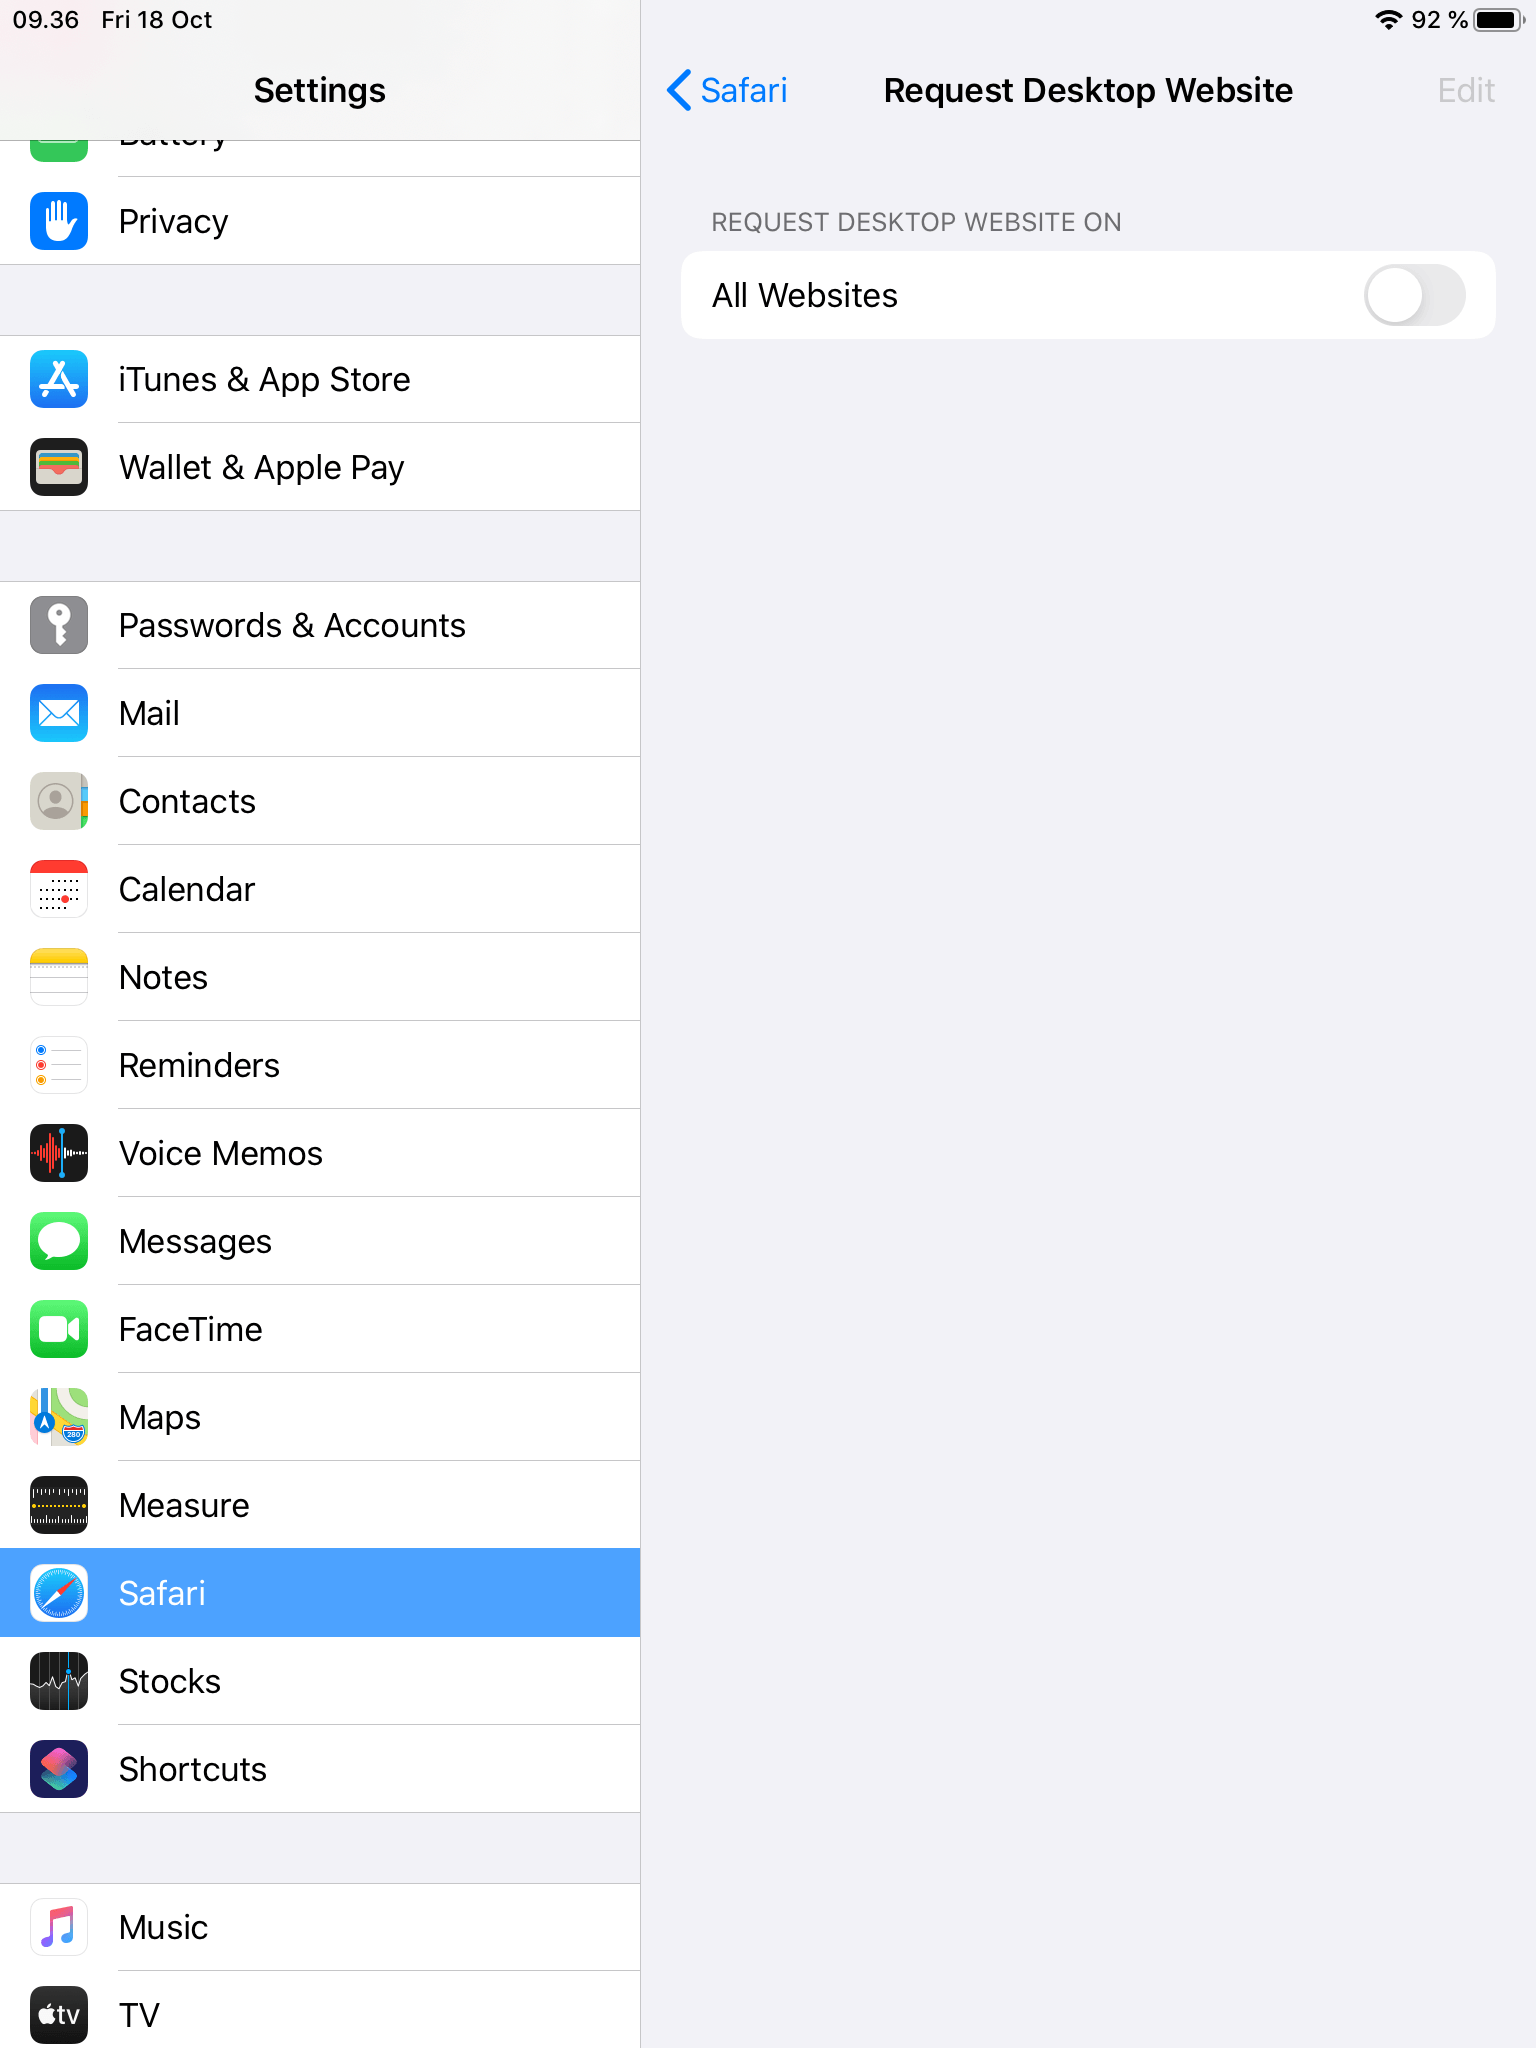
First, go into settings, and in under safari:
Click on “Request Desktop Website”:
Turn the setting OFF!
Now go into a browser.
Insert the URL from your console.
Now you need to login:
When you have logged in, you need to click “Accept Terms And Enroll”
Click “Allow”
Now go in settings, and click on “Profile Downloaded”
Install your profile, and you have enrolled your iPad device successfully: