

Option menu
The program options control the general behavior of CIPC. To open them, select Tools → Options.
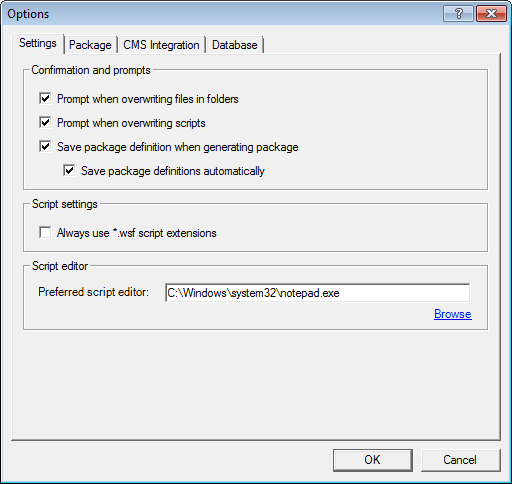
Settings Tab
Section titled “Settings Tab”| Element | Subtitle | Description |
| Confirmation and prompts | Prompt when overwriting files in folders | Mark, this checkbox to receive a warning before overwriting any existing installation-program parts of existing packages. Clear this checkbox to overwrite automatically without notice |
| Prompt when overwriting scripts | Mark, this checkbox to receive a warning before overwriting any existing installation scripts. Clear this checkbox to overwrite automatically without notice. Note that customization that has been made to an existing script will not be reproduced in your re-generated scripts. You will have to manually edit those changes into the new script. A backup file is made when overwriting | |
| Save package definition when generating package | When this box is checked, CIPC will save package definition each time the package is generated, using the name and version settings to identify it. This will overwrite your previously saved definition | |
| Save package definitions automatically | Available when Save package definition when generating package is checked. Saves the definition without showing the Save package definition dialog | |
| Script settings | Always use *.wsf script extensions | Check this box to give generated scripts the .wsf extension. When it’s cleared, generated scripts get the standard .cis extension |
| Script editor | Preferred script editor | The program that opens a script when you double-click it in the Package creation summary dialog. Click Browse to select the program file. The file must exist. If you leave the field empty, Notepad is used |
Package Tab
Section titled “Package Tab”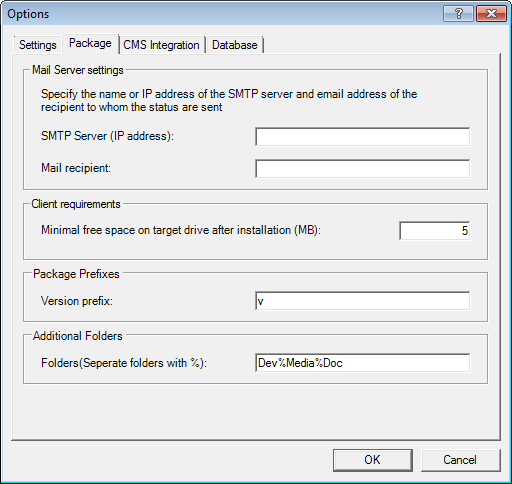
| Element | Subtitle | Description |
| Mail server settings | SMTP Server (IP address) | Enter the name or IP address of your SMTP server. This server is required to process and forward outgoing mail |
| Mail recipient | Enter the e-mail address of a person/list who should receive status emails about the success and/or failure of each script/program run | |
| Client requirements | Minimal free space on target drive after installation (MB) | The Client Requirements area controls how much extra disk space must be left on a target computer after the installation is finished. This is important because space must still be available for temporary system files, swap disk space, user data, etc. When a finished script is run on a client computer, it starts by making sure enough space exists on the target hard drive. If there is not enough space, then the script/program will cancel the installation and generating an error message. The value is in megabytes, and the default is 5 |
| Package Prefixes | Version prefix | When you generate a package, CIPC adds this prefix to the package version, unless the version already starts with it. The default is v, so version 1.0 becomes v1.0 |
| Additional Folders | Folders (Separate folders with %) | Folders that CIPC creates in the version folder of the package, next to the Kit folder, when you generate it. Separate the folder names with %. For example, Dev%Media%Doc creates a Dev, a Media, and a Doc folder |
CapaInstaller Integration Tab
Section titled “CapaInstaller Integration Tab”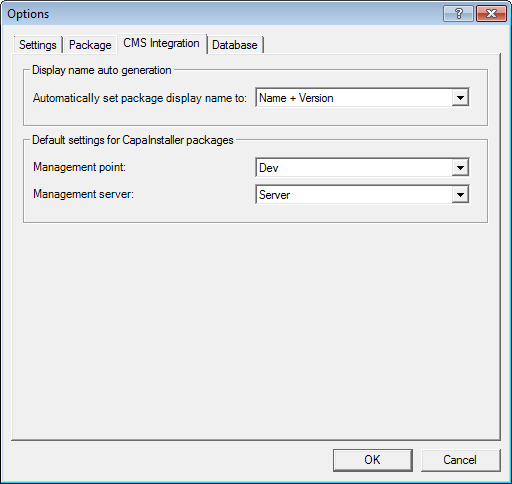
| Element | Subtitle | Description |
| Display name auto generation | Automatically set package display name to | Set the naming standard for the display name of the package in the CapaInstaller Console. Choose between: Name: Name(General) Name + Version: Name(General) + Version(General) Description: Description (General) () = Section name The display name is set when CIPC creates the package, and is at most 100 characters |
| Default settings for CapaInstaller packages | Management point | The packages created will be stored on this management point. Select a root management point. CIPC can’t create packages on a child management point |
| Management server | The packages will automatically be linked to this management server and to the replica servers of the management point. Only servers on the selected management point are listed |
Database Tab
Section titled “Database Tab”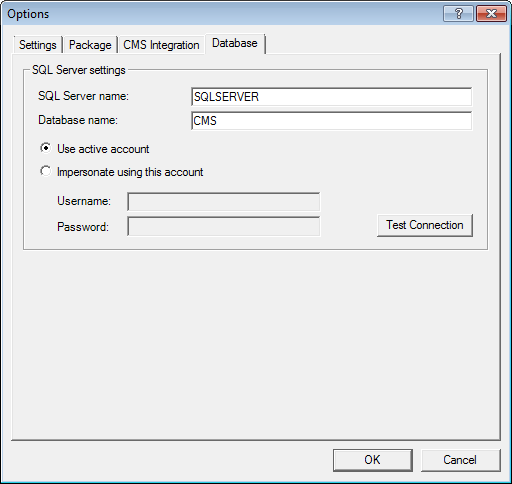
| Element | Subtitle | Description |
| SQL server setting | SQL Server name | Enter the name of the server where the database located. |
| Database Name | Enter the name of the database itself | |
| Impersonate using this account | Mark the Impersonate using this account radio button if the database connection should be established using SQL Server authentication. Afterwards specify a user name and password. Mark the Use active account radio button if the database connection should be established using Window authentication. In this case, CIPC will access the database as the Windows user running CIPC. Be aware that the user has to be granted access (read/write) to the database to be able to use CIPC. |
|
| Test Connection | Use the Test Connection button to test the connection to the SQL Server with the specified server name and credentials. Note: When you change the server or database name and click OK, CIPC asks to restart, because the new database is only used after a restart. |