

Create a Report
Create a custom report with the report items and criteria you want.
-
Select the Reporting and Queries plugin.
-
Select File → New. If the current report has unsaved changes, you’re asked whether to save it first.
-
On the toolbar, select the area you want to use, for example Hardware or Software.

-
In the tree view, right-click the item you want to include in your report, and then select Select item. To add the item with criteria, select Select with criteria… instead.
-
Repeat step 4 for each item. You can switch between areas while you build the report.
-
To limit the result, select Tools → Define criteria…. For more information, go to Define report criteria.
-
To see the result, select Preview on the toolbar. For more information, go to Preview a report.
-
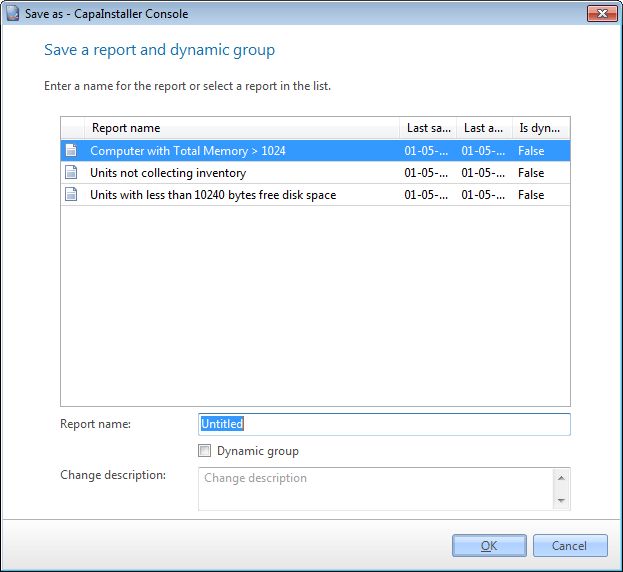
Select File → Save… or File → Save as….
-
Enter a name for the report. To use the report as a dynamic group query too, select Dynamic group. You can also enter a Change description.
-
Select Save or Save as.
If you select File → Save… for a report that is already saved, the console only asks you to confirm and enter a change description.
The report is saved in the database and appears in the list when you select File → Open…. To make the report available in Reporting Services, go to Deploy to reporting services.
Related
Section titled “Related”- Custom made reports - What a custom report is.
- Define report criteria
- Preview a report
- Deploy to reporting services