

Create a Script
An AutoSteps script defines what AutoSteps runs: a program (the executable), the arguments for it, and optionally a file, such as an AutoHotkey script or a self-contained .exe file, that AutoSteps copies to the computer before each run.
How a script reports data to PerformanceGuard
Section titled “How a script reports data to PerformanceGuard”A script reports its measurements through the PerformanceGuard agent on the same computer. The data must follow the structure that the Autosteps Chart Widget uses. How a script communicates with the agent is described in Monitor Complex Activity with AutoSteps.
A script reports these values:
| Property | Description | Example |
|---|---|---|
| Transaction Group | The overall category of the measurement. Maximum 64 characters. | TransactionGroup = PG Demo Scripts |
| Transaction Name | A narrower category, typically the application or website that the script tests. Maximum 64 characters. | TransactionName = NOTEPAD Document |
| Tags | The exact operation that the script performed. Maximum 64 characters. | ComPG1.setTag("NOTEPAD startup")ComPG1.setTag("Type in text")ComPG1.setTag("Save NOTEPAD document") |
The reported transaction groups, names and tags appear on the AutoSteps Activity page.
Create a script
Section titled “Create a script”- Select Administration → AutoSteps → Scripts.
- Select Create
 .
. - In Name, type a name for the script.
- In Category, select a script category. To create a new category, select New category next to the field. Categories help you organize and find your scripts.
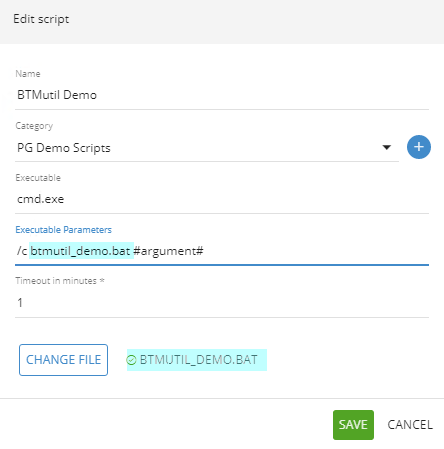
- In Executable, type the program that runs the script, for example
autohotkey.exeorcmd.exe. - In Executable parameters, type the arguments for the program, in the order and syntax that the program expects. For example
/c btmutil_demo.batforcmd.exe. - In Timeout in seconds, type how long the script can run. The default is 60 seconds. If the script is still running when the timeout expires, AutoSteps stops it, and the run counts as failed.
- Optional: select Upload file and select the file that the executable should run, for example an
.ahkscript. - Select Create.
The script appears in the list. The Job count column shows how many jobs use it.
How AutoSteps runs the uploaded file
Section titled “How AutoSteps runs the uploaded file”Before each run, AutoSteps copies the uploaded file to a working folder on the computer, and starts the executable in that folder. To run the uploaded file, add its file name to Executable parameters, for example notepad_demo.ahk.
Use parameter variables
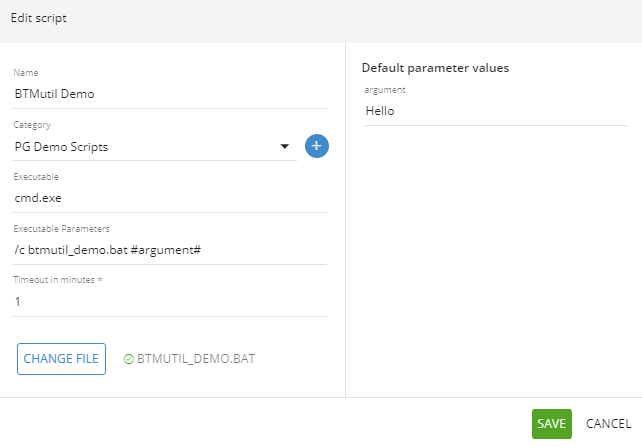
Section titled “Use parameter variables”You can define parameters as variables, so that each job can use its own value. Enclose each variable name in hash signs (#), for example /c #parameter1# #parameter2#. Text that isn’t enclosed in hash signs is passed to the executable as it is.
When you leave the Executable parameters field, a Default parameter values section shows a field for each variable. Type the value that jobs use by default. In a job, you can override the default value. See Create a Job.
Run a self-contained executable
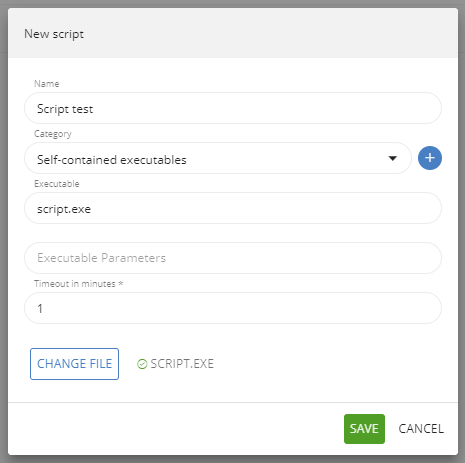
Section titled “Run a self-contained executable”AutoSteps can run a self-contained executable (.exe file) that you upload with the script. You then don’t have to install the program on the computers that run the script.
- Select Administration → AutoSteps → Scripts and select Create .
- In Executable, type the file name of the executable that you upload.
- If the executable takes arguments, type them in Executable parameters, for example
/c dir c:. - Select Upload file, select the executable, and then select Create.
Edit, download or delete a script
Section titled “Edit, download or delete a script”Select the menu button  next to a script, and then select one of these:
- Edit: Change the script. To replace the uploaded file, select Upload file again.
- Download file: Save the uploaded file on your computer. This is only available if the script has an uploaded file.
- Delete: Select Delete, and then select Confirm.