

Install PerformanceGuard Agents
You can install PerformanceGuard agents on all Windows platforms, including application servers and Citrix servers. There are two agent installation packages: one for 32-bit and one for 64-bit Windows. The package must match the operating system. The 32-bit package refuses to install on 64-bit Windows. If you’re in doubt about whether a computer has a 32-bit or a 64-bit operating system, look under Settings → System → About on the computer in question.
Quick installation
Section titled “Quick installation”Double-click the installer (.msi) file to install the agent. The installation usually takes less than a minute. There is no need to restart the computer after installation.
I’ve just installed an agent. Now I want to view startup data from the agent in PerformanceGuard. How can I speed up that process? Because the computer doesn’t need to be restarted when you install the agent, it can take a while before you get startup data from the agent. You can restart the computer to speed up the process, but for technical reasons, you should wait at least ten minutes after installing the agent before you restart the computer.
Command-line installation
Section titled “Command-line installation”You can also install the PerformanceGuard agent from an elevated command prompt:
msiexec /i XXXXX.msi IP=xx.xx.xx.xx PORT=4001Replace XXXXX.msi with the name of the agent installation file (note that names are different, depending on whether you use a 32-bit or a 64-bit agent installation file).
Replace xx.xx.xx.xx with the IP address or fully qualified domain name of your PerformanceGuard frontend server.
Installation options
Section titled “Installation options”If required, you can run the agent installation file with a number of parameters.
Logging
Section titled “Logging”A log file helps PerformanceGuard support diagnose problems. You generate the log file, called install.log, with these parameters:
msiexec /lx!*v install.log /i XXXXX.msiReplace XXXXX.msi with the name of the agent installation file (note that names are different, depending on whether you use a 32-bit or a 64-bit agent installation file).
Log generation also works when you remove agents.
Custom encryption
Section titled “Custom encryption”We recommend a custom encryption key for your agents, especially for agents that run AutoSteps. See also the installation procedure in the following.
msiexec /i XXXXX.msi ENCRYPTION=2 AESKEY=xxxxxxxxxxxxxxxxxxxxxxxxxxxxxxxxReplace XXXXX.msi with the name of the agent installation file (note that names are different, depending on whether you use a 32-bit or a 64-bit agent installation file).
Replace xxxxxxxxxxxxxxxxxxxxxxxxxxxxxxxx with the 128-bit custom key.
Write the key as 32 hexadecimal characters (0-9 and A-F). The key must be the same as the agent encryption key of your frontend server.
Service start delay
Section titled “Service start delay”You can specify that the agent should wait for a certain number of seconds before it starts its service. This can occasionally be useful in order to ensure that the agent measures performance on the required network adapter (NIC) if a computer has more than one adapter.
To do this, add the SSD (service start delay) property with the required number of seconds (an integer) to the installer command line. If you don’t specify SSD, a new installation uses a delay of 5 seconds.
Example (where the service start delay should be 20 seconds):
msiexec /i XXXXX.msi IP=xx.xx.xx.xx PORT=4001 SSD=20Replace XXXXX.msi with the name of the agent installation file (note that names are different, depending on whether you use a 32-bit or a 64-bit agent installation file).
Replace xx.xx.xx.xx with the IP address or fully qualified domain name of your PerformanceGuard frontend server.
How long a delay should I specify? That depends on the computer that the agent is installed on. You may need to experiment with different delays before you find the optimal one. If in doubt, start out with a delay between 5-20 seconds, and then adjust the delay if required.
Will the delay affect the agent’s startup measurements? No, the agent measures the computer’s startup times correctly despite the delay. However, don’t set a delay so long that the agent service doesn’t start in time to measure login performance.
Silent installation
Section titled “Silent installation”If you deploy the agent to multiple client computers via a software distribution tool, you may want to keep the installation process completely transparent to the end users.
In that case, add the /qn (quiet, no user interface) parameter to the installer command line:
msiexec /i XXXXX.msi IP=xx.xx.xx.xx PORT=4001 /qnReplace XXXXX.msi with the name of the agent installation file (note that names are different, depending on whether you use a 32-bit or a 64-bit agent installation file).
Replace xx.xx.xx.xx with the IP address or fully qualified domain name of your PerformanceGuard frontend server.
The installer never restarts the computer, also not in a silent installation.
Installation parameters
Section titled “Installation parameters”| Name | Description | Default Value |
|---|---|---|
| IP=<server_ip> | The IP address or hostname of the PerformanceGuard Frontend server that the agent should connect to. | performanceguard |
| PORT=<port_no> | The TCP port number on which the PerformanceGuard Frontend server must listen for data from the agent. | 4001 |
| GROUP=<group_hint> | The agent configuration group into which the agent will be placed when it first connects. | Default |
| AGENT_ID=<agent_id> | The agent identifier. The agent_id parameter is most often used if you re-install the entire PerformanceGuard system, server as well as all agents. In this case, set it to agent_id=0. This will force the agent to retrieve a new ID from the server. Only use this parameter if you are an experienced PerformanceGuard administrator. If you use this parameter without a clear understanding of the implications, you may corrupt agent configuration groups. Be careful not to give several agents the same agent_id. You may of course assign an agent_id of zero to several agents. | 0 |
| SSD=<service_start_delay> | The number of seconds the agent waits before it attaches to the network. On some hardware configurations, this value must be larger than zero, otherwise the agent can’t collect network data. | 5 |
| ENCRYPTION=“<0, -1, 1, -2 or 2>” | Defines whether the agent should use encryption when it communicates with the Frontend server. 1. 0: Don’t use encryption 2. -1: Use encryption if the Frontend server supports encryption 3. 1: Force use of encryption (that is: don’t communicate with Frontend servers that don’t support encryption) 4. -2: Use custom defined encryption if the Frontend server supports encryption 5. 2: Force use of custom-defined encryption |
-1 |
| AESKEY=“<128bit key>” | The custom key the agent uses when it encrypts data that it sends to the Frontend server. Required when ENCRYPTION is -2 or 2. |
None |
Settings on a computer that already has an agent
Section titled “Settings on a computer that already has an agent”If the computer already has, or has had, a PerformanceGuard agent, the installer reuses the agent’s existing settings: server address, port, configuration group, agent ID, service start delay and encryption. The settings stay in the registry even when you remove an agent. The installer uses the settings in this order, highest priority first:
- What you enter in the installation wizard.
- Parameters on the command line.
- The existing settings from the registry.
- The default values in the table.
Installation procedure
Section titled “Installation procedure”-
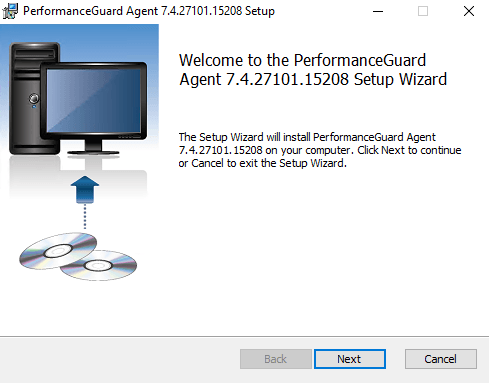
Navigate to the folder in which you placed the downloaded PerformanceGuard agent installer, and start the installation.
-
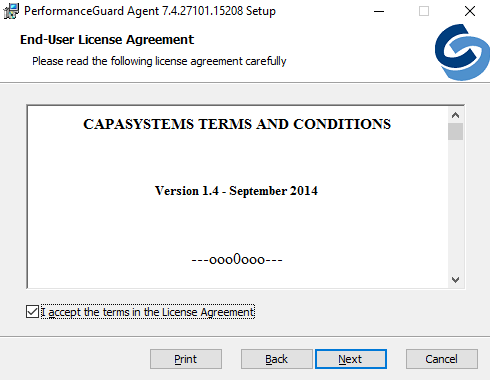
Read and accept the end-user license agreement, and then click Next.
-
In Agent Parameters, specify the settings for your PerformanceGuard server:
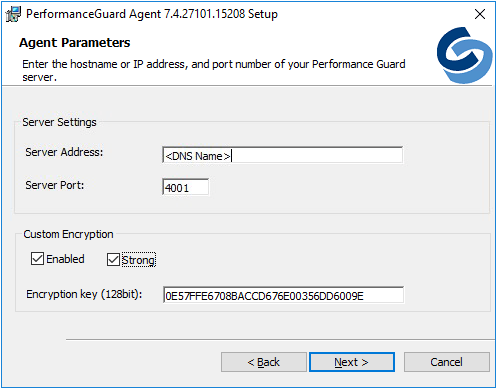
- Server Address: The address of the PerformanceGuard frontend server (collector) that the agent should connect to. Use the DNS name of the computer where the frontend server is installed. If you always use the same DNS name, you don’t need to reinstall agents if the frontend server’s IP address changes.
- Server Port: The TCP port on which the frontend server listens for data from agents. We recommend port 4001 unless your organization’s firewall administrator has told you to use another port.
Under Custom Encryption, specify the custom encryption of the traffic between the agent and the frontend server:
- Enabled: Use custom-defined encryption if the frontend server supports encryption.
- Strong: Force use of custom-defined encryption. The agent doesn’t communicate with frontend servers that don’t use the key.
- Encryption key (128bit): The custom key, written as 32 hexadecimal characters (0-9 and A-F). It must be the same key as the agent encryption key of your frontend server.
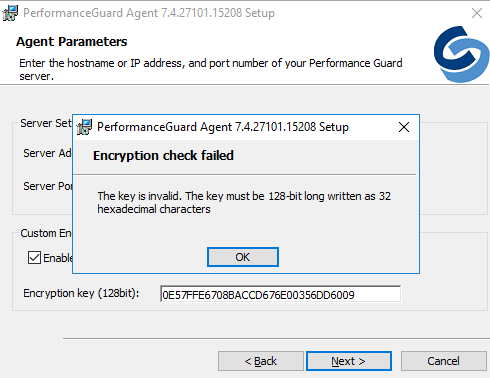
If the key is shorter than 32 characters or contains other characters, you get the message Encryption check failed.
When ready, click Next.
-
Click Install. When the installation is complete, click Finish.
-
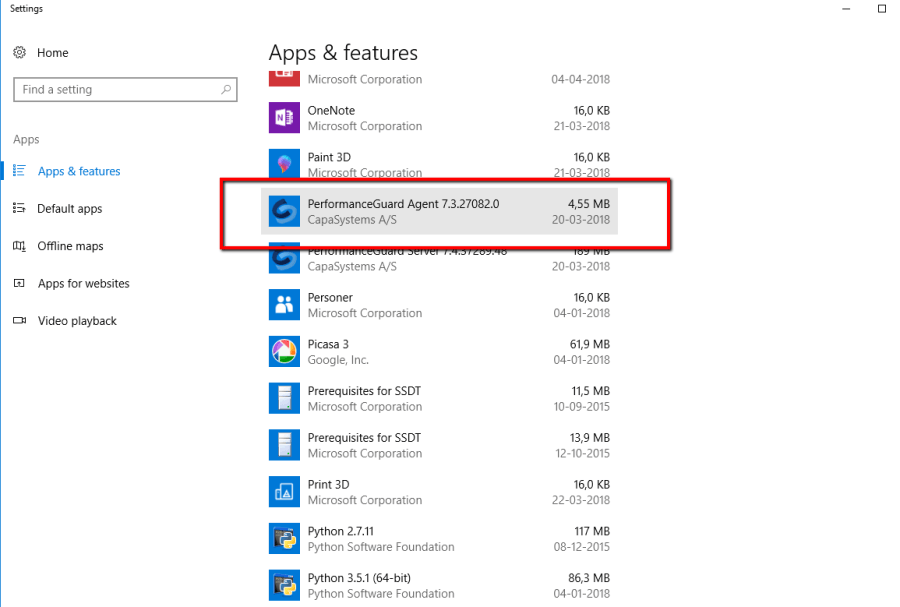
Check that the PerformanceGuard agent appears in Settings → Apps → Apps & features on the computer.
Upgrade
Section titled “Upgrade”See Agent Upgrade.
Repair
Section titled “Repair”It’s possible to repair an agent. This means that it’s possible to re-install the files for a client if the files have been corrupted or overwritten:
msiexec /f XXXXX.msi /qnReplace XXXXX.msi with the name of the agent installation file (note that names are different, depending on whether you use a 32-bit or a 64-bit agent installation file).
A repair will recover the files used by the PerformanceGuard agent, but won’t change or modify the configuration for a given agent.