

Create a Job
A job tells AutoSteps which script to run, on which executor group, and how often. AutoSteps runs each job on one of the available computers in the executor group, so the work is load balanced between the computers in the group.
Create a job
Section titled “Create a job”- Select Administration → AutoSteps → Jobs.
- Select Create
 .
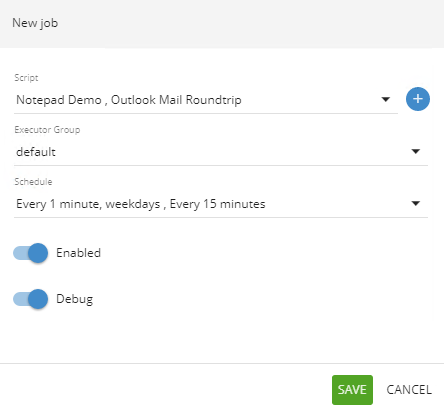
. - In Script, select one or more scripts.
- In Executor group, select one or more executor groups.
- In Schedule, select how often the job runs. See Schedules.
- Leave Enabled selected if the job should start running right away.
- Select Debug if you want to troubleshoot the script. See Troubleshoot a job with debug mode.
- Optional: override script parameters. See Override job parameters.
- Select Create.
Create is only available when you have selected a script, an executor group and a schedule.
PerformanceGuard creates one job for each combination of the scripts and executor groups that you selected. For example, if you select two scripts and three executor groups, you get six jobs.
The job list
Section titled “The job list”The Jobs page lists your jobs with these columns:
- Script and Script category: The script the job runs.
- Executor group: The group of computers that runs the job. Select the name to see if the group is enabled, when a job was last scheduled on it, its time zone and how many computers it has.
- Schedule: How often the job runs.
- Enabled: A green dot means the job runs. A red dot means the job is turned off.
- Agent count: The number of computers in the executor group.
A job only runs when both the job and its executor group are enabled.
Edit or delete a job
Section titled “Edit or delete a job”- Select the menu button next to the job.
- Select one of these:
- Edit: Change the script, executor group, schedule, Enabled, Debug or job parameters, and then select Save. When you edit a job, you can select only one script and one executor group.
- Delete: Select Delete, and then select Confirm.
Override job parameters
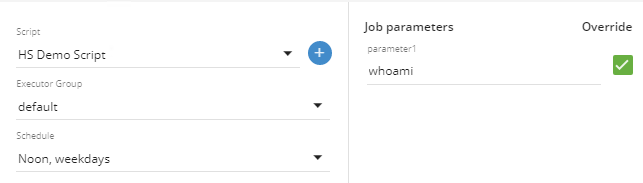
Section titled “Override job parameters”If the script uses parameter variables (see Create a Script), the dialog shows a Job parameters section when you select exactly one script. For each parameter you can:
- Leave Override cleared to use the default value from the script.
- Select Override and type a value that only this job uses.
Troubleshoot a job with debug mode
Section titled “Troubleshoot a job with debug mode”When Debug is selected, AutoSteps keeps a copy of each run on the computer that runs the job. For each run, AutoSteps creates a folder under AppData\Local\Scout\ExecutionDir for the user who runs AutoSteps. The folder name is the job name followed by the date and time of the run. The folder contains:
- The script file.
stdout.txt: The environment variables that the script ran with, and the output from the script.stderr.txt: Error output from the script, if there is any.
Without debug mode, AutoSteps deletes the script file after each run. Turn off Debug when you have finished troubleshooting.
Built-in scripts
Section titled “Built-in scripts”AutoSteps comes with these scripts in a demo script category, which you can use to test your setup:
- BTMutil Demo: A batch file that shows how to use
BTMUtil.exe, the tool supplied with the PerformanceGuard agent, to time the steps of a script. See Monitor Complex Activity with AutoSteps. - Notepad Demo: An AutoHotkey script that opens Notepad, types some text, saves the file and closes Notepad. It reports each step to PerformanceGuard through the agent’s COM start-stop interface. See AutoSteps Source Code.
- Outlook Mail Roundtrip: An AutoHotkey script that sends an e-mail with Outlook and measures the time until the e-mail arrives. Before you use it, edit the script and replace the recipient address with a mailbox that the Outlook profile on the executor computer receives mail for.
The Notepad Demo and Outlook Mail Roundtrip scripts need AutoHotkey on the computers in the executor group.