
Back Up Database
PerformanceGuard supports the following relational database management systems:
- SQL Server 2012 (CPU license) from PerformanceGuard version 6.1.16
- SQL Server 2014 from PerformanceGuard version 6.5.100
- SQL Server 2016 from PerformanceGuard version 7.0
- SQL Server 2017 from PerformanceGuard version 7.4
- SQL Server 2019 RC1 have been tested with PerformanceGuard version 7.5 but no official release was available from Microsoft at the time of the release of PerformanceGuard 7.5
-
Open Microsoft SQL Server Management Studio and connect to the required database server.
-
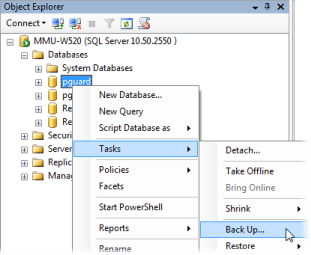
In Microsoft SQL Server Management Studio’s Object Explorer, locate the pguard database.
-
Right-click pguard and select Tasks > Back Up…
-
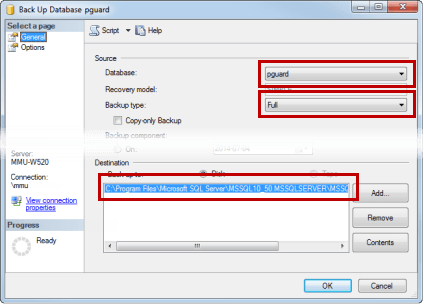
In the Source section of the Back Up Database dialog’s General page, make sure that:
- the database pguard is selected
- the backup type Full is selected
- Then make a note of the backup destination in the bottom part of the dialog.
-
Switch to the Back Up Database dialog’s Options page and select Overwrite all existing backup sets.
-
Click OK.
The backup process will begin, and you’ll be able to view its progress. It can take a while to back up the database. When the backup is finished, you’ll see a confirmation message. The backed-up database has now been saved as a .bak file at the destination you made a note of in step 4.
For information about how to restore your backed-up database, see Restore Database.