

Provisioning Templates
A provisioning template is a collection of settings that control the provisioning process: which Windows image is installed, the Windows installation settings, and the scripts that run during provisioning. Each template must be linked to an enrollment configuration, which dictates how the device is set up in CapaOne after the operating system is installed.
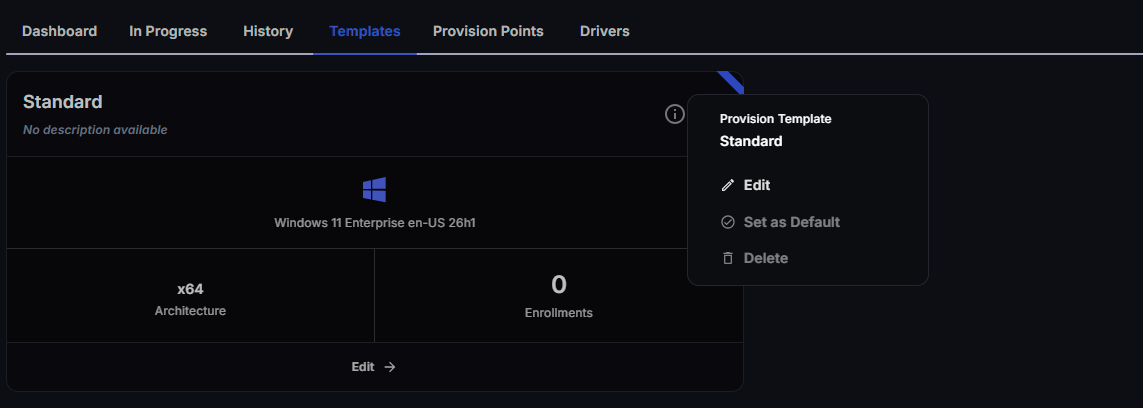
Templates are managed under Windows → Provision → Templates.
Link a template to an enrollment configuration
Section titled “Link a template to an enrollment configuration”You link a template from the enrollment configuration, not from the template:
- Go to Windows → Enrollment.
- Create an enrollment configuration, or open an existing one’s menu and select Edit.
- Under Provision, select the template in Provision Template.
- Save the configuration.
Only enrollment configurations with a linked template are offered when you scan the QR code on a device that’s being provisioned. See Windows Enrollment.
Manage templates
Section titled “Manage templates”Open the menu on a template to manage it:
- Edit — change the template’s settings.
- Set as Default — mark the template as the default template.
- Delete — delete the template. CapaOne shows how many enrollment configurations use the template. If you continue, the template is removed from those enrollment configurations. You can’t delete the default template.
General
Section titled “General”| Setting | Description |
|---|---|
| Name | A short, descriptive name for the template. Required. |
| Description | Optional free-text description. |
You don’t build or maintain OS images. Select the architecture, operating system, release, and edition — CapaOne delivers a matching, up-to-date installation image. The same image works across hardware models, because drivers are resolved per device during deployment.
| Setting | Description |
|---|---|
| Architecture | The architecture(s) this template supports: x64, ARM64, or both. |
| Operating System | The Windows version to install. |
| Release | The release of the selected operating system. |
| Edition | The edition of the selected release. |
| Display Language | The Windows display language. Must be a language included in the image. Maps to <UILanguage> in unattend.xml. |
Provision scripts
Section titled “Provision scripts”Under Assigned Scripts, select one or more organization-defined scripts to run during device provisioning. Use scripts for configuration that must happen during installation rather than after enrollment.
Operating system configuration
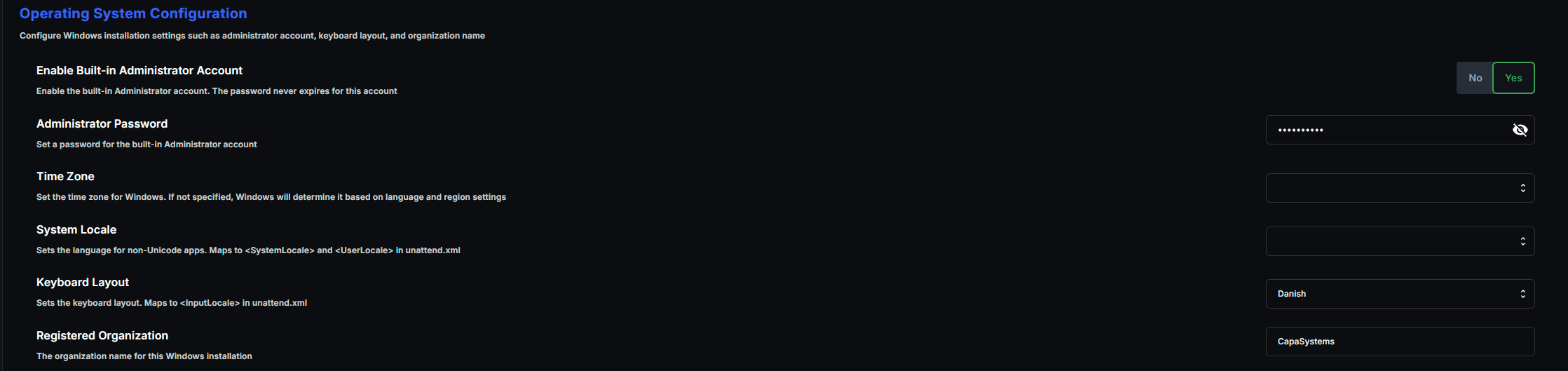
Section titled “Operating system configuration”These settings map to the Windows answer file (unattend.xml) used during installation.
| Setting | Description |
|---|---|
| Enable Built-in Administrator Account | Enables the built-in Administrator account. The password for this account never expires. Off by default. |
| Administrator Password | Required when the Administrator account is enabled. 8–127 characters, containing at least 3 of: uppercase letters, lowercase letters, numbers, special characters. |
| Time Zone | The Windows time zone. If not set, Windows determines it from language and region settings. |
| System Locale | The language for non-Unicode apps. Maps to <SystemLocale> and <UserLocale>. |
| Keyboard Layout | The keyboard layout. Maps to <InputLocale>. |
| Registered Organization | The organization name registered in the Windows installation. |