

Windows Enrollment
Windows endpoints are enrolled by installing the CapaOne Agent (see requirements). An enrollment configuration decides which groups, configurations, and Windows tags a Windows device receives once enrolled. Tags are a Windows-only feature in CapaOne. Go to Windows → Enrollment, select a configuration, and click View:
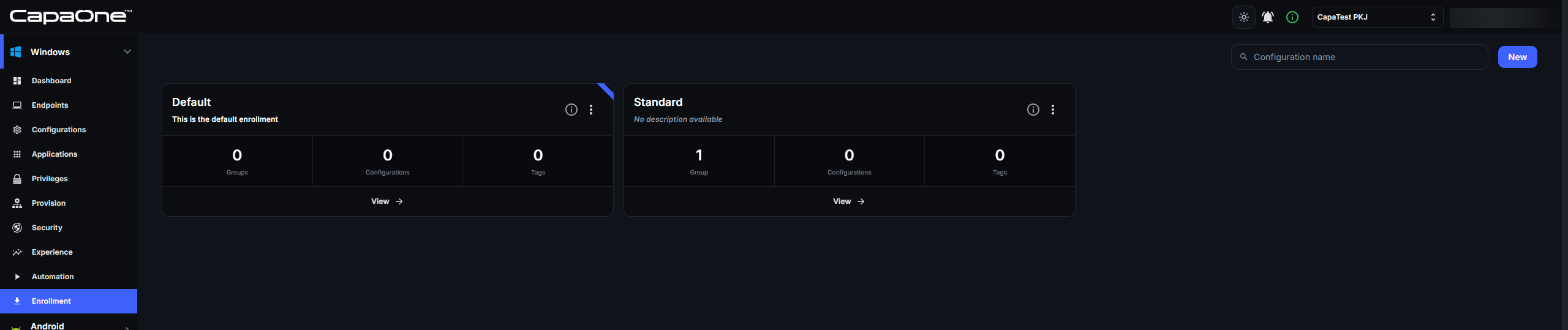
The configuration marked with a corner ribbon is the default — it is used when a device enrolls without specifying a configuration.
Create an enrollment configuration
Section titled “Create an enrollment configuration”- Go to Windows → Enrollment and click New.
- Enter a Name and, optionally, a Description. The name must be unique.
- Under Relations, select the Groups, Configurations, and Tags to assign to endpoints when they enroll.
- Under Provision, optionally select a Provision Template to use when the device is provisioned with Provision Manager.
- Click Create.
To start from an existing configuration, open its menu and select Duplicate.
Manage enrollment configurations
Section titled “Manage enrollment configurations”Each configuration’s menu has these options:
- Edit — change the name, description, relations, or provision template.
- Duplicate — create a copy that you can change.
- View configuration — open the installation methods and settings.
- Set as default — make this the default configuration.
- Delete — delete the configuration.
You can’t delete the default configuration. Set another configuration as the default first.
A red warning icon on a configuration means that its provision template uses an operating system that’s no longer available. Update the template to resolve it.
Installation methods
Section titled “Installation methods”The configuration drawer offers four ways to install the agent:
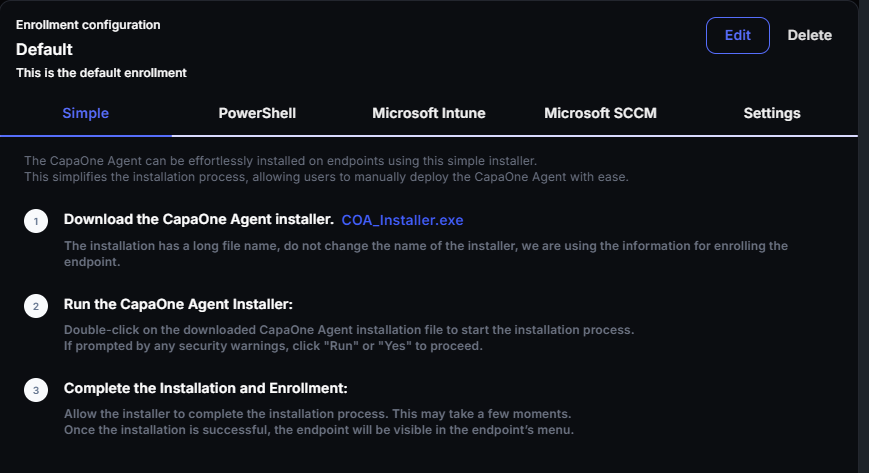
- Simple — click the
COA_Installer.exelink and run the downloaded installer on the endpoint. The file is saved with a long name that starts withCapa1_. The enrollment information is encoded in that file name, so do not rename the file. The installer downloads the agent fromhttps://cdn.capaone.com. - PowerShell — copy the generated command and run it in PowerShell with administrator rights. It downloads the agent and installs it silently with your organization key and enrollment configuration.
- Microsoft Intune — download the generated
InstallCapaOneAgent.ps1and assign it to a device group as a platform script. Optional compliance-check scripts are also provided. See Windows Enrollment with Intune. - Microsoft SCCM — download
COA SCCM.zip, which contains install and uninstall scripts ready to import into SCCM. See Windows Enrollment with SCCM.
After enrollment
Section titled “After enrollment”The device appears under Windows → Endpoints with the groups, configurations, and Windows tags from the enrollment configuration applied. The Settings tab of the drawer shows exactly what will be applied, including an optional Provisioning Template used when provisioning Windows devices.
Having trouble with the agent? See CapaOne Agent installation.