

Set Up Intune Permissions for CustomApps Upload
To upload a CapaOne Company App to Intune, the Entra ID application that CapaOne uses needs Intune permissions in Microsoft Graph. This guide shows you how to add them.
Configure Intune permissions
Section titled “Configure Intune permissions”-
Log in to the Azure portal
- Navigate to https://portal.azure.com/ and log in to your account.
-
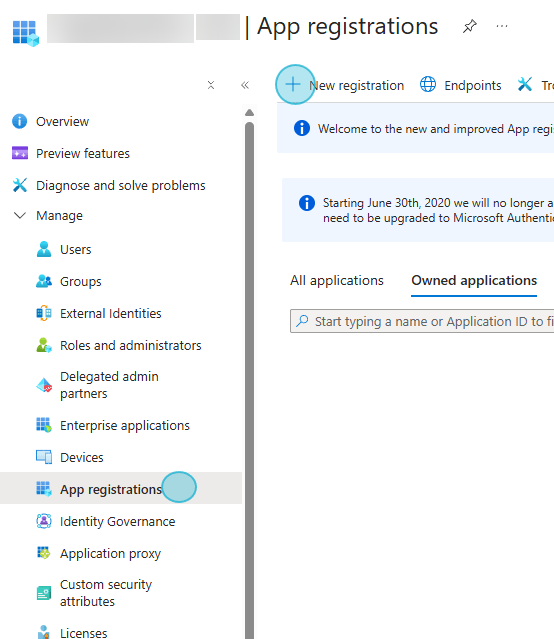
Navigate to App registrations
- In the left menu, select Microsoft Entra ID.
- Click App registrations.
-
Select the application
- Open the app registration that your CapaOne Entra ID integration uses.
- If you create a new app registration instead, also create an Entra ID integration for it in CapaOne.
-
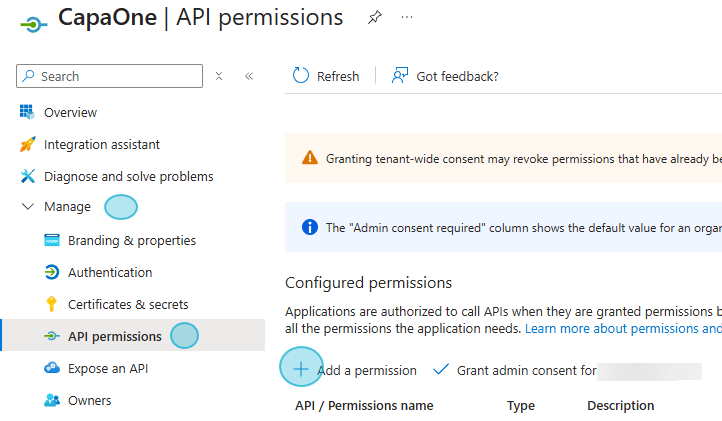
Configure API permissions
- In your app registration, go to Manage > API permissions
- Click Add a permission
-
Add the required Intune permissions
-
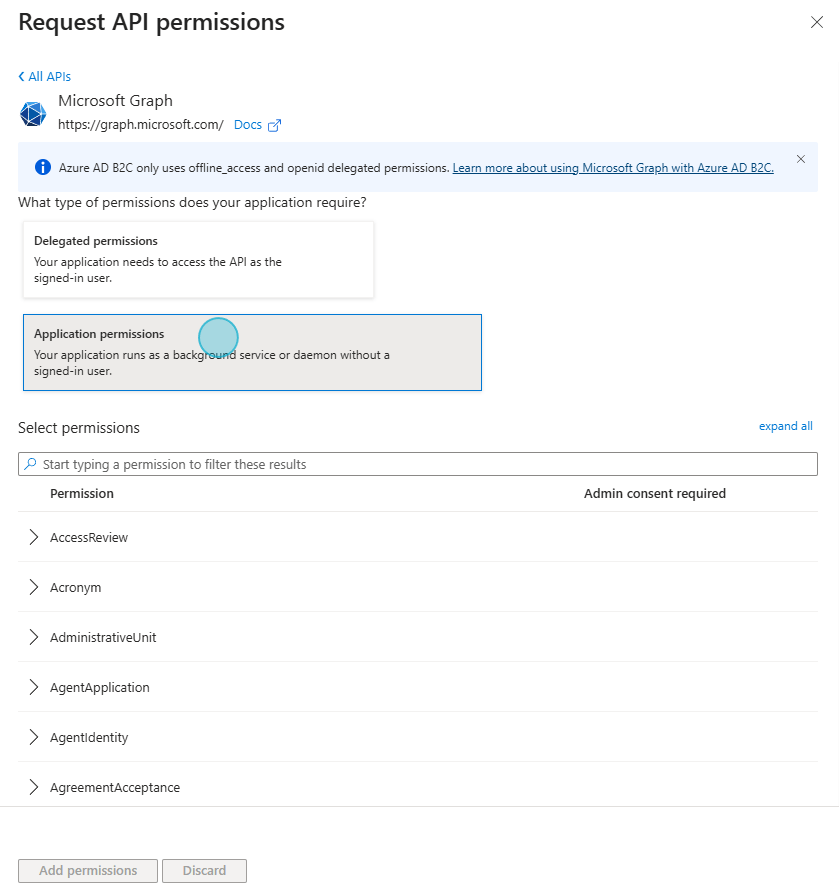
Select Microsoft Graph
-
Choose Application permissions
-
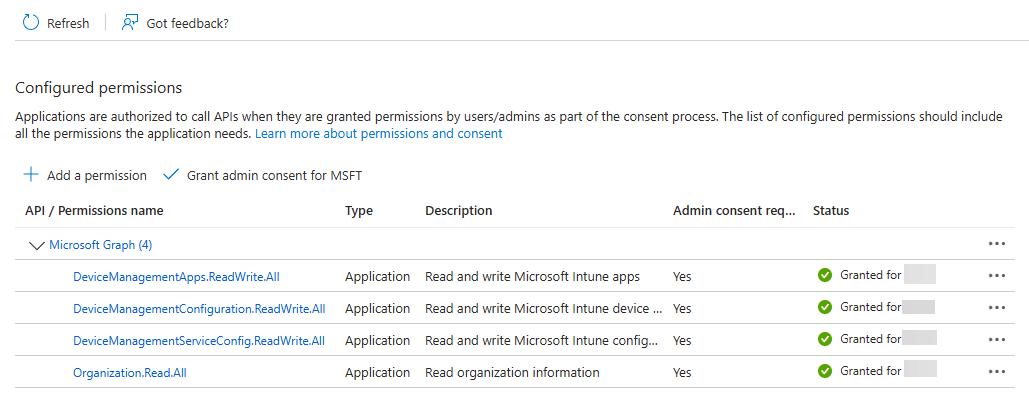
Search for and add the following permissions:
Organization.Read.AllDeviceManagementApps.ReadWrite.AllDeviceManagementConfiguration.ReadWrite.AllDeviceManagementServiceConfig.ReadWrite.All
-
-
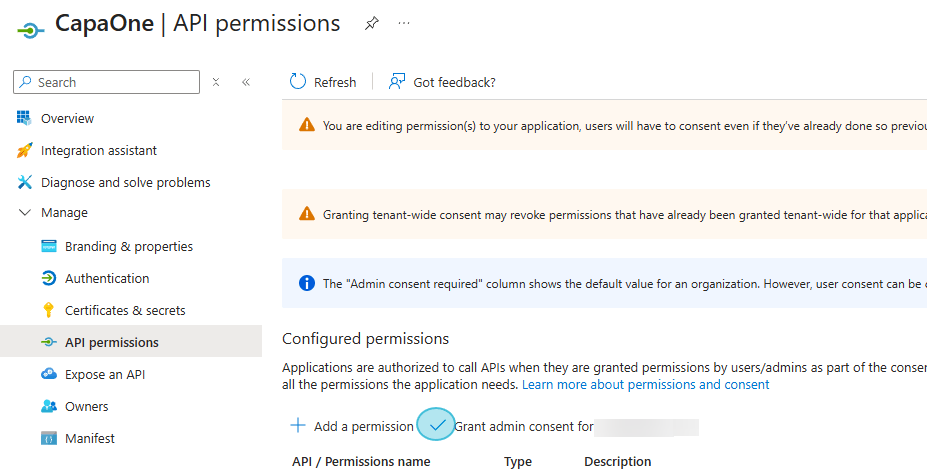
Grant admin consent
- After adding permissions, click Grant admin consent for your organization.
-
Verify the permissions
- Ensure the permissions are listed and show as “Granted for [Your Organization]”
If a permission is missing
Section titled “If a permission is missing”CapaOne checks the permissions when you upload. If a permission is missing, the upload fails with a message that starts with Missing required permission: followed by the name of the permission, for example DeviceManagementApps.ReadWrite.All. Add the permission, grant admin consent, and upload again. This message also appears if the tenant has no active Intune subscription.