

Integrate CapaOne with Entra ID
Connect CapaOne to Microsoft Entra ID to sync your directory users to Management → Users. You register an application in Entra ID, give it read permissions for users and groups, and then create an Entra ID integration in CapaOne with the application’s details. The same integration can also be used to upload Company Apps to Intune. See Set Up Intune Permissions for CustomApps Upload.
Register an application in Entra ID
Section titled “Register an application in Entra ID”-
Navigate to https://portal.azure.com/#home
-
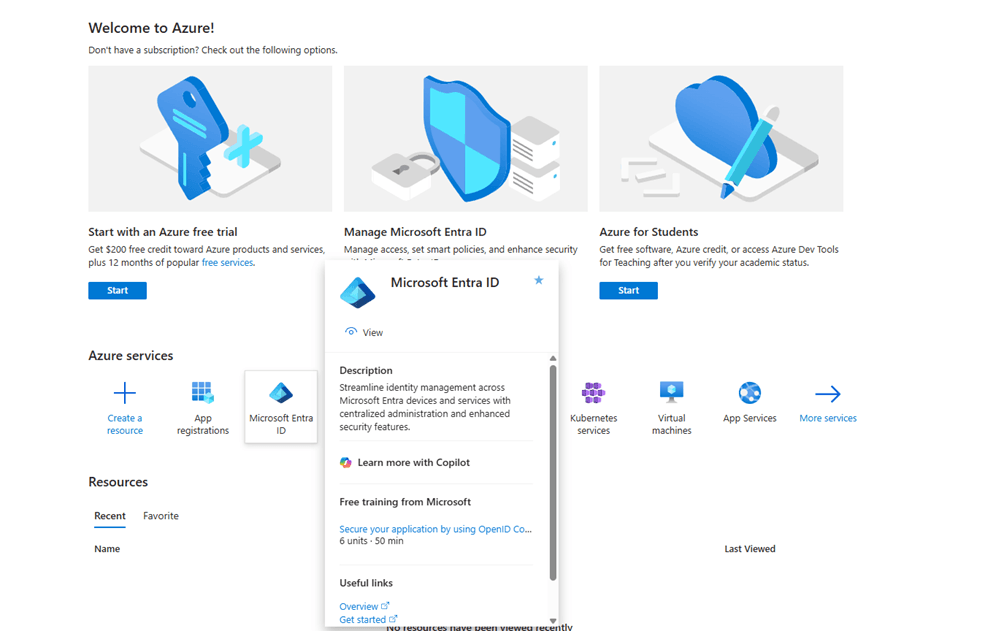
Click Microsoft Entra ID
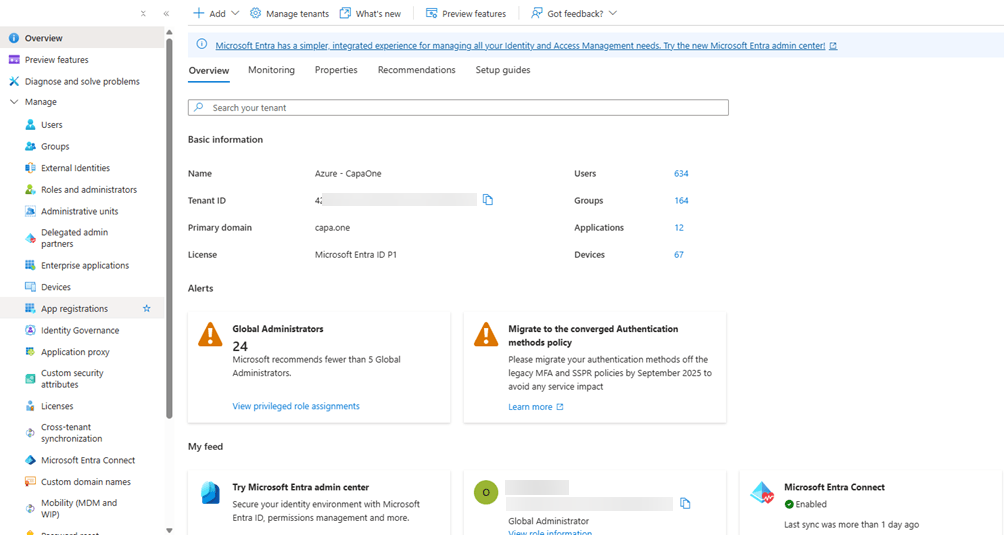
- Click App registrations
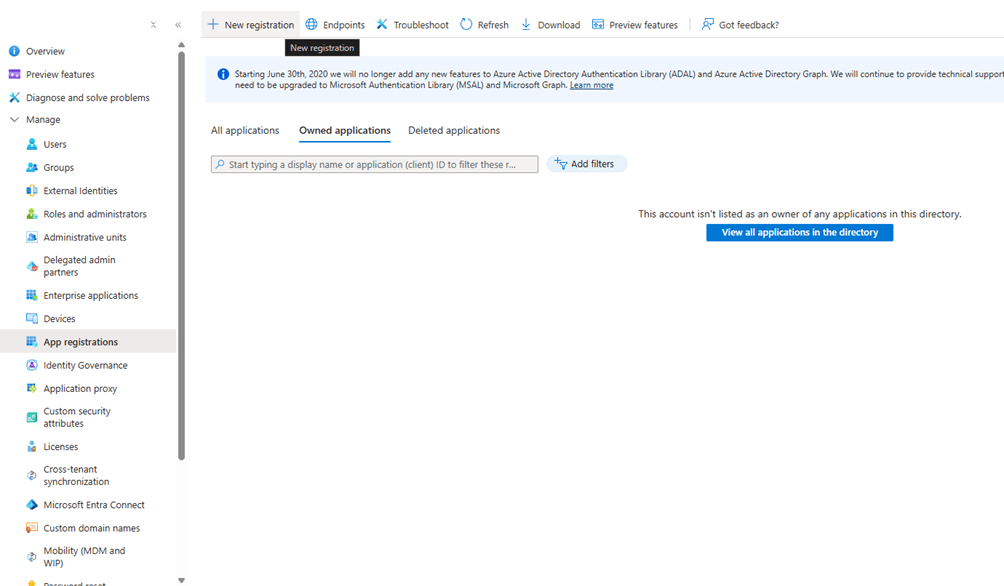
- Click New registration
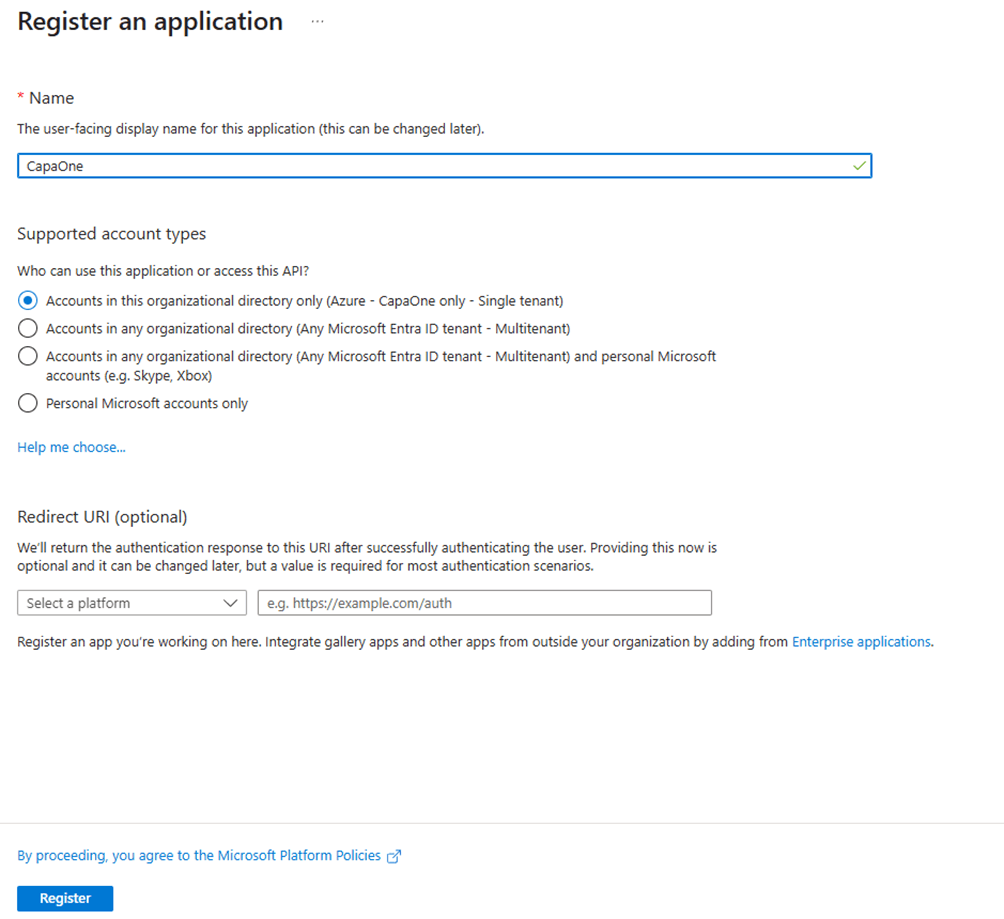
- Provide a name, select Accounts in this organizational directory only under Supported account types, and click Register at the bottom of the page
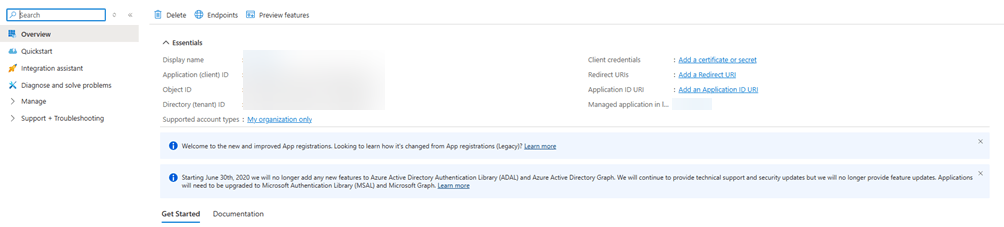
- Click on Add a certificate or secret
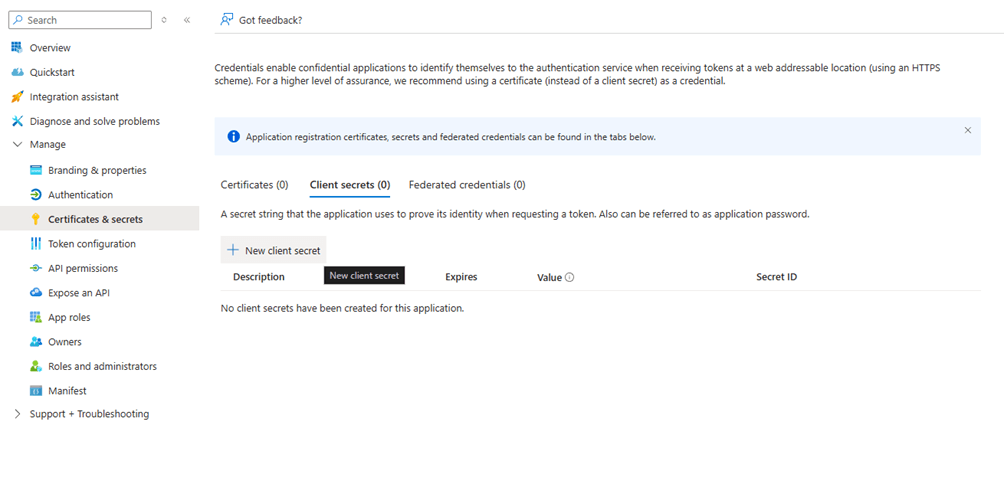
- Click on New client secret
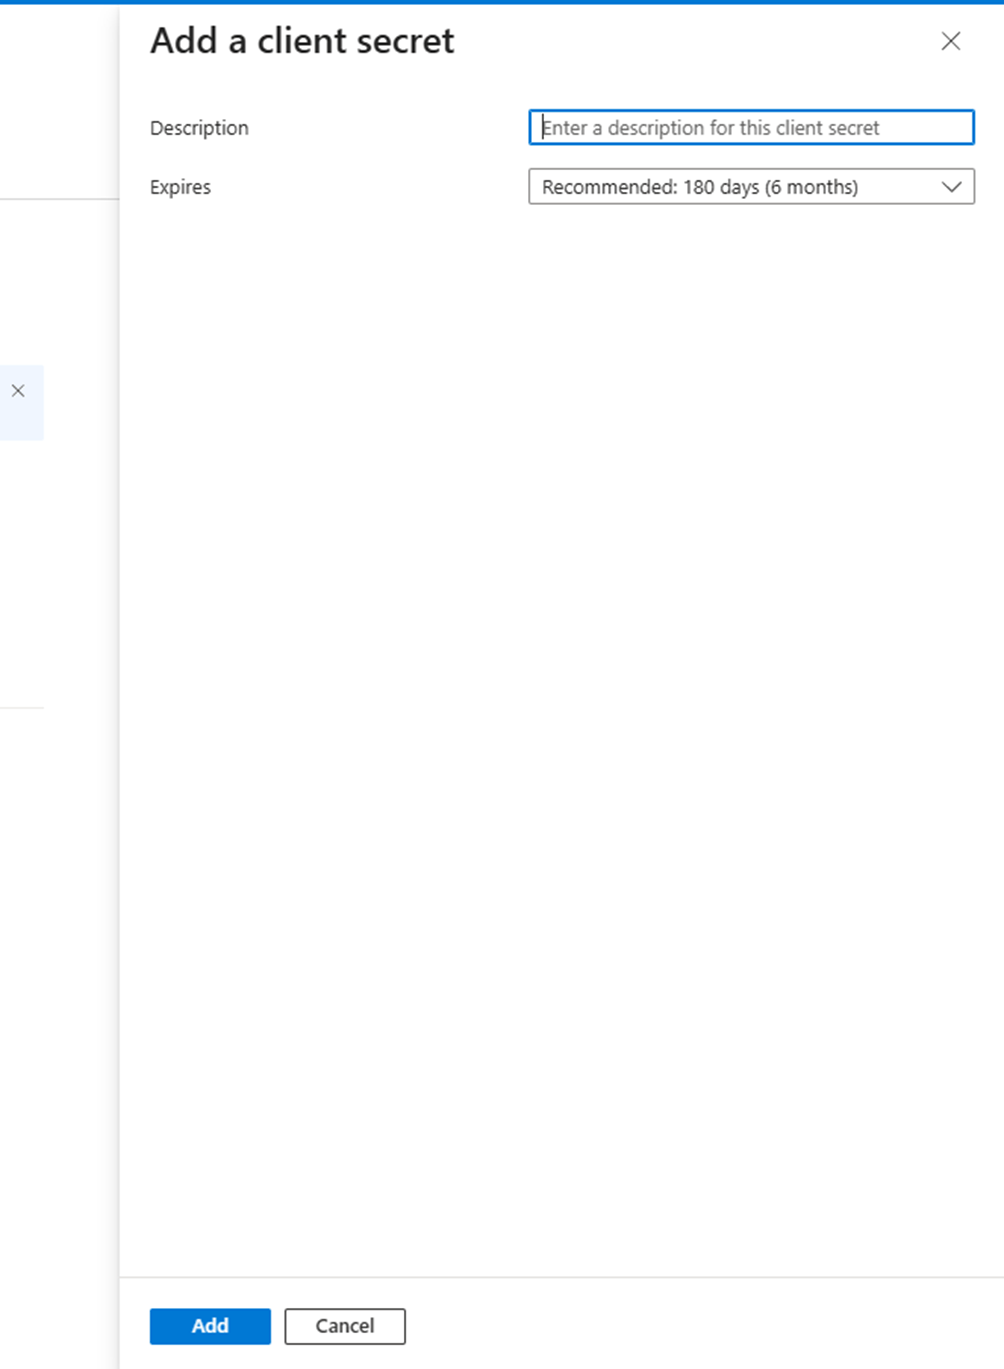
- Provide a description (not required) and set an expiration date. We suggest setting it to 24 months. Afterwards click Add at the bottom of the page
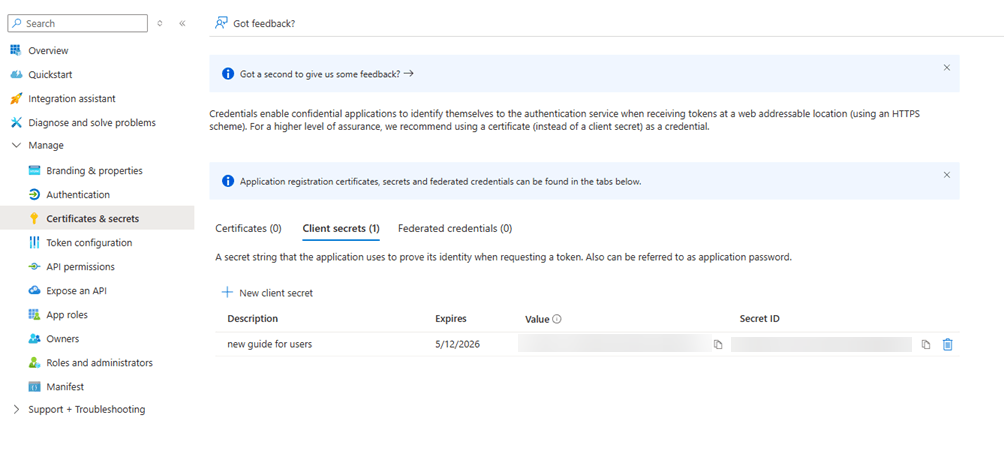
- After the client secret is created you need to copy the value and save it in a notepad. If you refresh or leave the page you will have to create a new client secret
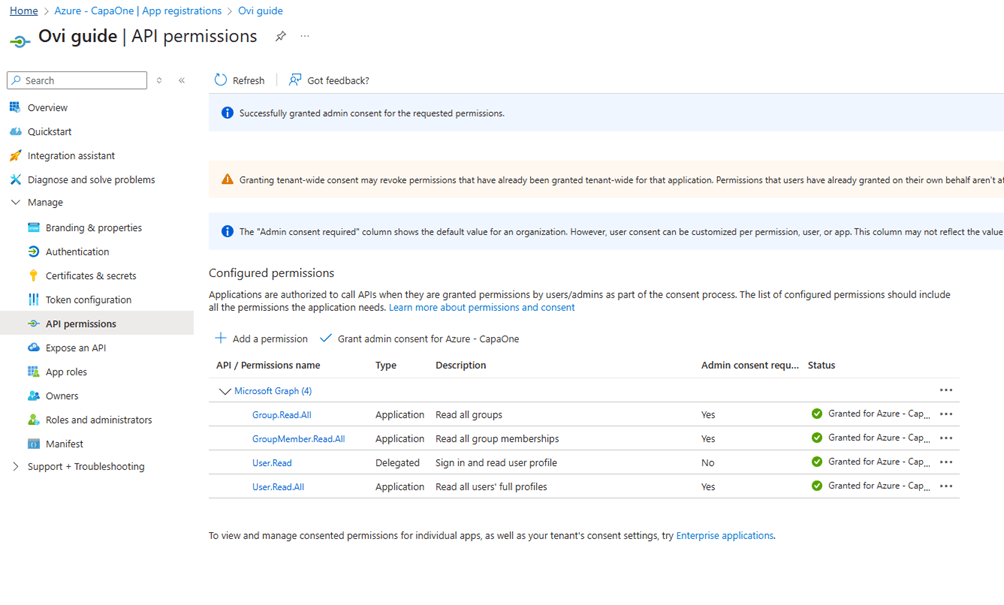
- Click on API permissions in the sidebar and then Add a permission
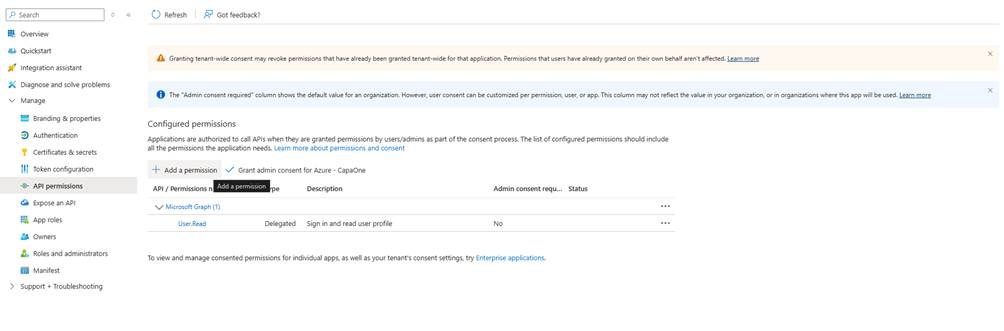
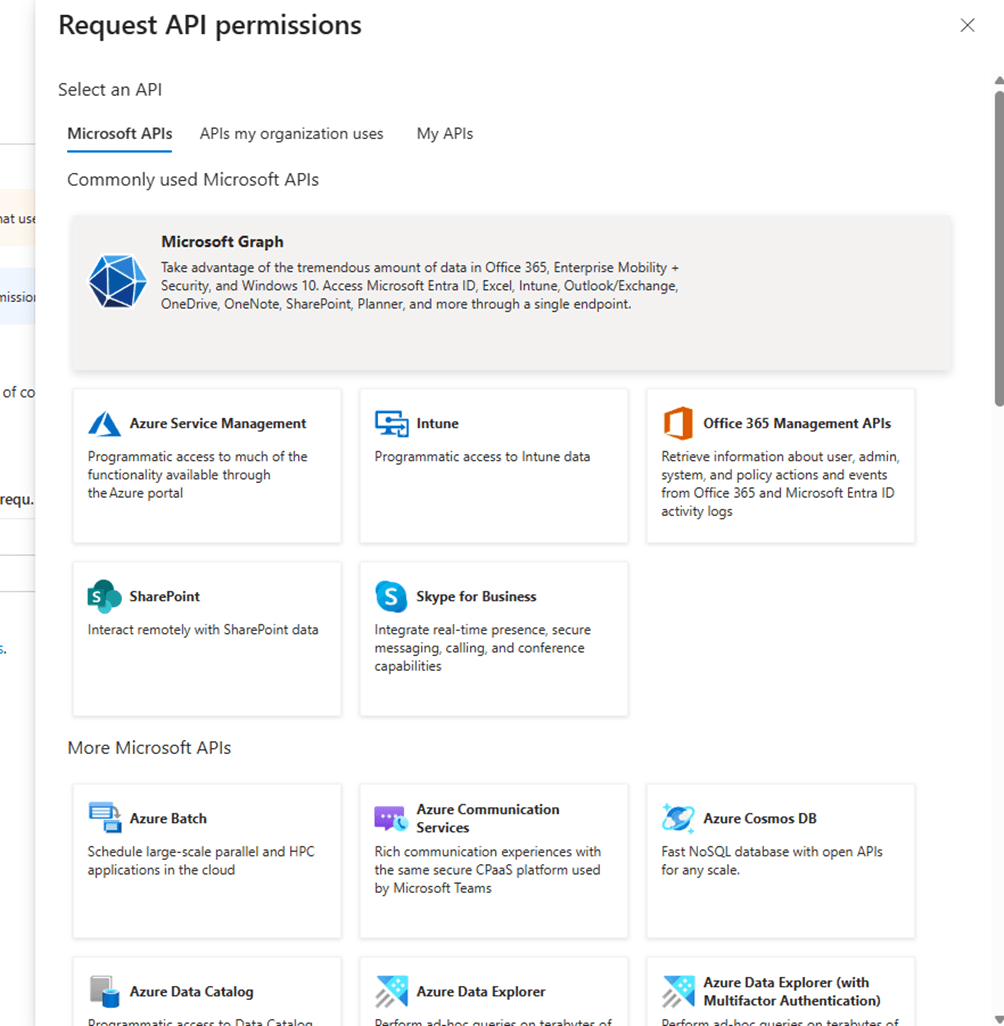
- Select Microsoft Graph
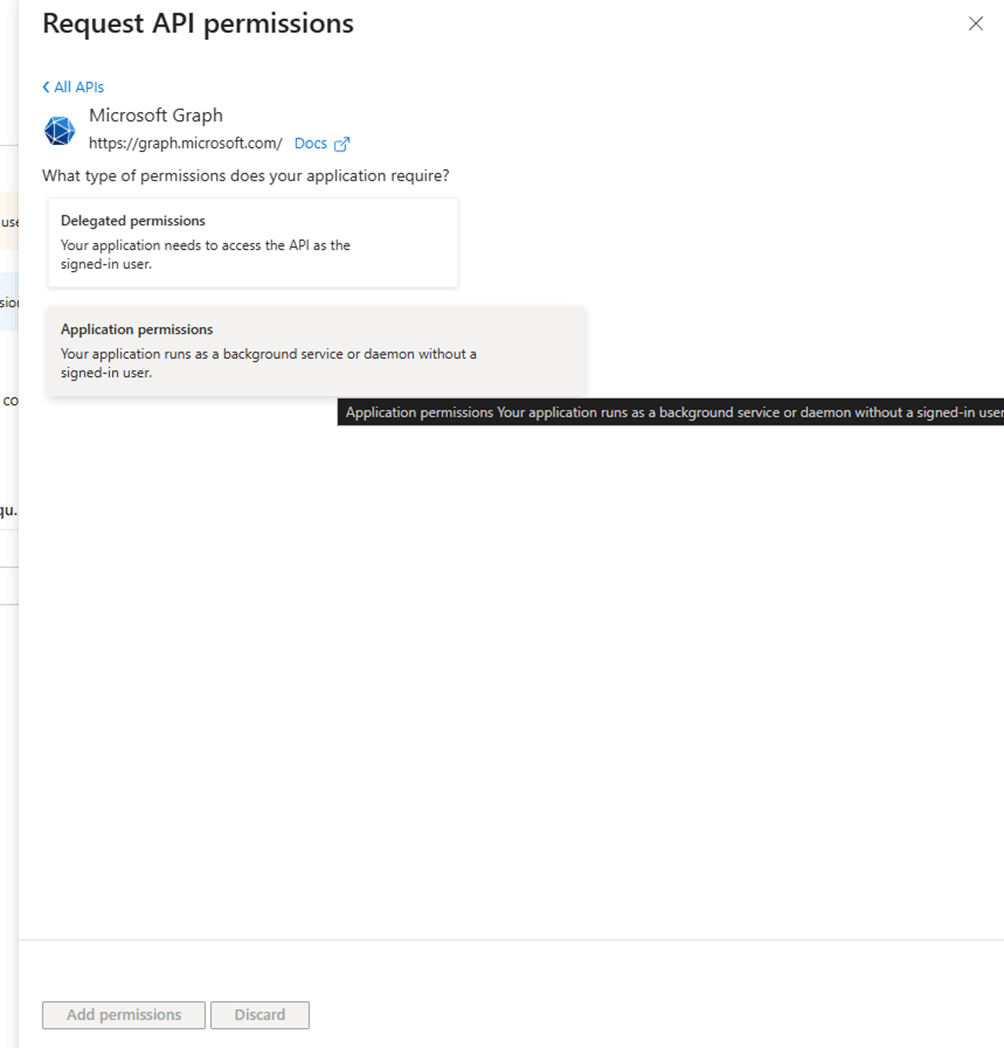
- Select Application permissions
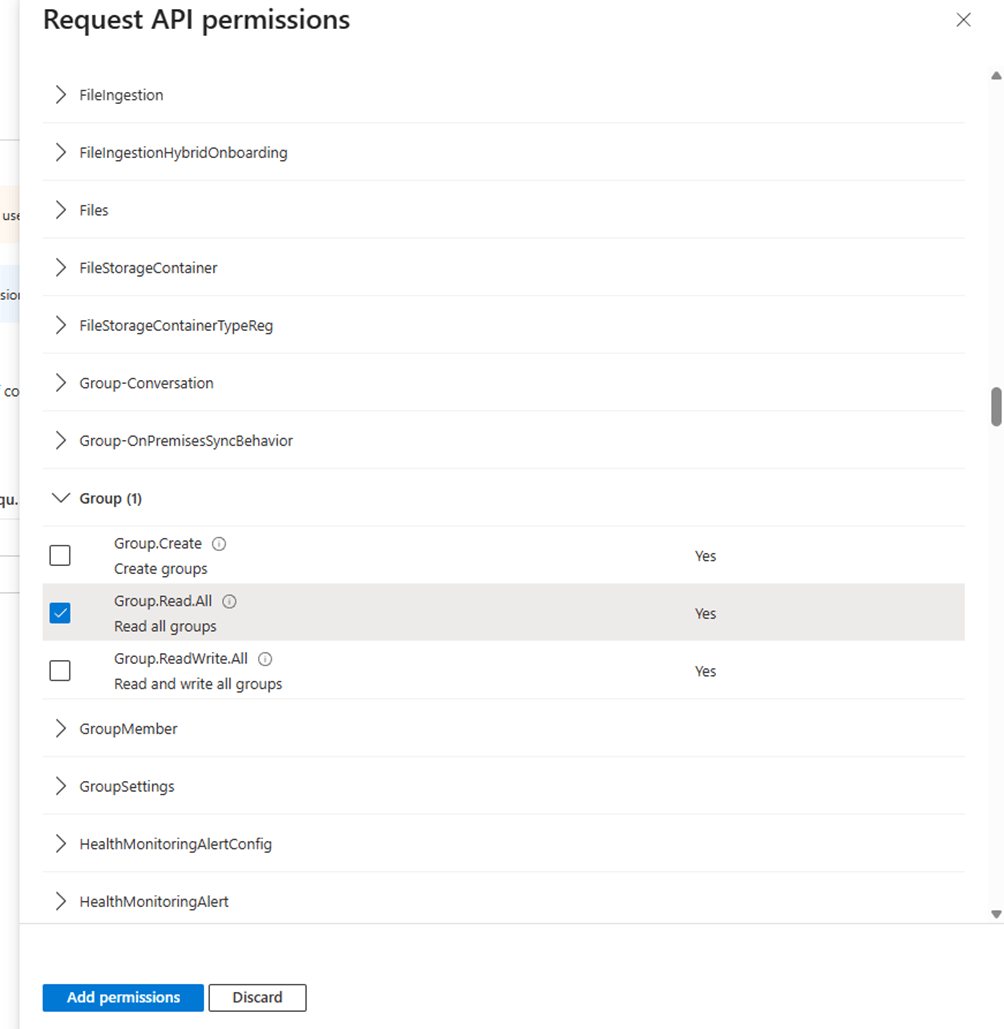
- Scroll down and expand Group and set a checkmark in Group.Read.All and then Add permissions at the bottom of the page
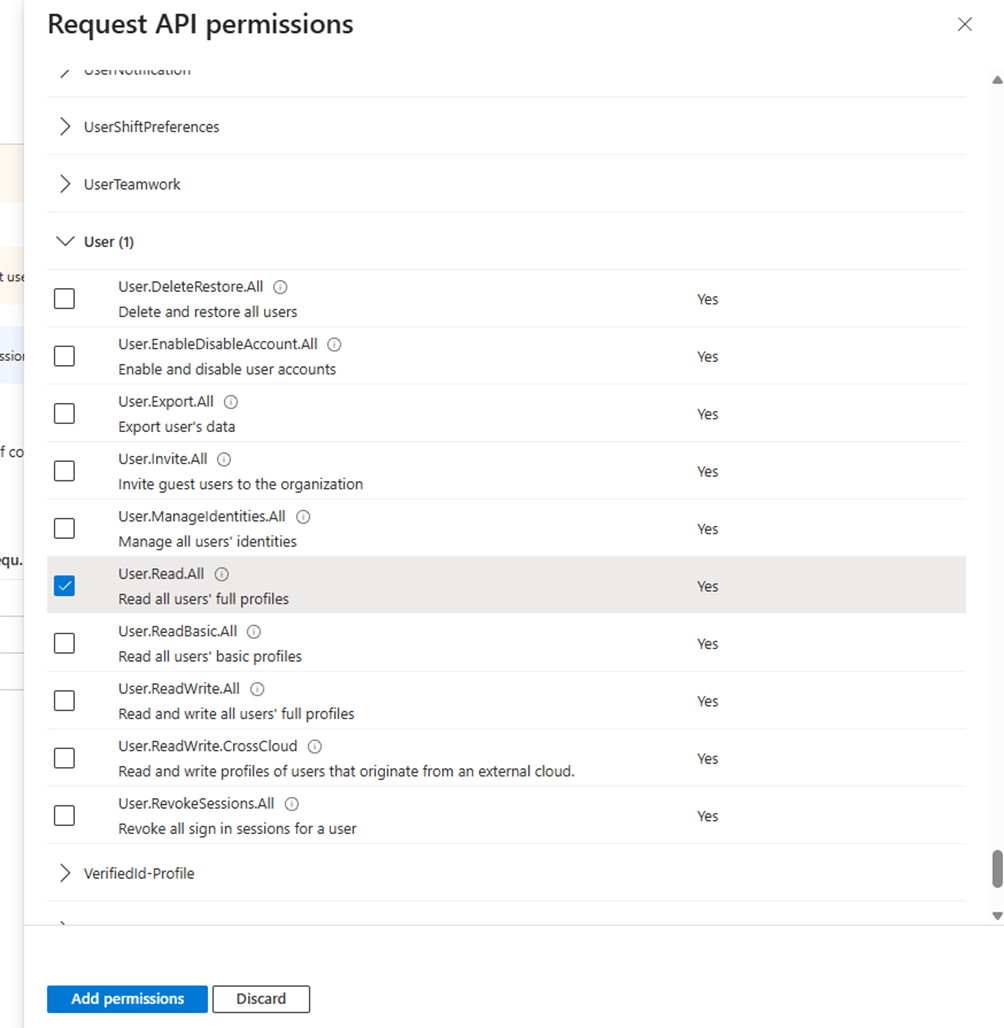
- Go through the same permission steps and set a checkmark in User for User.Read.All and Add permissions
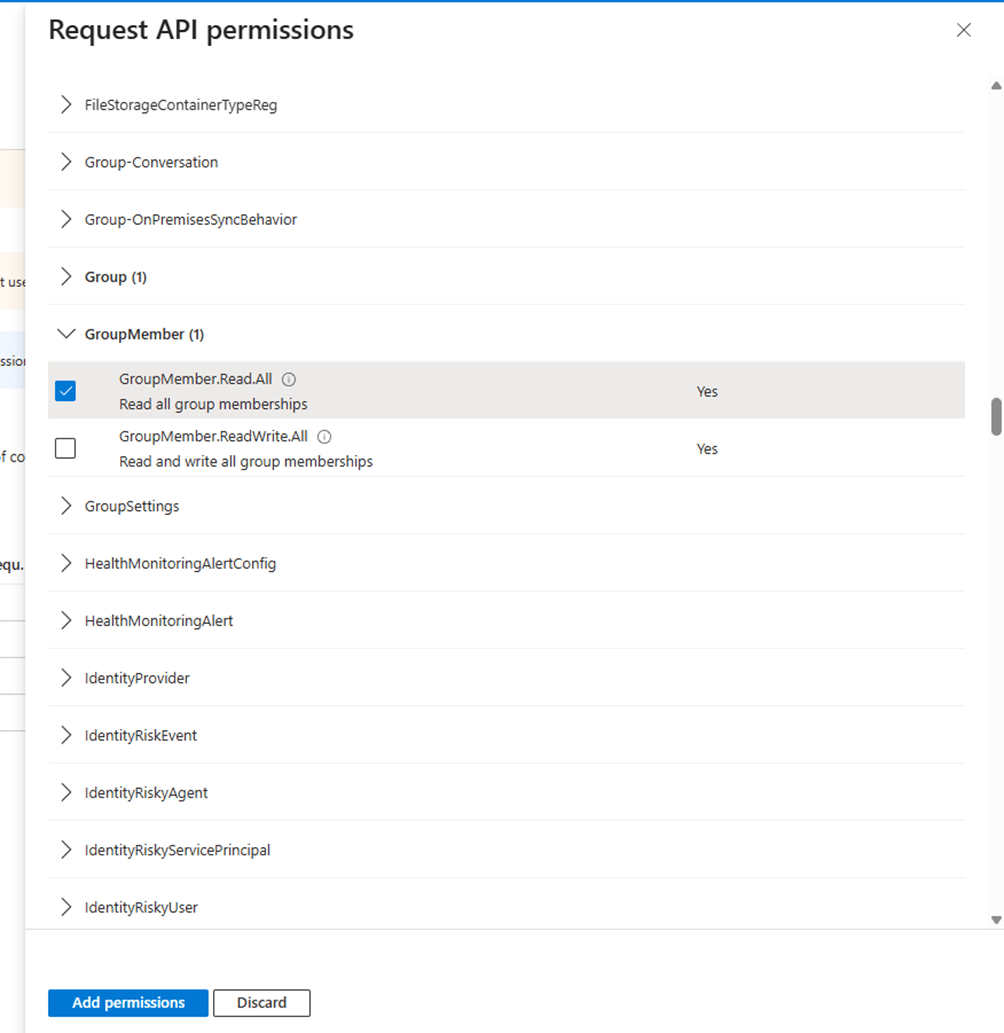
- Go through the same permission steps and set a checkmark in GroupMember for GroupMember.Read.All and Add permissions
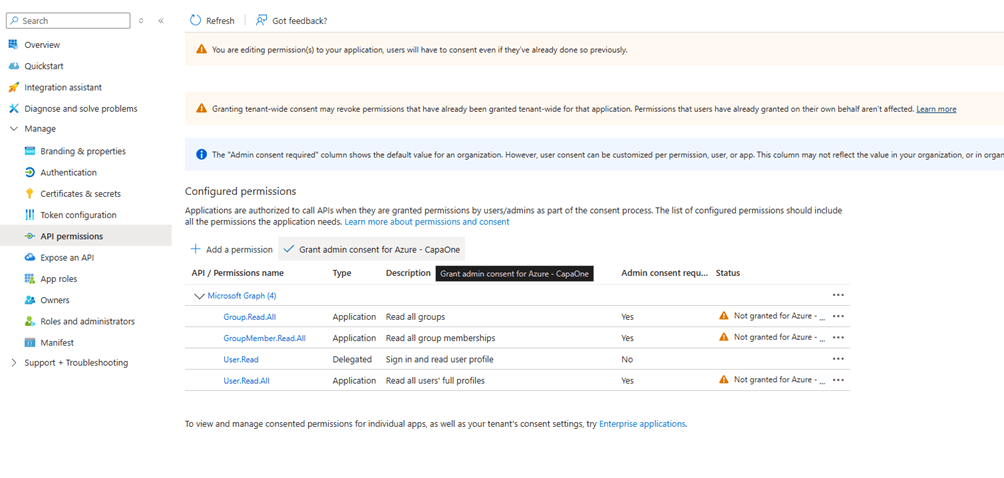
- Click on Grant admin consent for (name of directory)
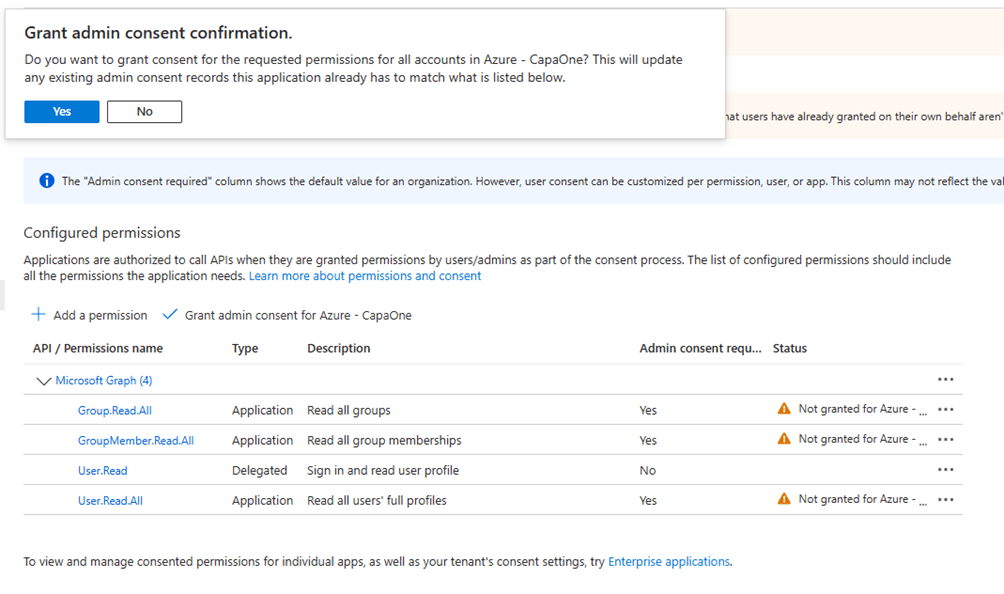
- Click Yes to the popup
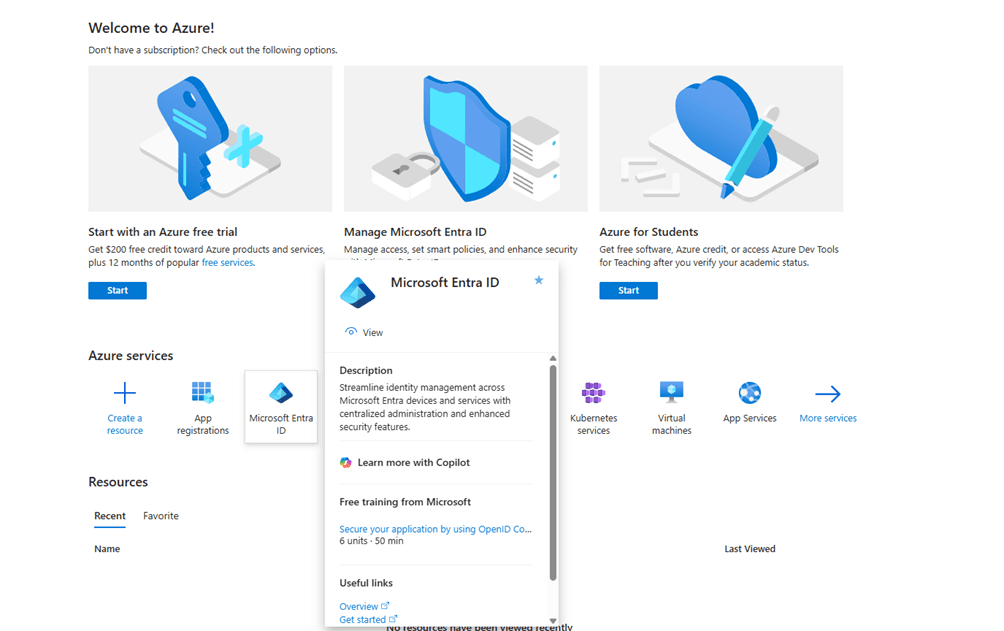
- Click on Home in the upper left corner
- Click on Microsoft Entra ID
- Click on App registrations in the left pane, and open the application you registered
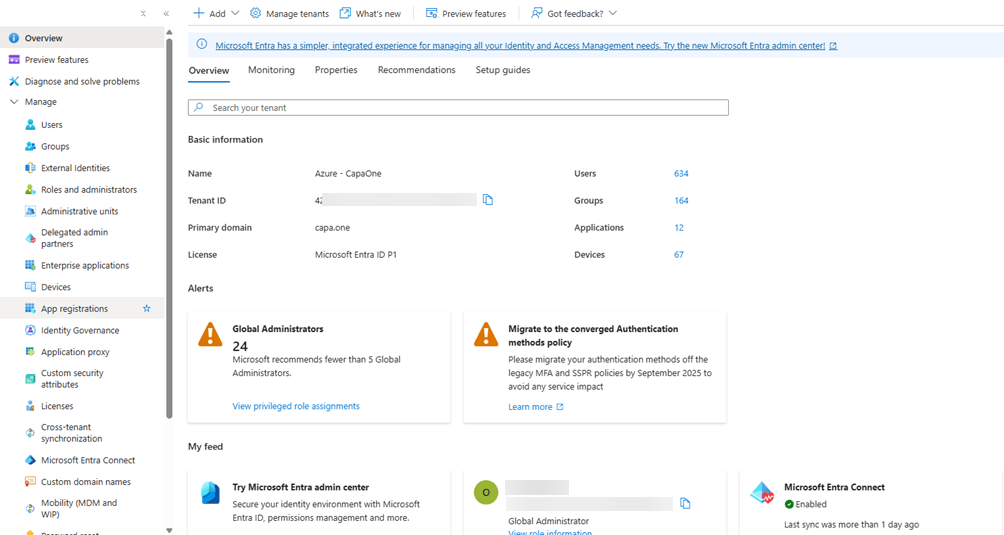
- Copy the Application (client) ID to your notepad

- Click on Properties in the left pane
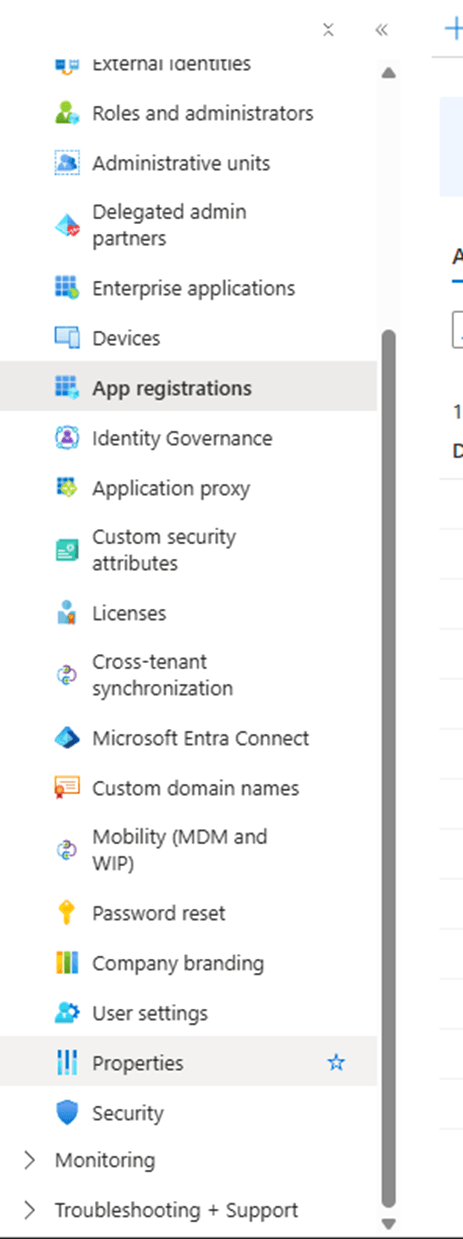
- Copy the tenant ID to your notepad
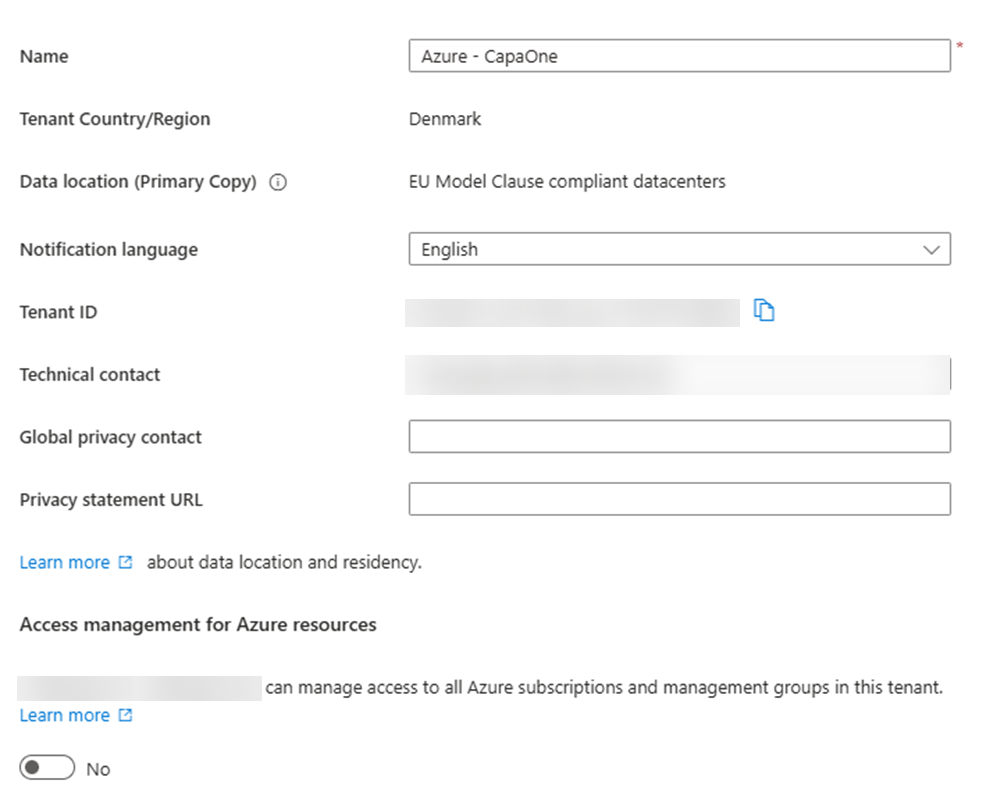
Create the integration in CapaOne
Section titled “Create the integration in CapaOne”- In CapaOne, go to Management → Integrations
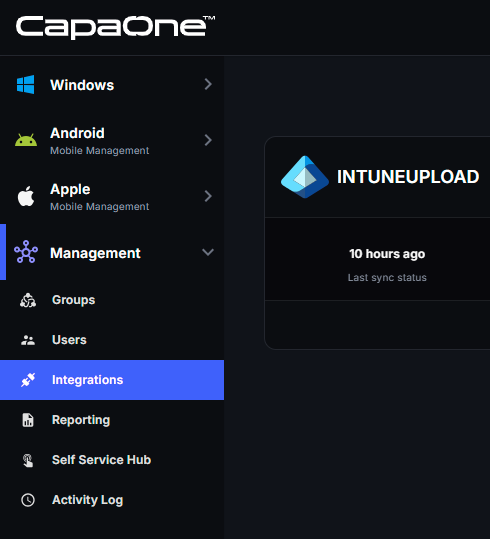
- Click on New to create a new integration

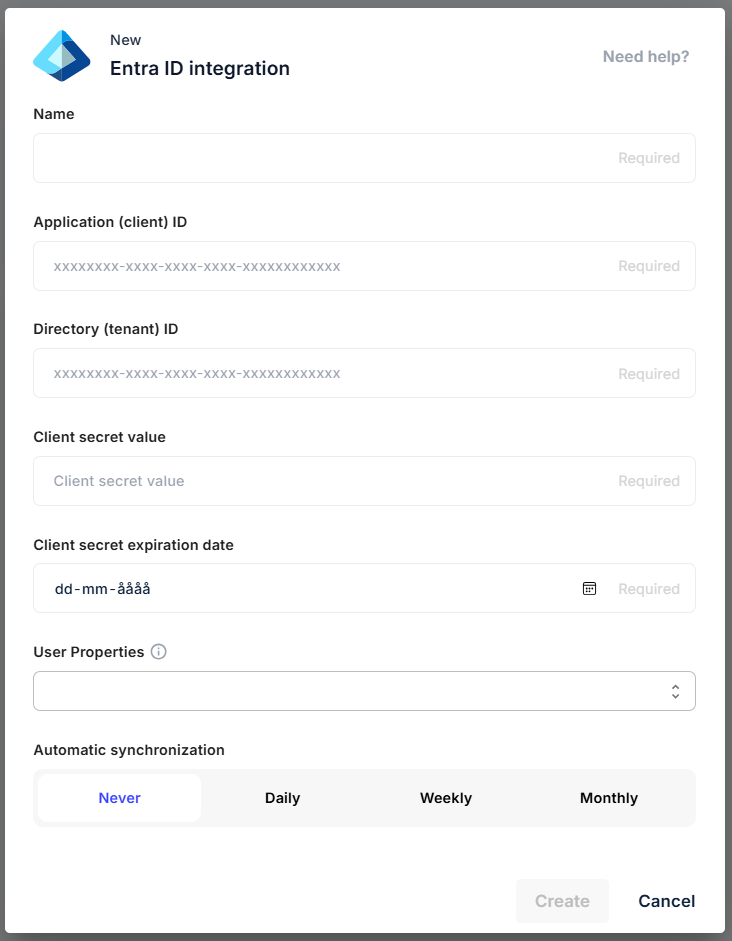
- Provide the following information for the new Entra ID integration
- Name – a name for the integration
- Application (client) ID – from step 21
- Directory (tenant) ID – from step 23
- Client secret value – from step 9
- Client secret expiration date – the expiration date you chose in step 8
- User Properties – optional. Select extra Entra ID user properties to sync, such as Department, Job Title, or Office Location. The user ID and email are always stored.
Then select a synchronization schedule: Never, Daily, Weekly, or Monthly. Unless you select Never, also select the time of day for the sync. For Weekly and Monthly, select the day as well. Click on Create.
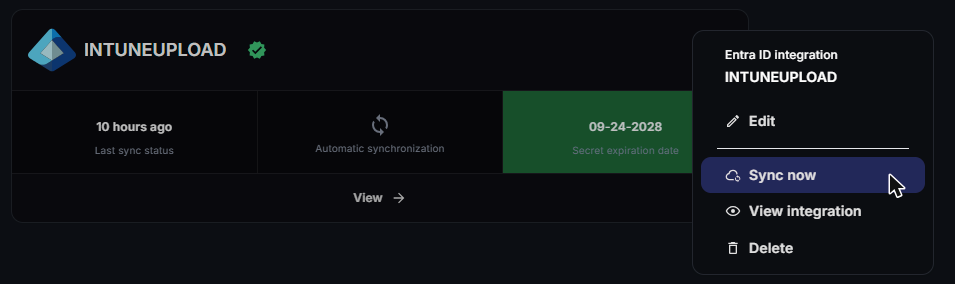
- If you click on the 3 dots to the right of the newly created integration you can do the following
- Edit
- Sync now
- View integration
- Delete
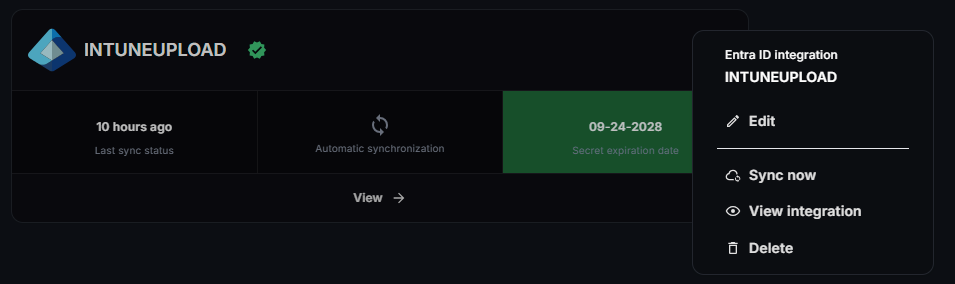
- Click on Sync now
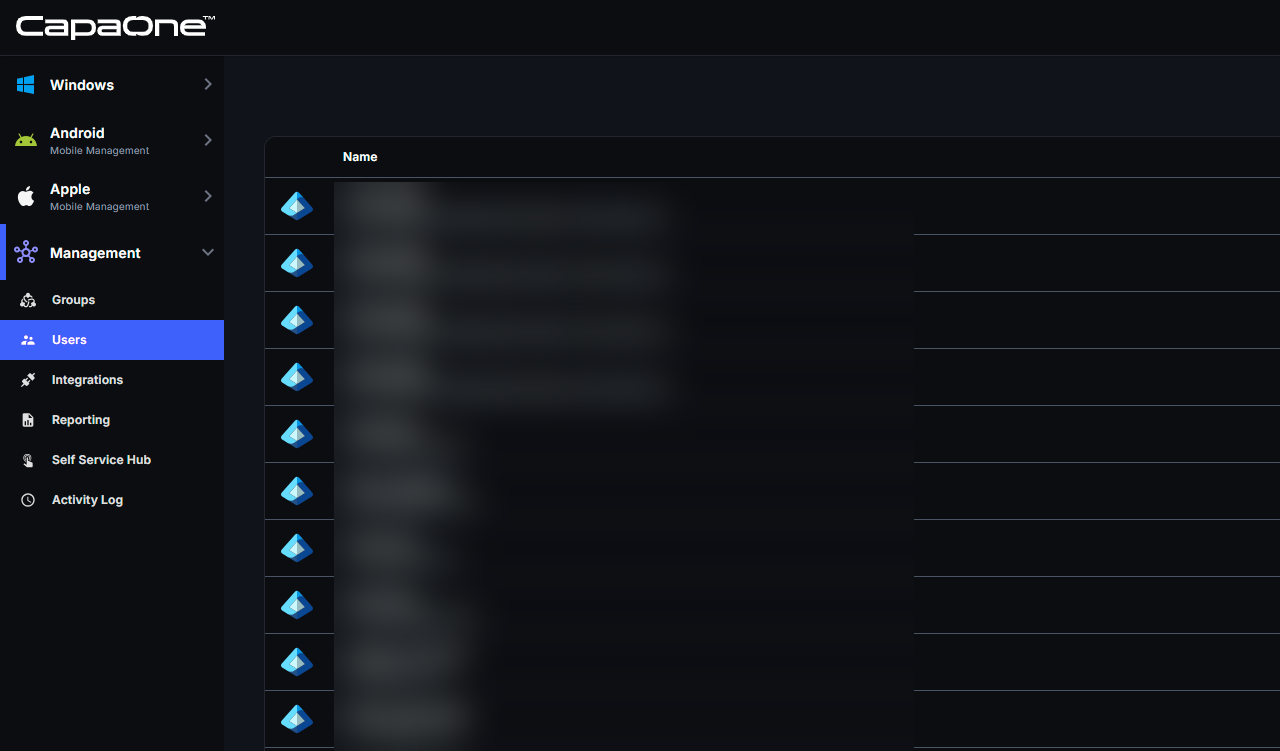
- When the sync is done, go to Management → Users. The users from Entra ID have an Entra ID icon to the left of their name
Renew the client secret
Section titled “Renew the client secret”The client secret expires on the date you set in Entra ID. When it expires, the integration can’t sync users and groups. Renew it before it expires:
- In the Azure portal, create a new client secret for the app registration, as in steps 6–9.
- In CapaOne, go to Management → Integrations.
- Click the options menu (⋮) next to the integration and select Edit. The Integration configuration page opens.
- Enter the new secret in Client secret. If you leave the field empty, the current secret is kept.
- Update Client Secret Expiration Date to the new expiration date.
- Click Save, and then select Sync now to confirm that the sync works.
The integration card on Management → Integrations shows the Secret expiration date. It turns yellow when the secret expires within a month and red when it has expired, so you can see when it’s time to renew. The card also shows the Last sync status. If a sync failed, click the status to open the synchronization log.