

Android Enrollment
Android devices are managed through Android Enterprise. If you just want to get devices enrolled, this article guides you through everything you need. If you want a deeper understanding of what Android Enterprise is, how the account settings work, and what the GDPR contact fields mean, see Android Enterprise Setup.
Link your Android Enterprise account
Section titled “Link your Android Enterprise account”The first time you open Android → Enrollment, CapaOne guides you through a one-time setup that registers your organization with Managed Google Play:
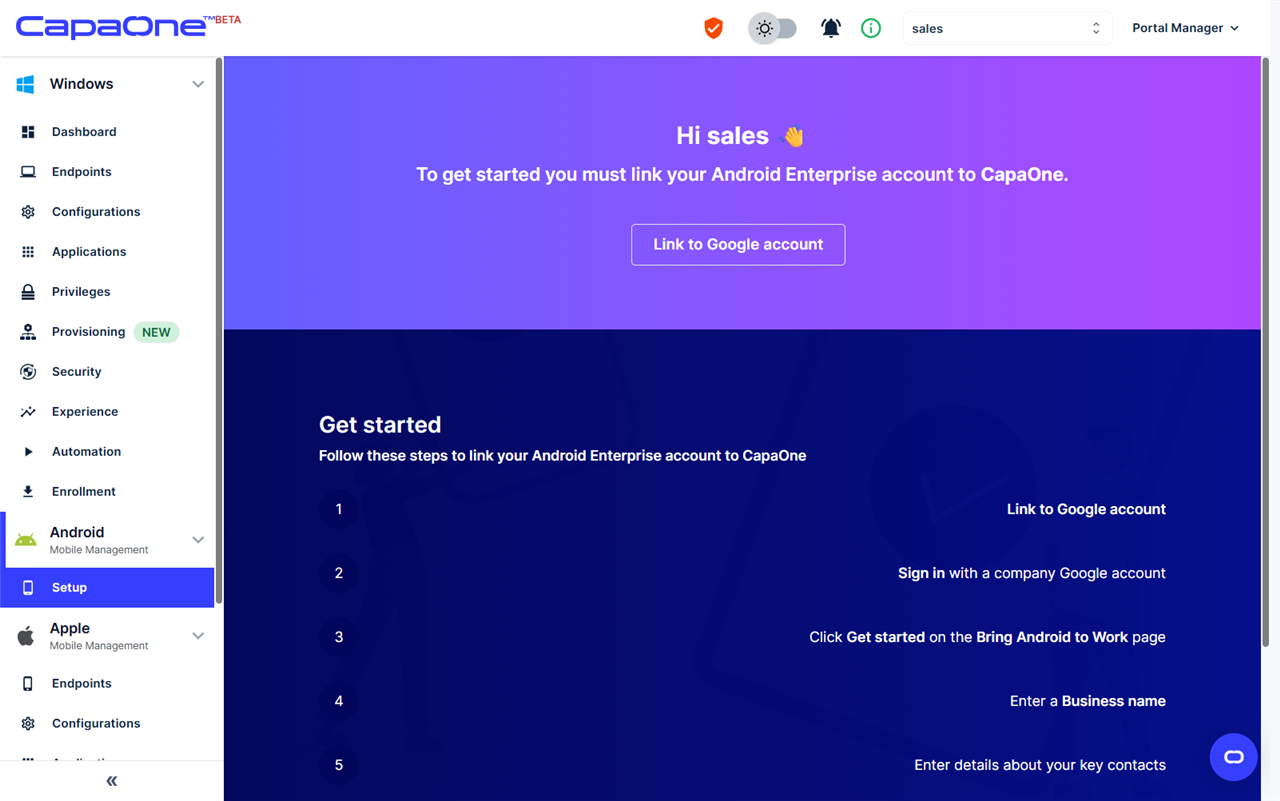
- Click Link to Google account.
- In the Link to Google Account dialog, optionally enter an Admin email and one or more Allowed domains, then confirm. Use a work email address rather than a Gmail account.
- Sign in with a company Google account.
- Click Get started on the Bring Android to Work page.
- Enter a business name and details about your key contacts.
- Read and agree to the Managed Google Play agreement, then confirm and complete registration.
Management modes
Section titled “Management modes”The Enable Work Profile setting of an Android enrollment configuration decides how devices are managed:
- Personal usage disallowed — a fully managed, company-owned device used only for work. The device must be factory reset or fresh out of the box, and is enrolled during initial device setup.
- Personal usage allowed — corporate apps and data live in a separate work profile, and the user’s personal apps and data stay private. With this option, the QR Code and Token tabs have separate instructions for company-owned and personally owned devices.
- Personal usage disallowed for userless devices — required for dedicated devices, such as kiosks and shared devices, that aren’t tied to a user.
Create an enrollment configuration
Section titled “Create an enrollment configuration”- Go to Android → Enrollment and click New.
- Enter a Name and, optionally, a Description.
- Select how long the enrollment token is valid, from No expiration (the default) to 1 year.
- Select the Enable Work Profile option. See Management modes.
- Optionally, select a User Authentication method: Microsoft authentication or Google authentication. The users must exist under Management → Users. With Google authentication, you can also set an Authentication Requirement and, when authentication is required, a Required Account Email.
- Under Relations, select the Groups, Configurations, and Applications to assign during enrollment.
- Select Use Android Agent to install the CapaOne Agent app during enrollment. Some settings in Android configurations require the app.
- Optionally, select the startup policy to apply during enrollment: The default policy or Lock Task policy. The Lock Task policy disables safe boot, screen capture, factory reset, and the camera, and installs system updates between 02:00 and 04:00.
- Optionally, set the Customization options, such as Enable System Apps During Provisioning, One-Time Only, and a Wi-Fi network to use during provisioning.
- Click Create.
The token validity, work profile, user authentication, one-time, and Android Agent settings can’t be changed after the configuration is created. To change them, create a new configuration, or use Duplicate on an existing one. To change the other settings, open the configuration’s menu and select Edit.
Enrollment methods
Section titled “Enrollment methods”Click View on a configuration, or open its menu and select View configuration, to access the enrollment methods, shown as tabs. The Summary tab lists the configuration’s settings.
The CapaOne instructions for QR code and token enrollment require Android 14 or later on the device.
- QR code — on a company-owned device, tap the welcome screen six times to launch the QR reader and scan the code. On a personally owned device, install the Android Device Policy app and scan the code from there.
- Token — on a company-owned device, enter
afw#setupon the Google sign-in screen during setup, then enter the enrollment token manually. On a personally owned device, enter the token in the Android Device Policy app. - Zero Touch — for zero-touch compatible devices: create a configuration in the zero-touch portal with Android Device Policy as the EMM DPC, and paste the JSON snippet from CapaOne into the DPC extras field. Assigned devices enroll automatically out of the box.
- Samsung Knox — create a profile in the Knox Mobile Enrollment portal using the same JSON snippet, and assign it to your Samsung devices.
Once enrolled, the device appears under Android → Endpoints with the groups, configurations, and applications from the enrollment configuration applied. See Android Endpoints.