Create organizations and manage users, billing, licenses & contracts
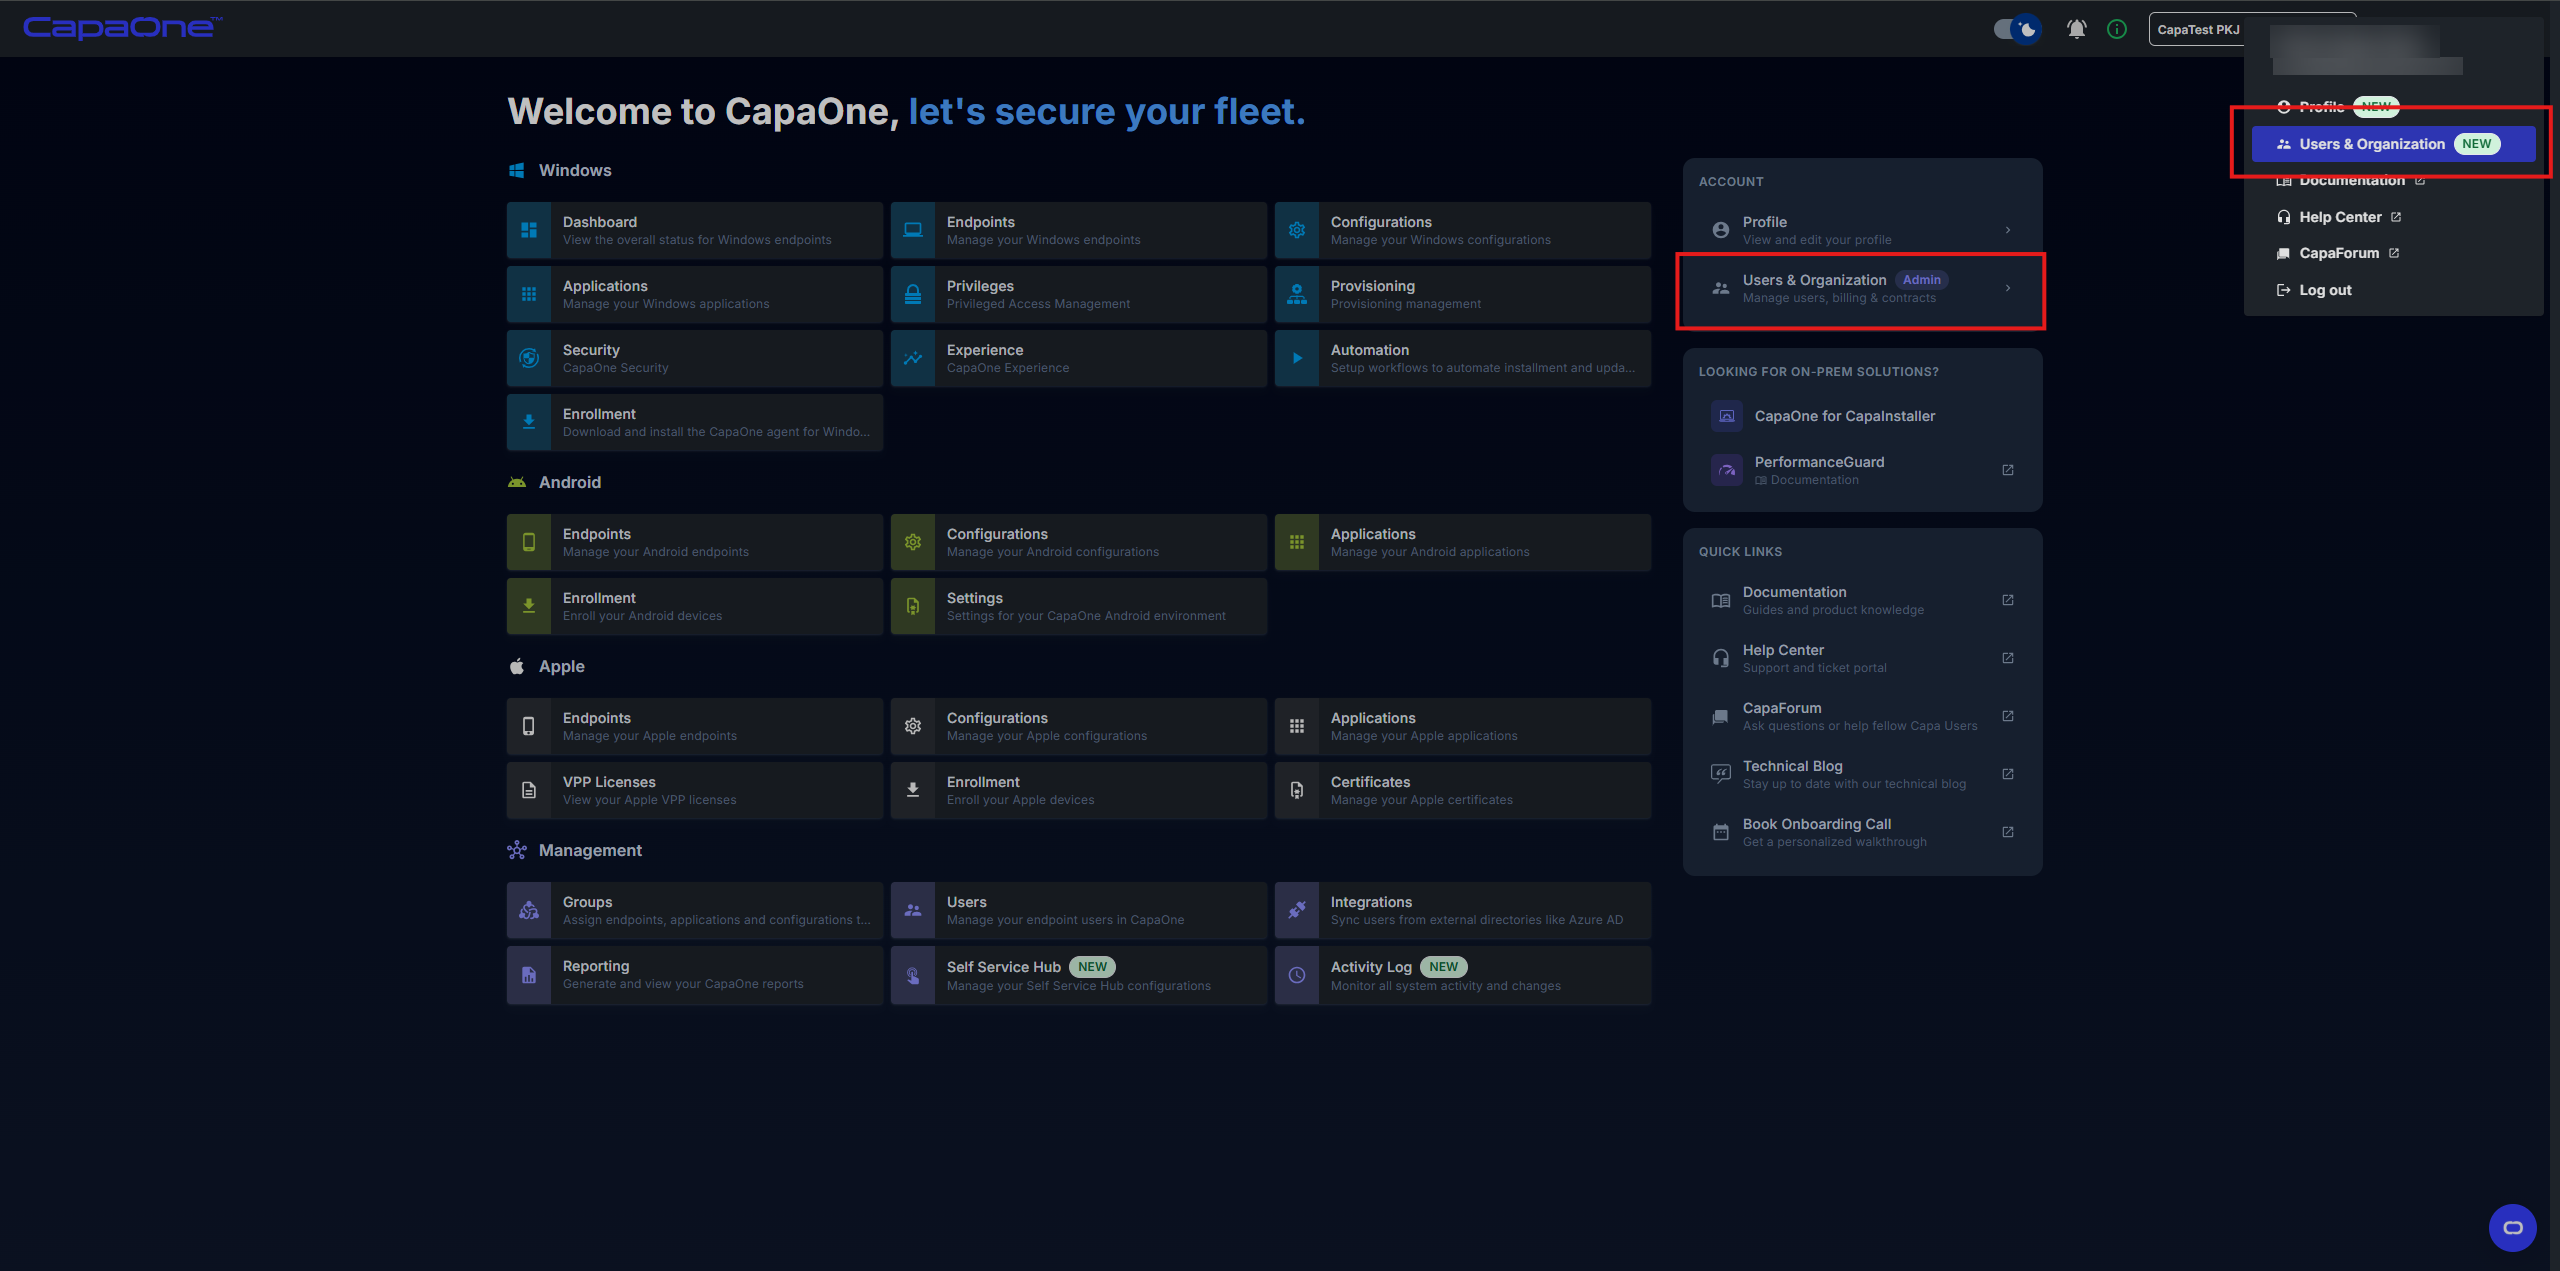
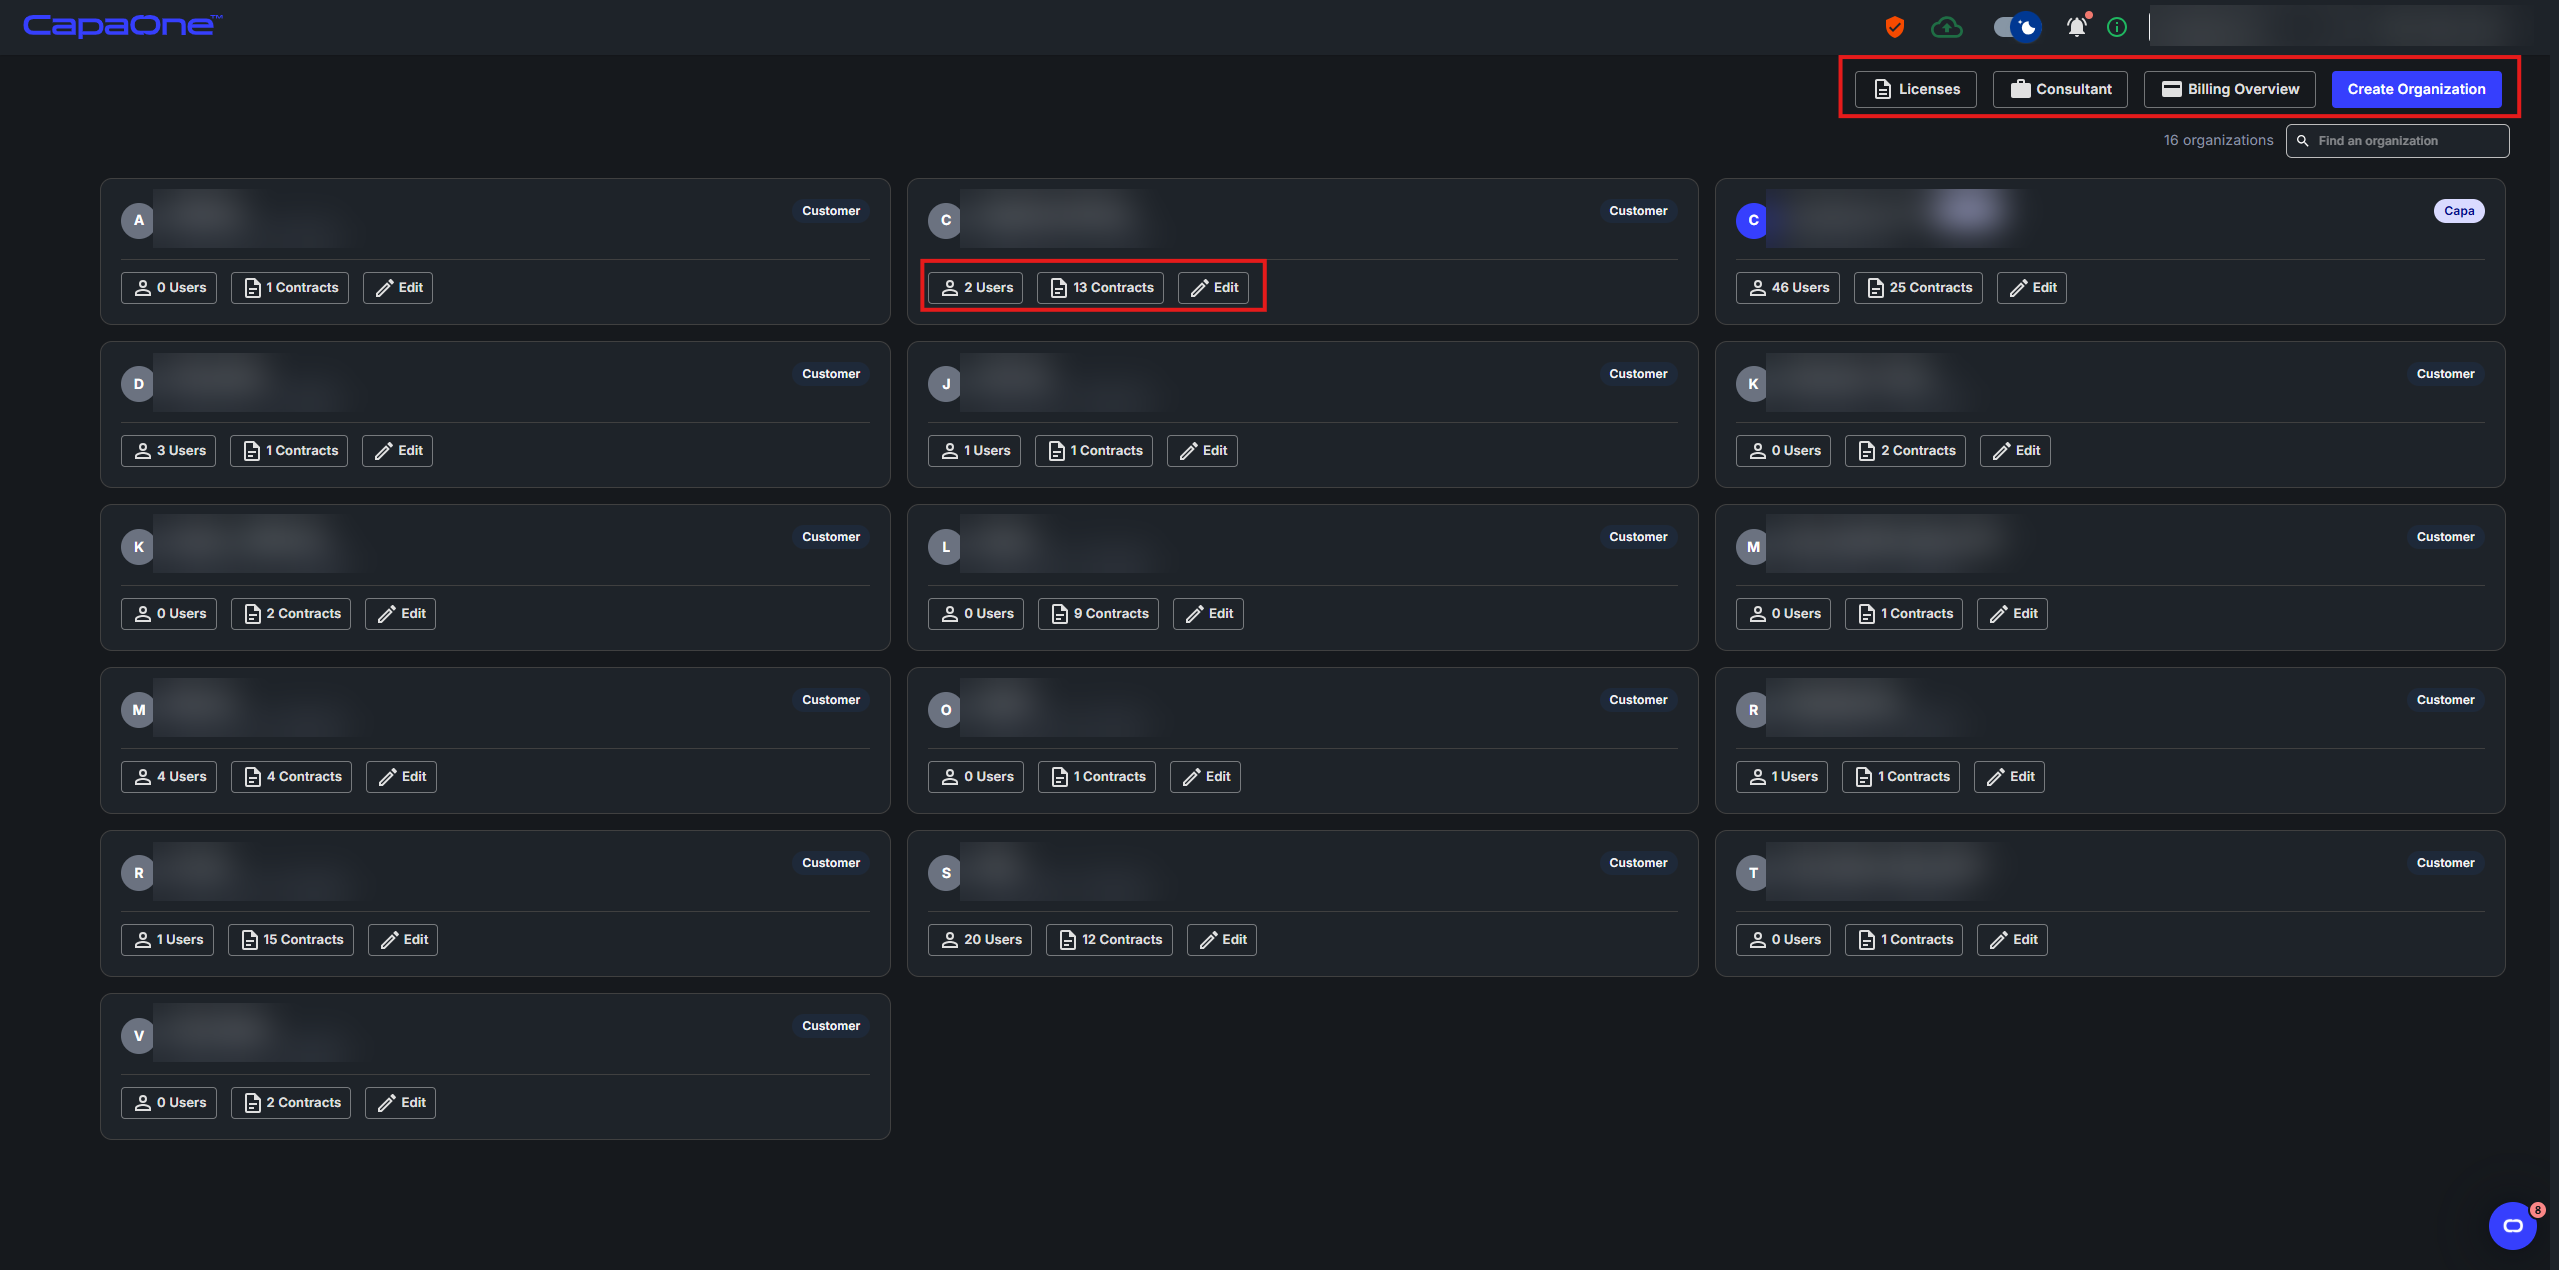
Users & Organization gives you an overview of your organizations and everything attached to them — users, contracts, licenses, and billing. The main view shows a card for your primary organization and each sub-organization, with quick-access buttons for each.
Organizations
Section titled “Organizations”Each organization card shows the organization’s name, its Organization ID, and three buttons: Users, Contracts, and Edit. The Users and Contracts buttons show how many users and contracts the organization has. Your own organization is marked Primary. Use Find an organization to search the list by name.
Create a sub-organization
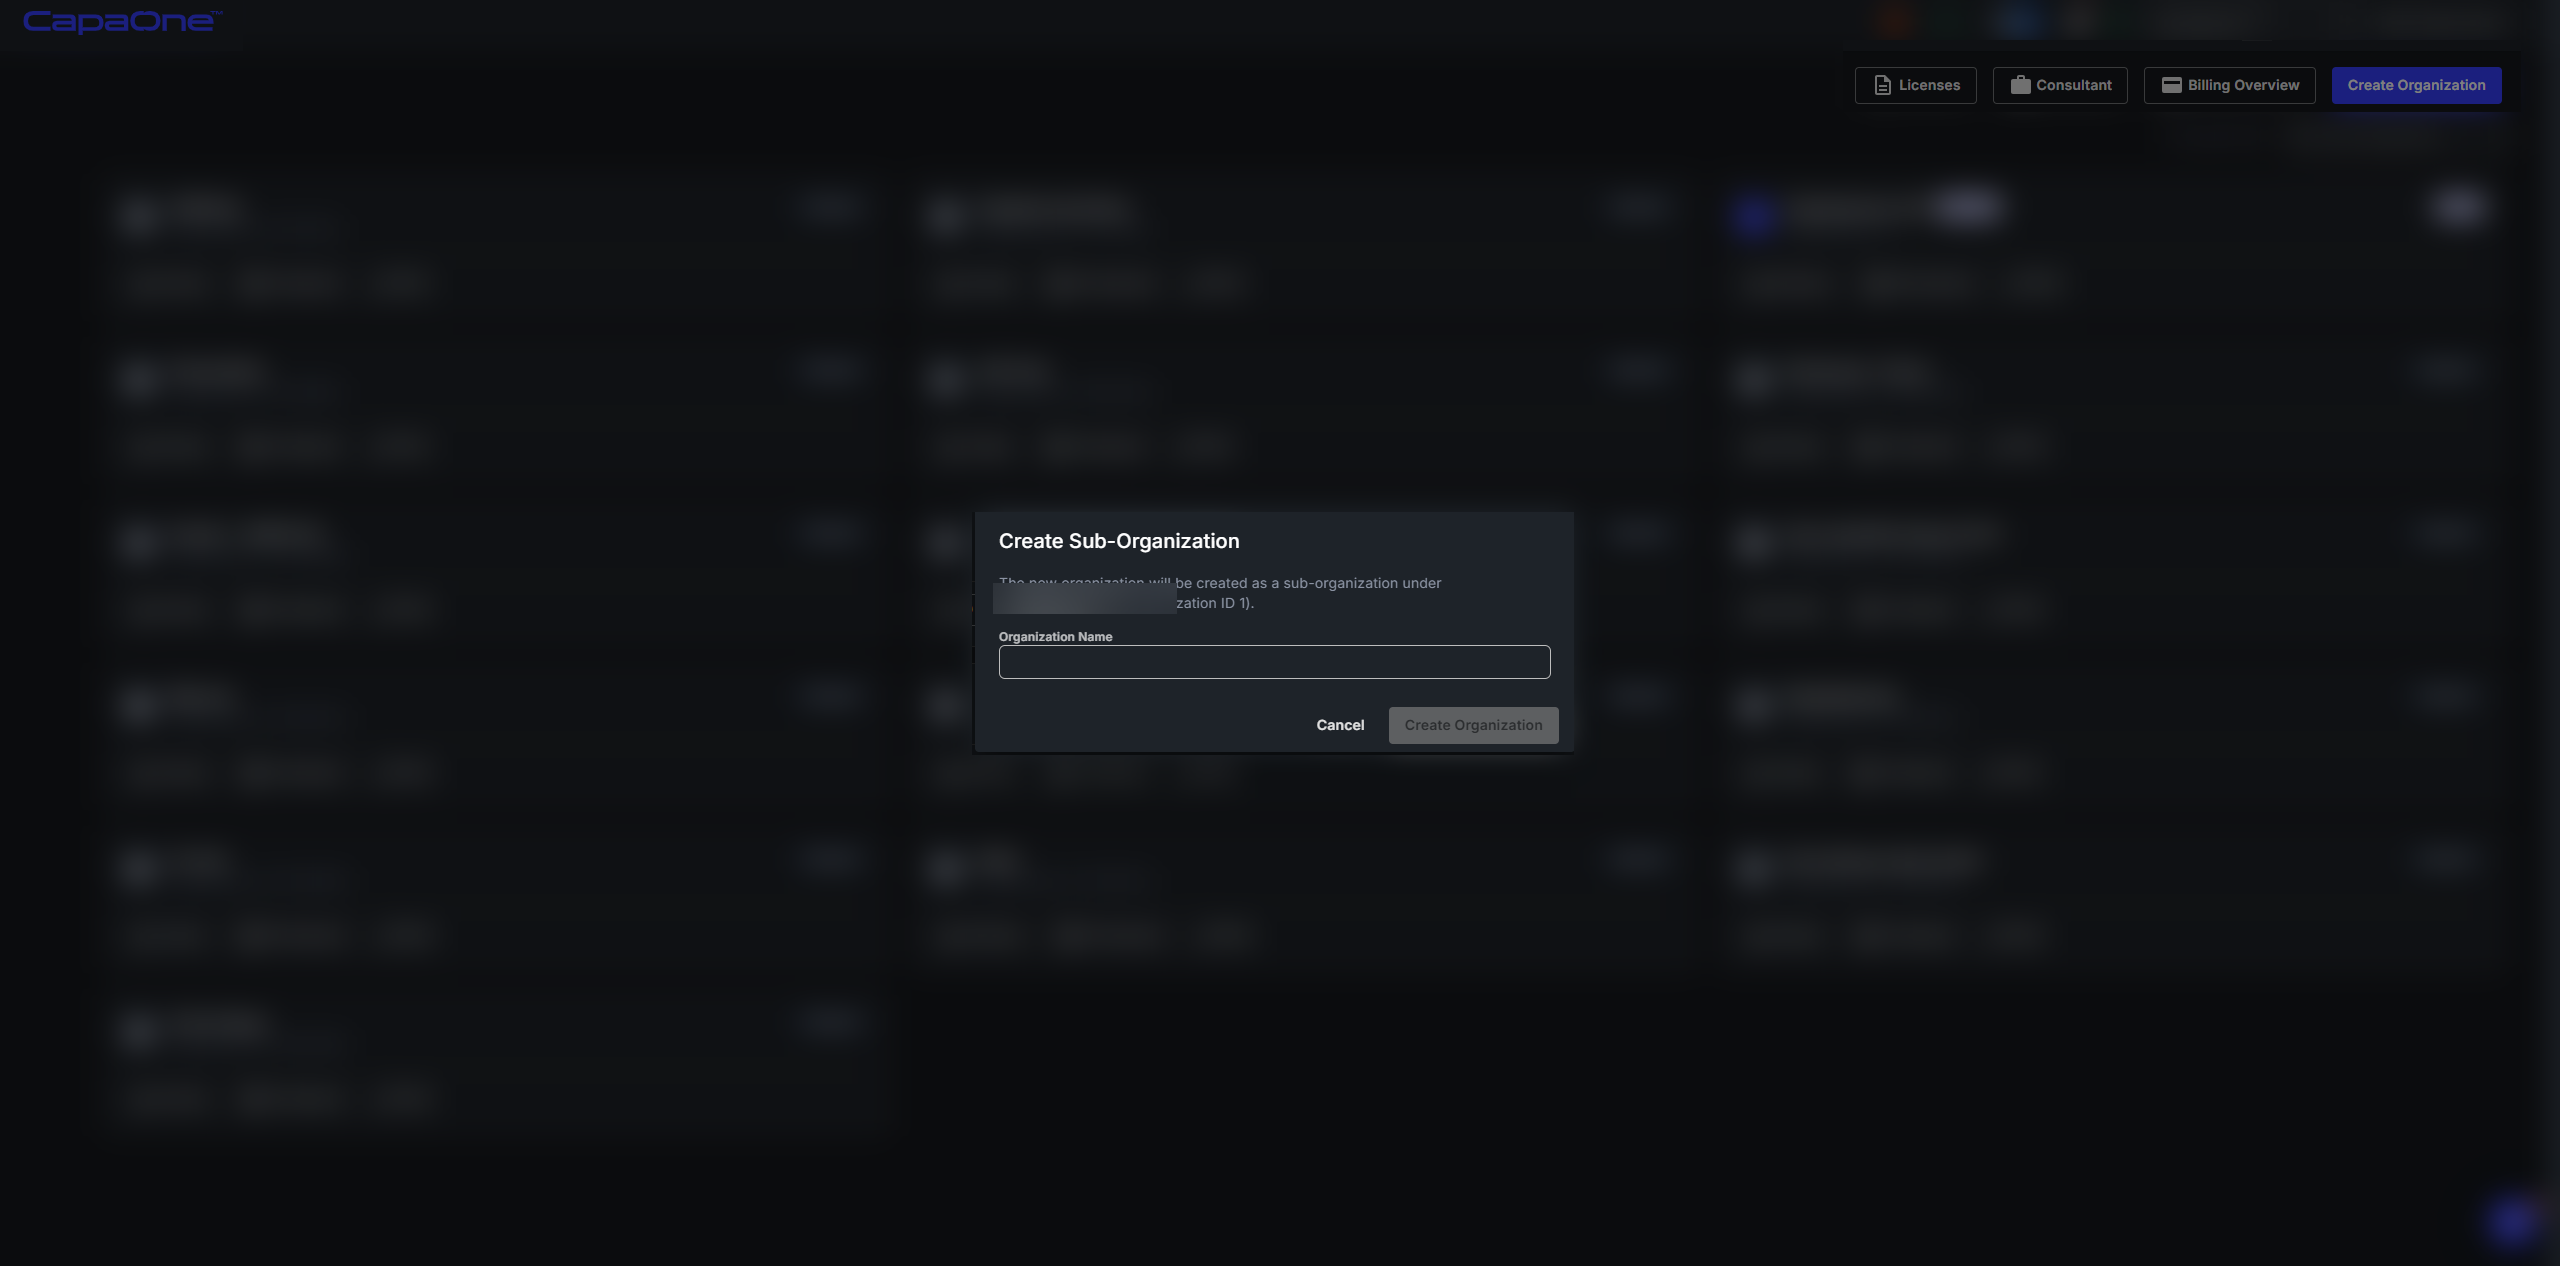
Section titled “Create a sub-organization”- Click Create Organization in the top-right corner.
- Enter an Organization Name.
- Click Create Organization.
The new organization is created as a sub-organization under your primary organization, and its card appears in the list. To give it access to products, see Contracts.
Edit an organization
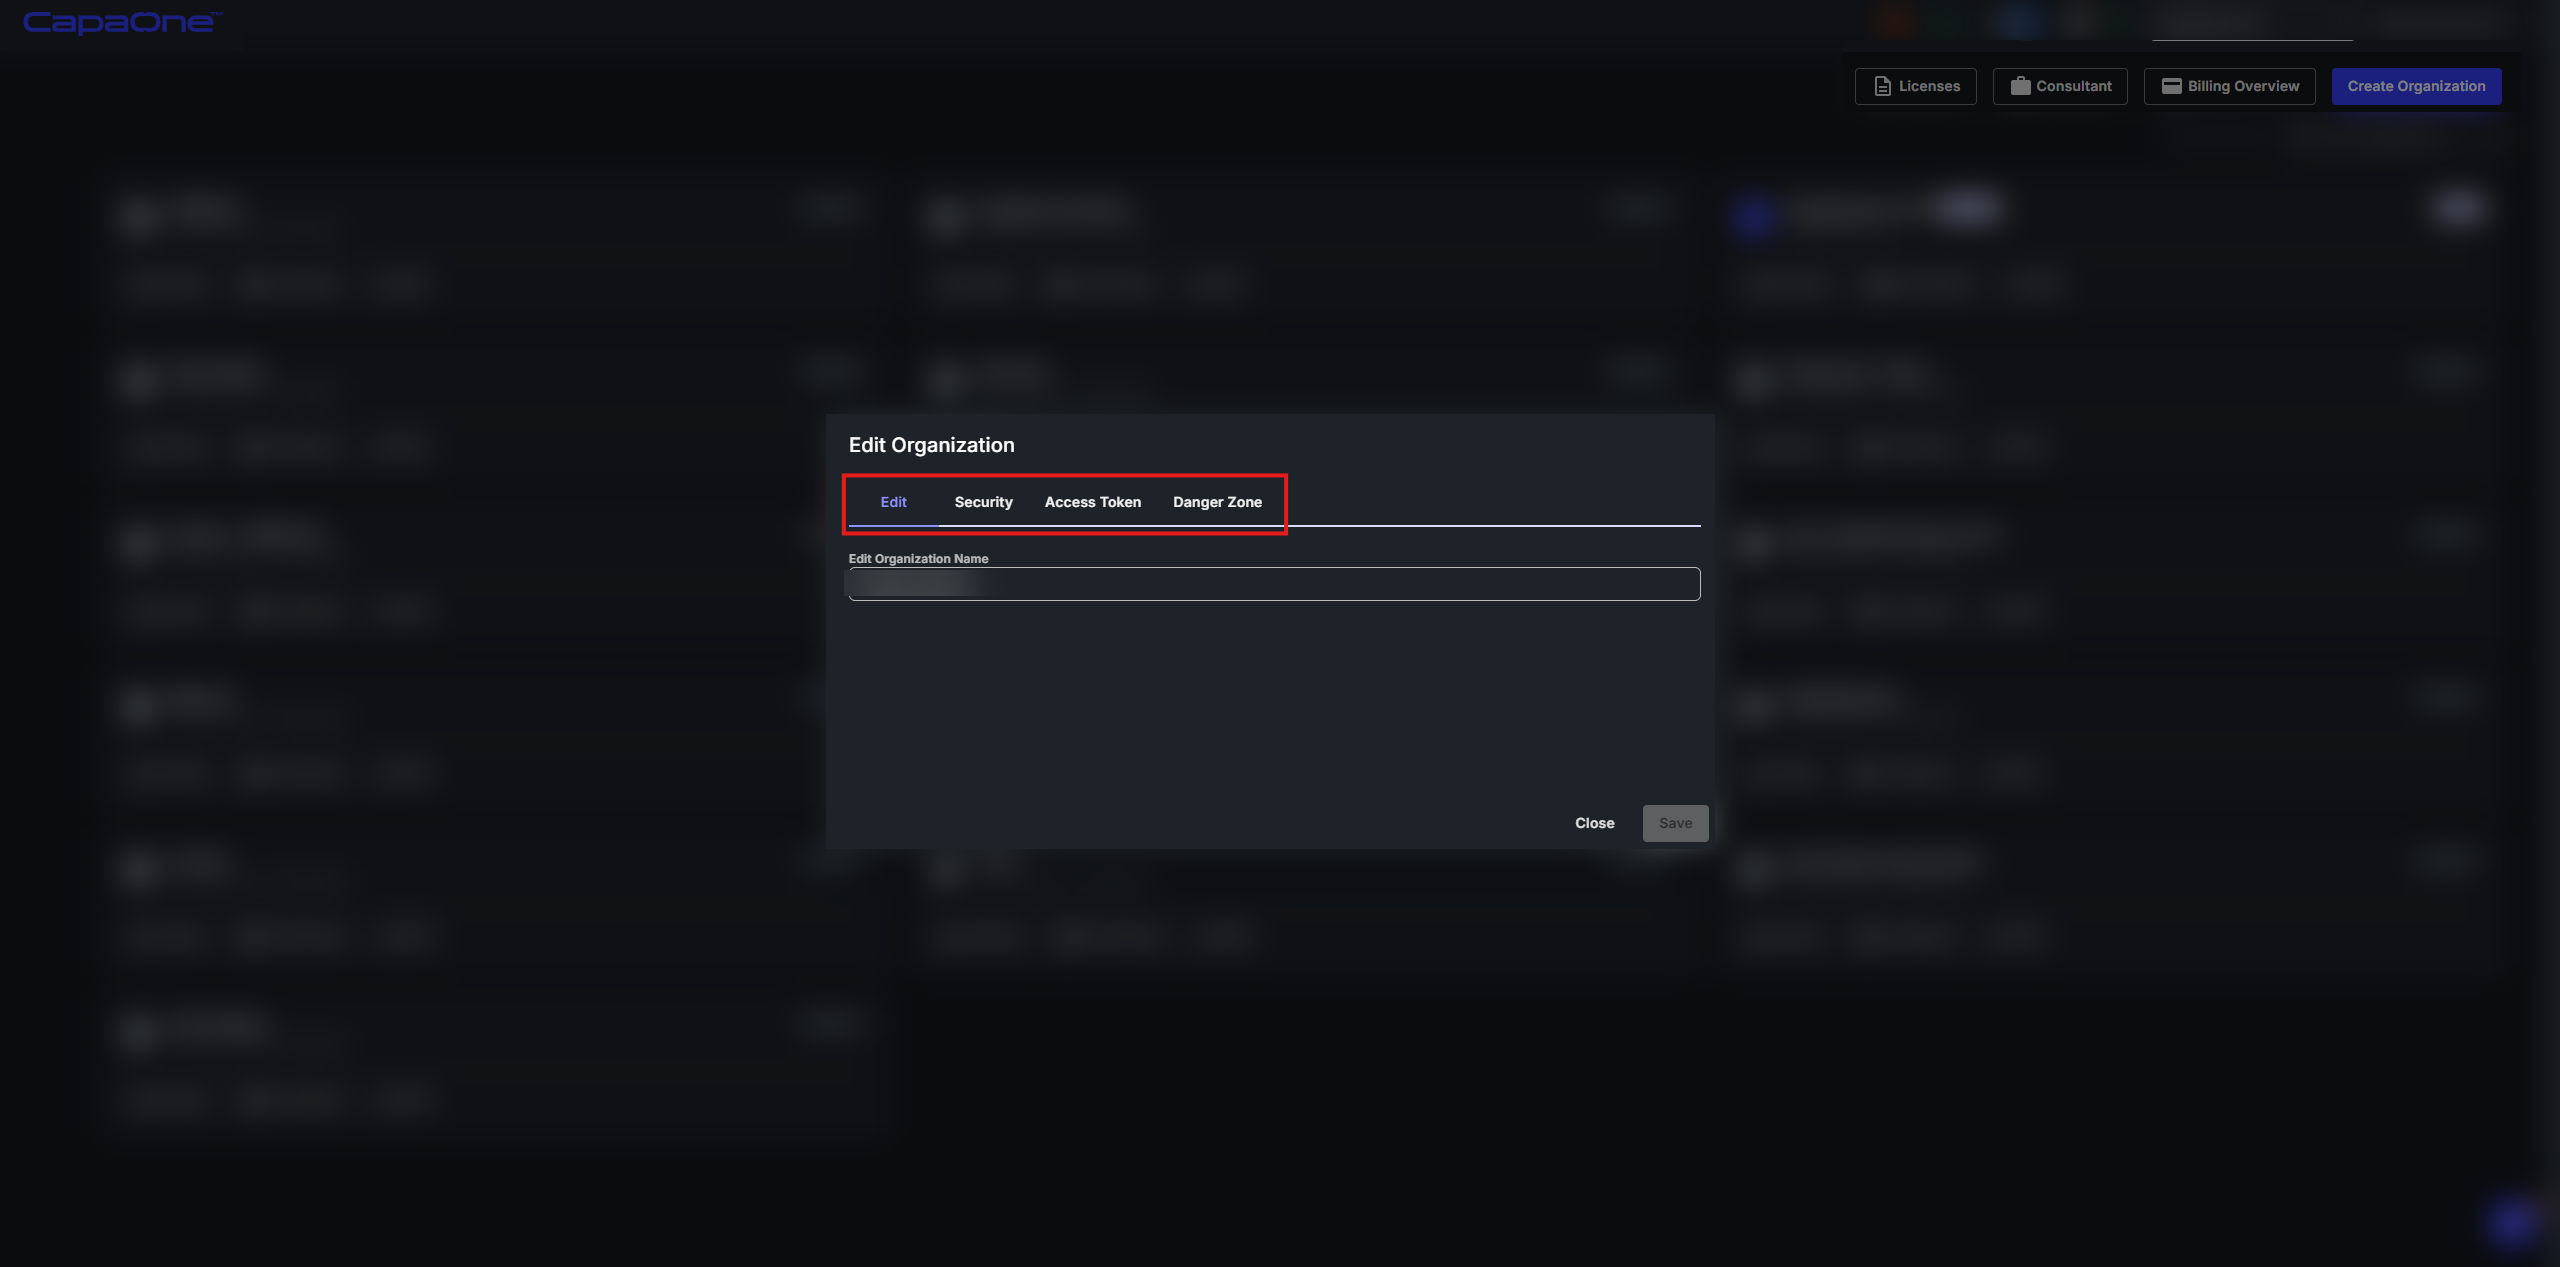
Section titled “Edit an organization”Click Edit on an organization card to open the Edit Organization dialog. It has four tabs:
- Edit — rename the organization and click Save. You can’t rename the primary organization here.
- Security — choose the sign-in methods users can use. See Manage Sign-in Methods.
- Access Token — view or generate the organization’s access token.
- Danger Zone — delete the organization.
Delete a sub-organization
Section titled “Delete a sub-organization”- Click Edit on the organization card and select the Danger Zone tab.
- Click Delete Organization, and then confirm.
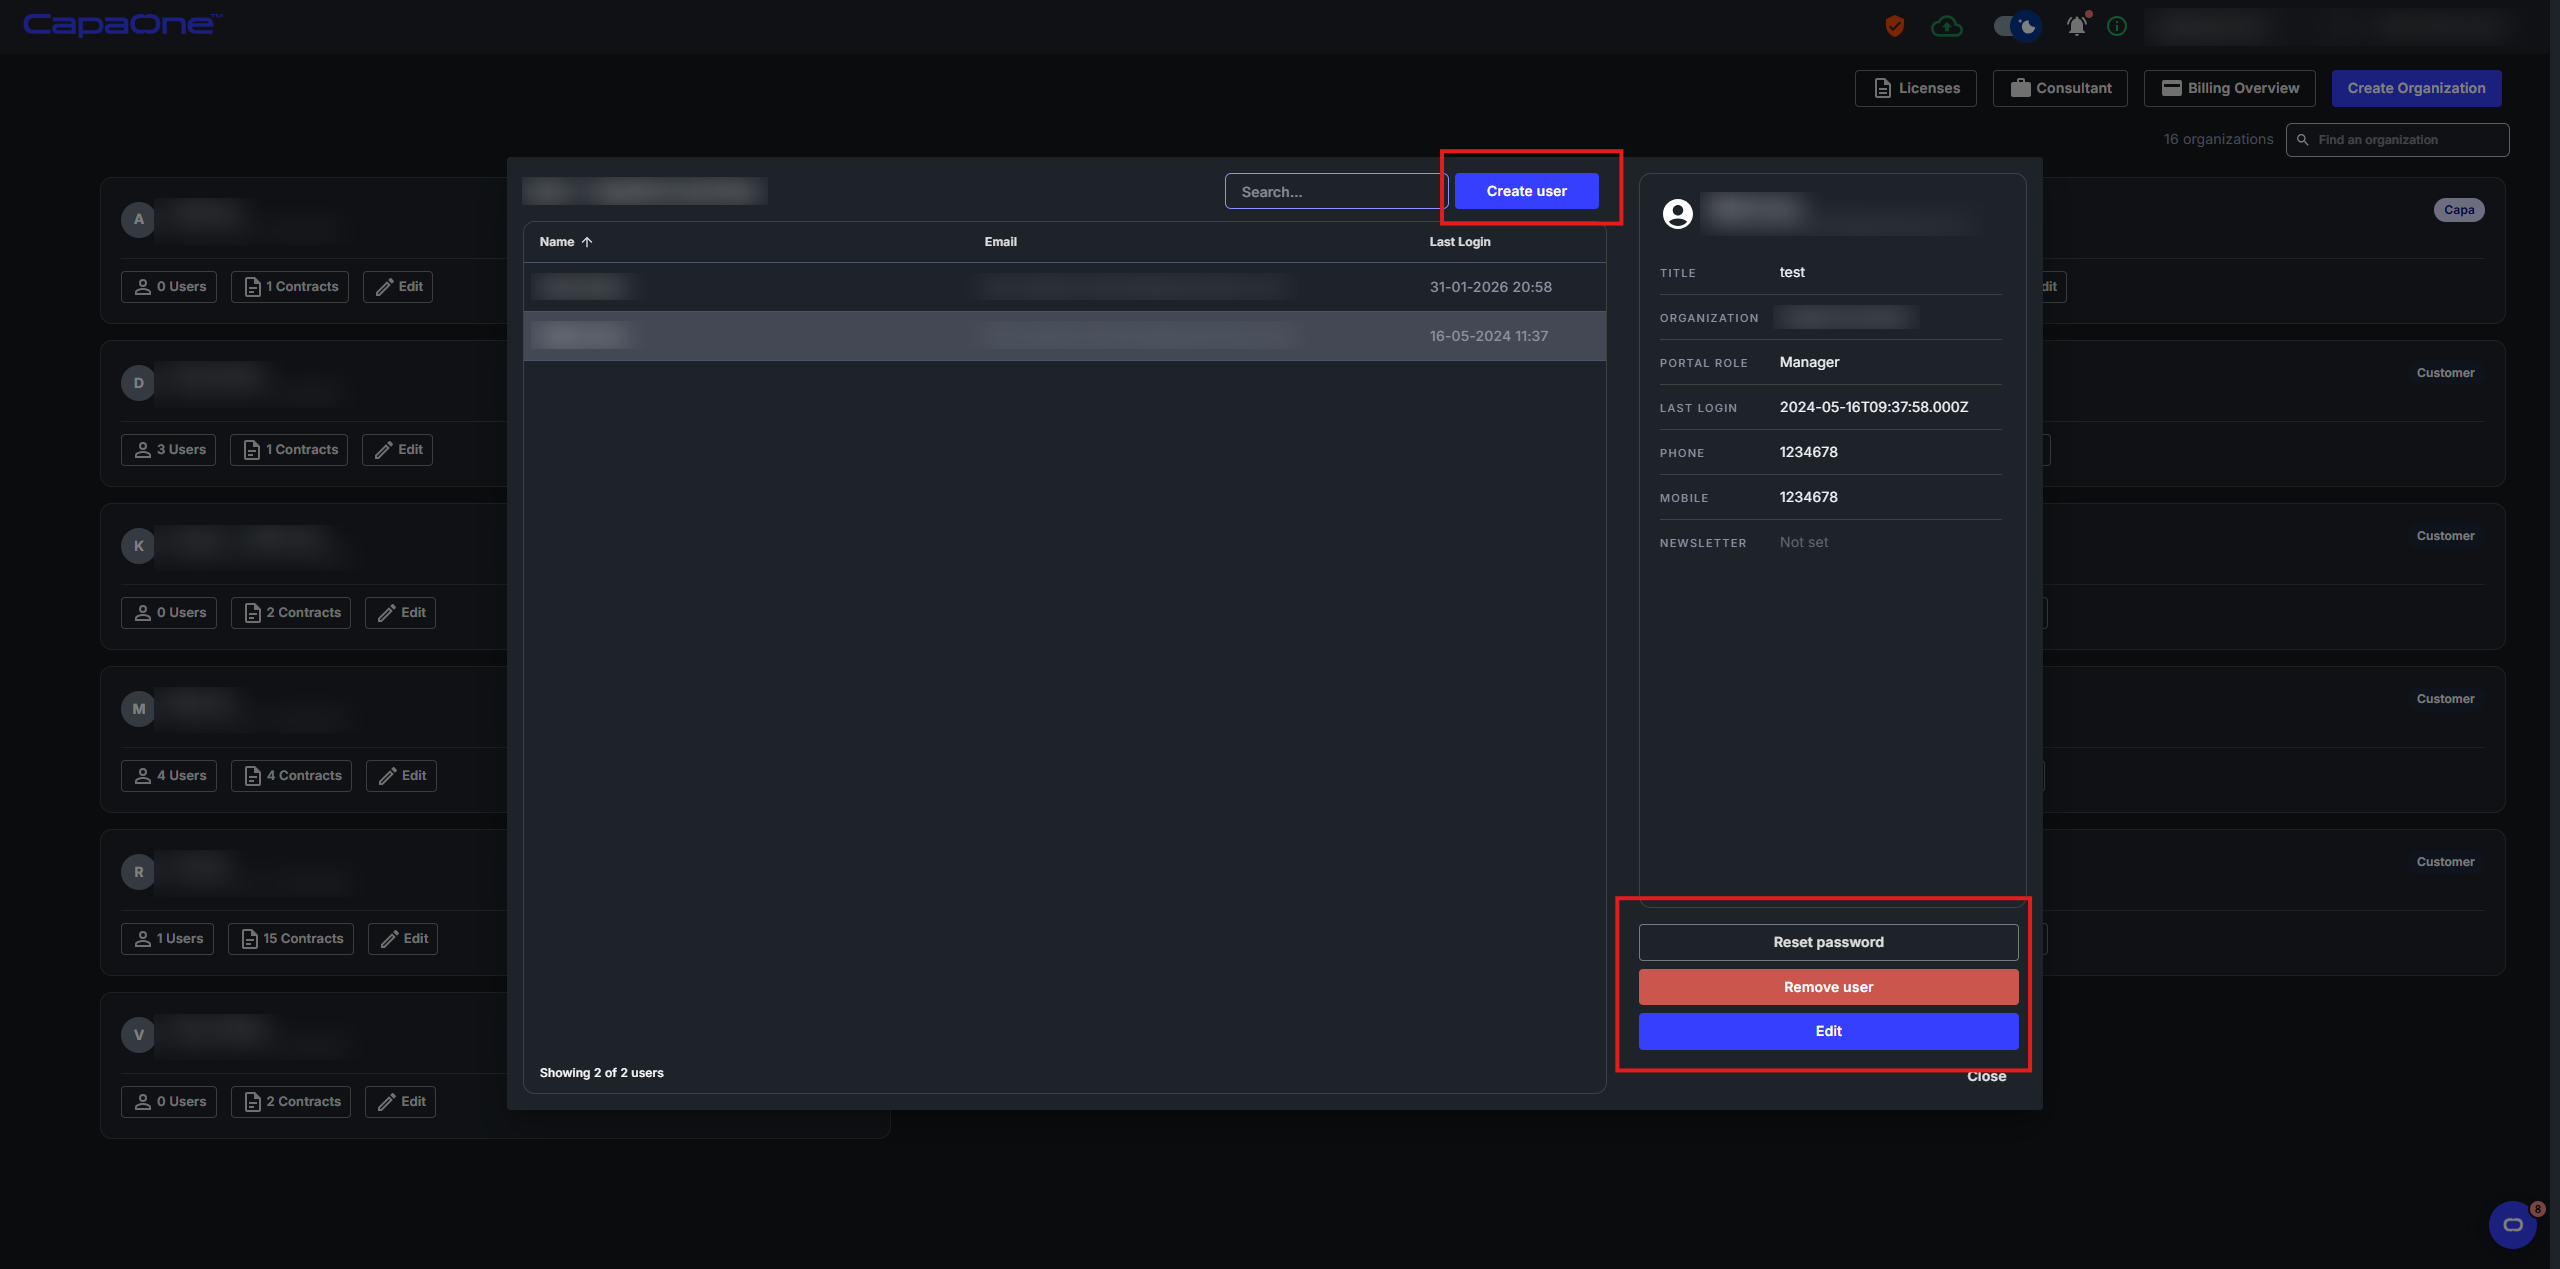
Click Users on an organization card to open the user list for that organization. The list shows each user’s name, email, and last sign-in. Use Search… to filter the list.
Click a user to see their details: title, organization, Portal Role, last login, and newsletter subscriptions. The detail panel has these actions:
- Reset password — sends a password reset email to the user.
- Remove user — deletes the user after you confirm. You can’t undo it.
- Edit — change the user’s name, email, job title, and role. See Roles and Product Access.
Create a user
Section titled “Create a user”- Click Users on the organization card, and then click Create user.
- Enter the user’s First Name, Last Name, and Email, and optionally a Job Title.
- Select a Role. The default is User.
- Click Create User.
CapaOne sends the new user a welcome email with a link to set their password.
An email address can belong to only one CapaOne user. If the email address is already used by a user in any organization, CapaOne doesn’t create the user — contact CapaSystems support. Disposable email addresses aren’t allowed.
Contracts
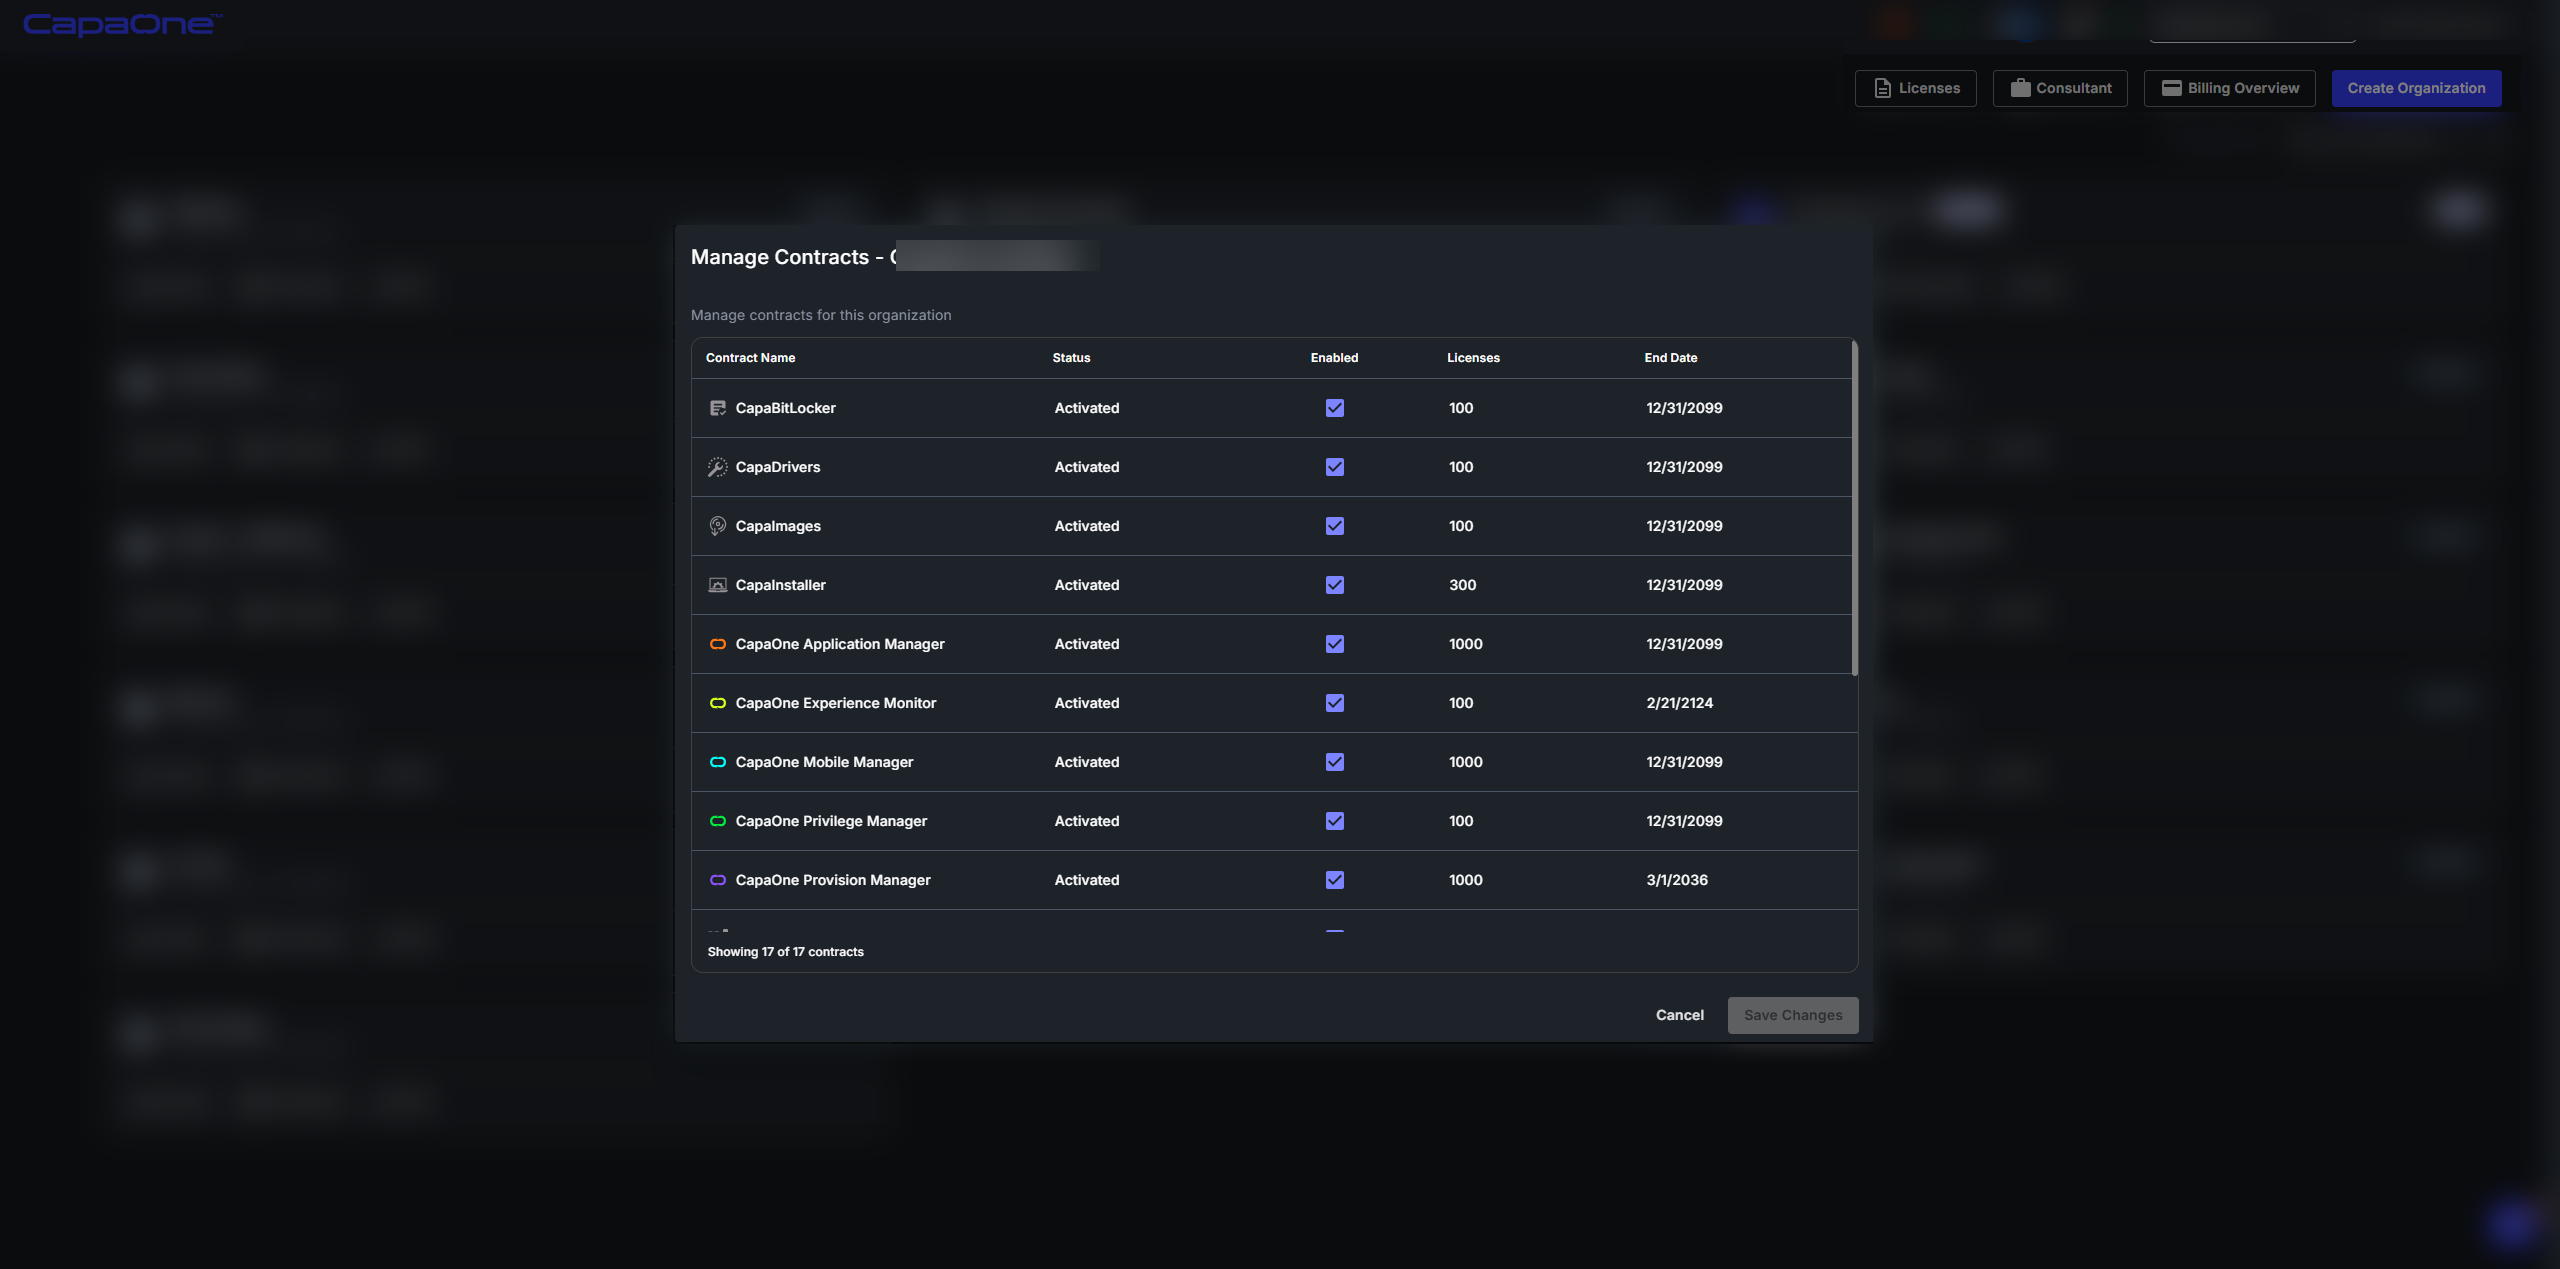
Section titled “Contracts”Click Contracts on an organization card to open Manage Contracts. It lists the products of your primary organization. Each row shows the contract name, status, whether it’s enabled for this organization, the number of licenses, and the end date. For the primary organization, all products are shown as enabled and can’t be changed.
To give a sub-organization access to a product:
- Click Contracts on the sub-organization’s card.
- Select Enabled for each product the sub-organization can use. Clear it to remove access.
- Click Save Changes.
- Review the products you’re enabling and disabling in the Confirm Contract Changes dialog, and confirm.
Disabling a product removes the sub-organization’s access to it immediately, and its users may lose access to features and data.
You can change contracts only while your own (parent) organization is selected in the organization selector. If another organization is selected, Manage Contracts is read-only. See Roles and Product Access.
Licenses
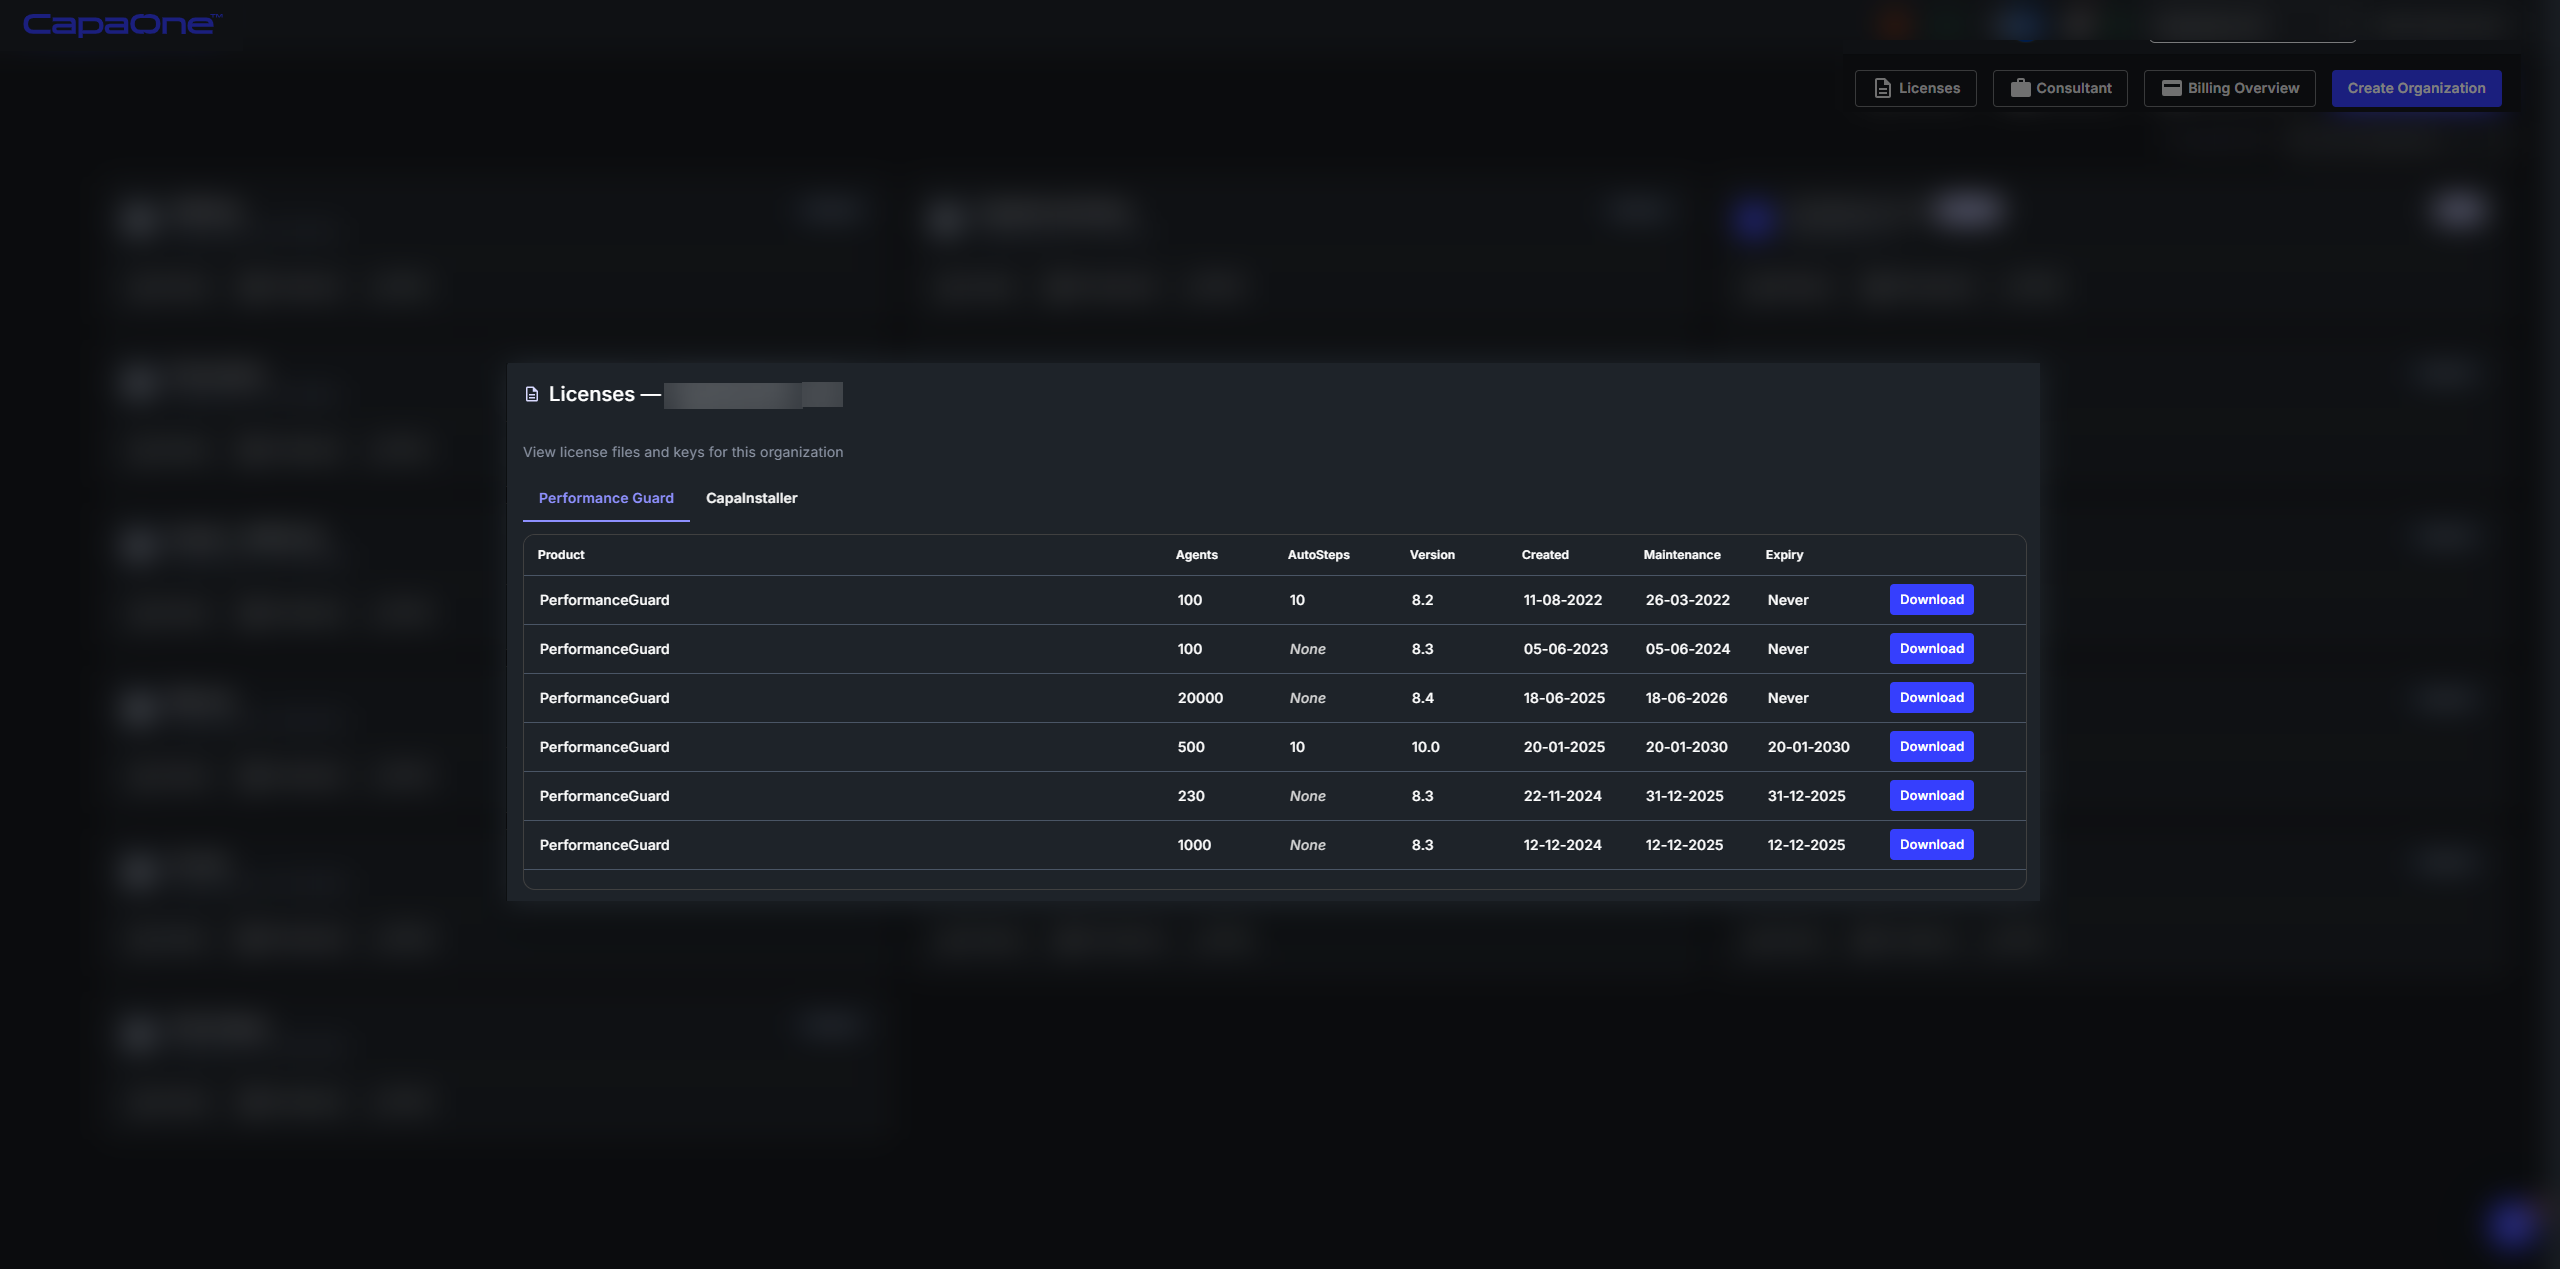
Section titled “Licenses”Click Licenses in the top toolbar to see the license files and keys for your on-premises products. The dialog has two tabs:
- Performance Guard — the product, number of agents and AutoSteps, version, creation date, maintenance date, and expiry date of each license. Click Download to download the license file.
- CapaInstaller — the customer name, license key, licensed products, units, whether it’s a trial, and the creation and expiry dates. Click the copy button next to a license key to copy it.
Billing Overview
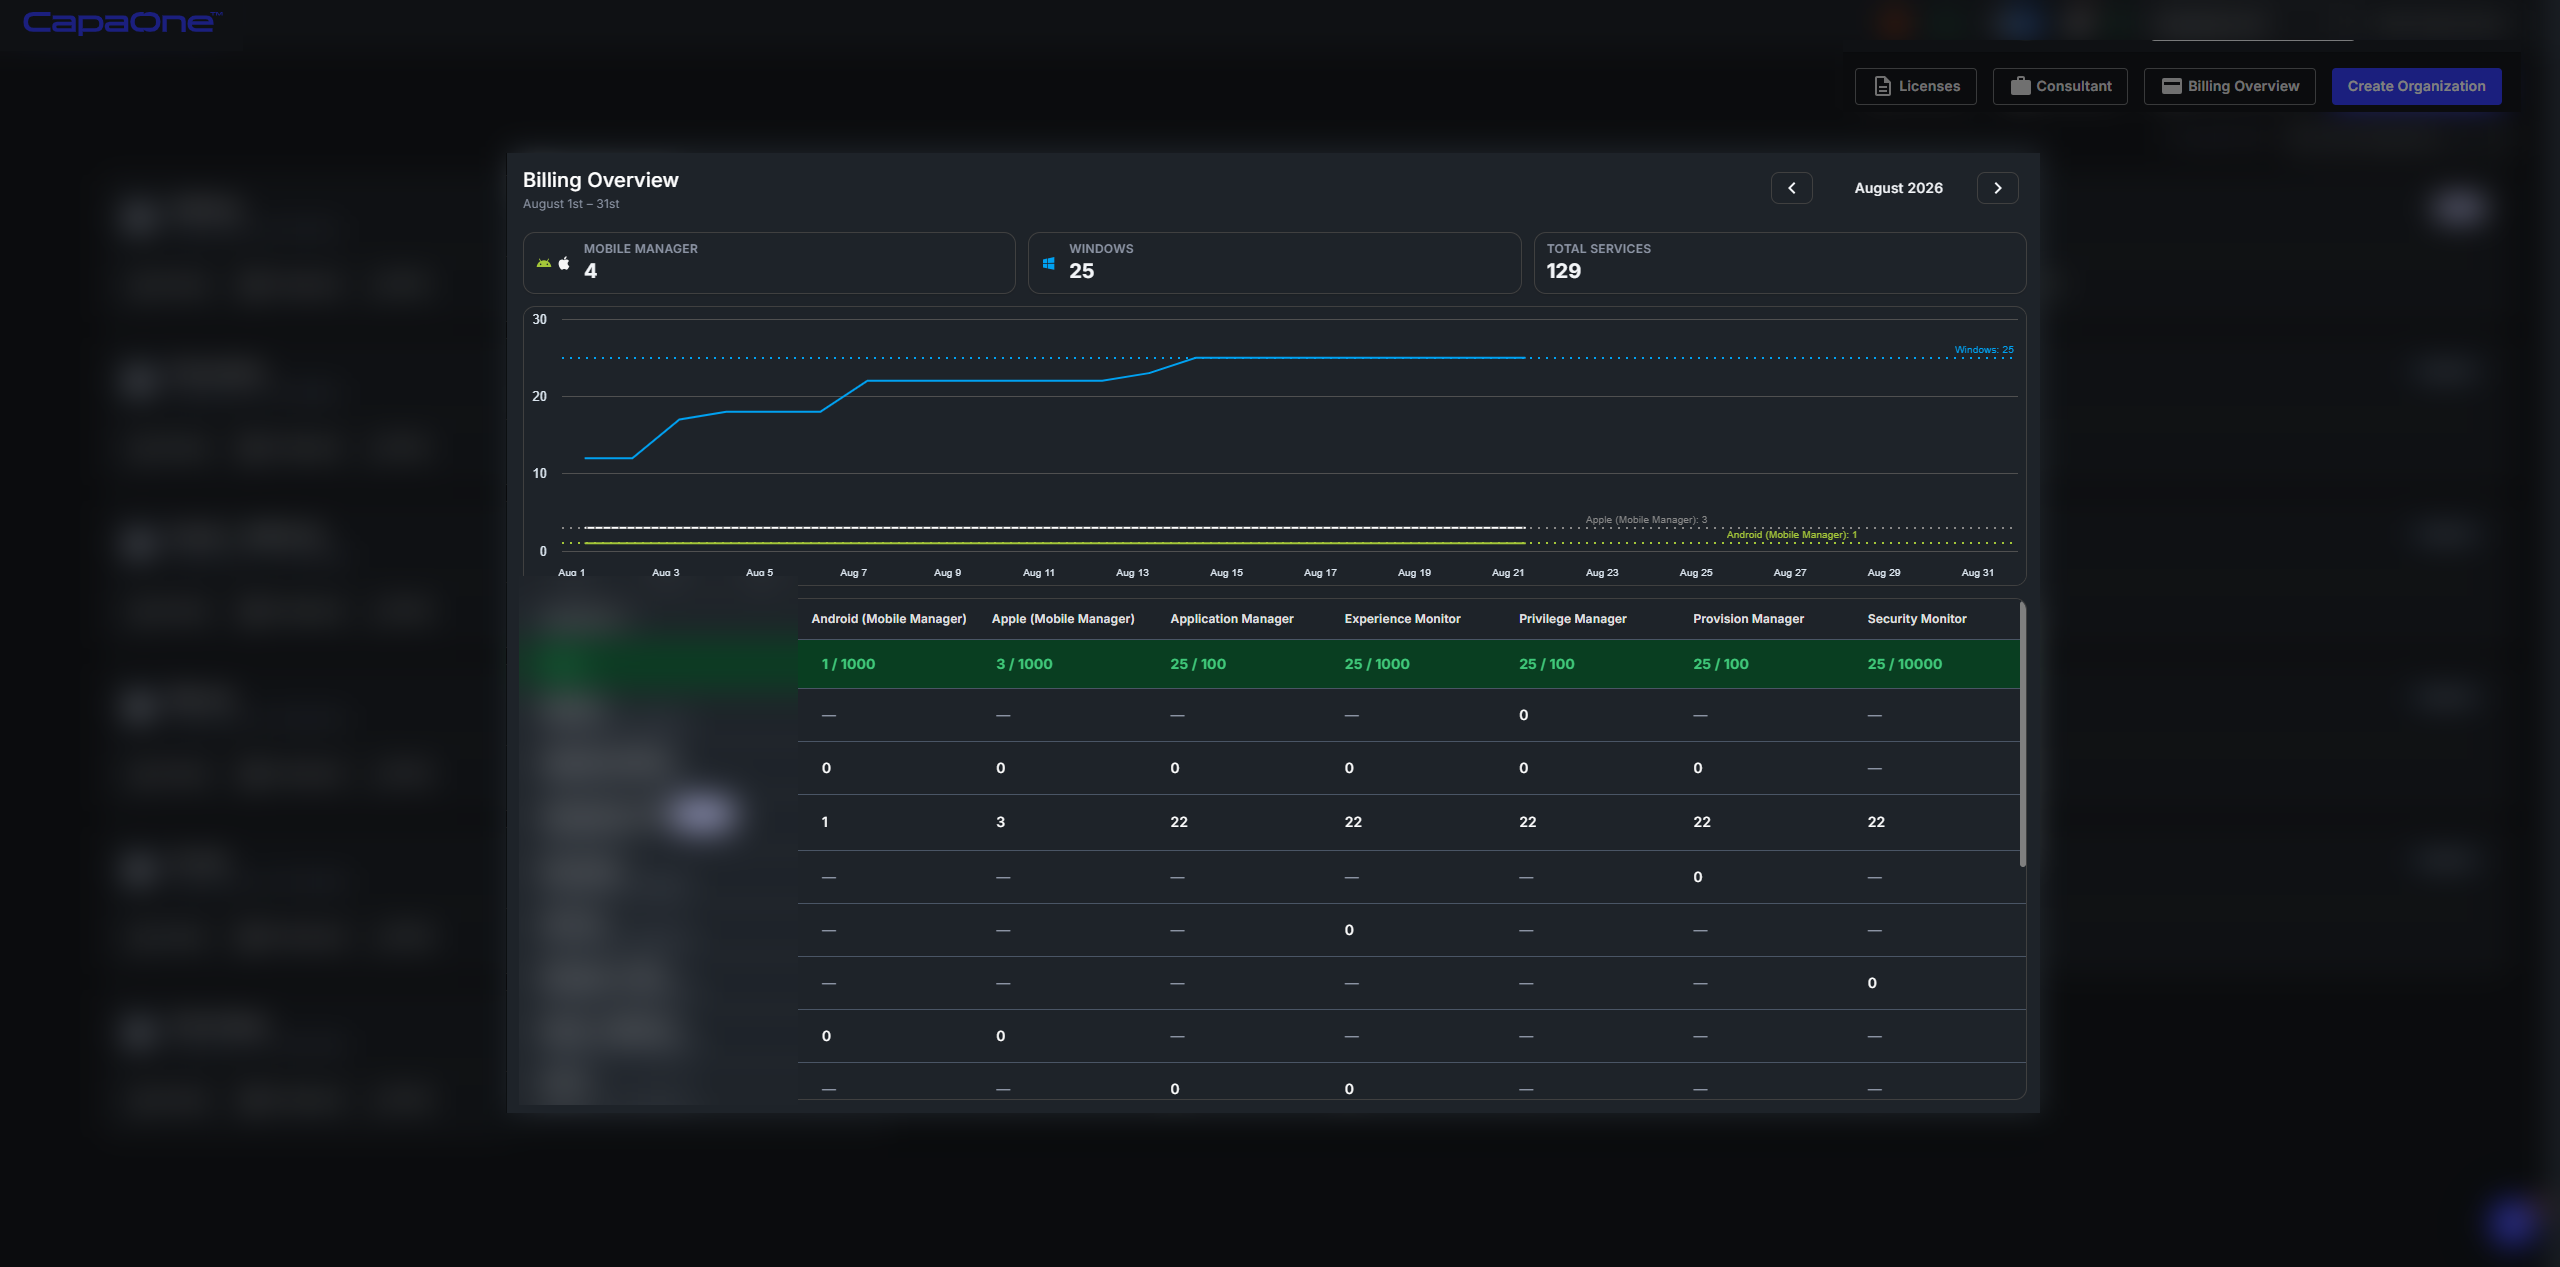
Section titled “Billing Overview”Click Billing Overview in the top toolbar to see the usage for a month across your primary organization and its sub-organizations. Use the arrows to move between months. You can’t go past the current month.
- The cards at the top show the usage for Mobile Manager, Windows, and Total services.
- The chart shows the number of active Windows, Android, and Apple endpoints for each day of the month.
- The table shows the usage per organization and product, with a Totals row at the top. Click a column header to sort.
Consultant
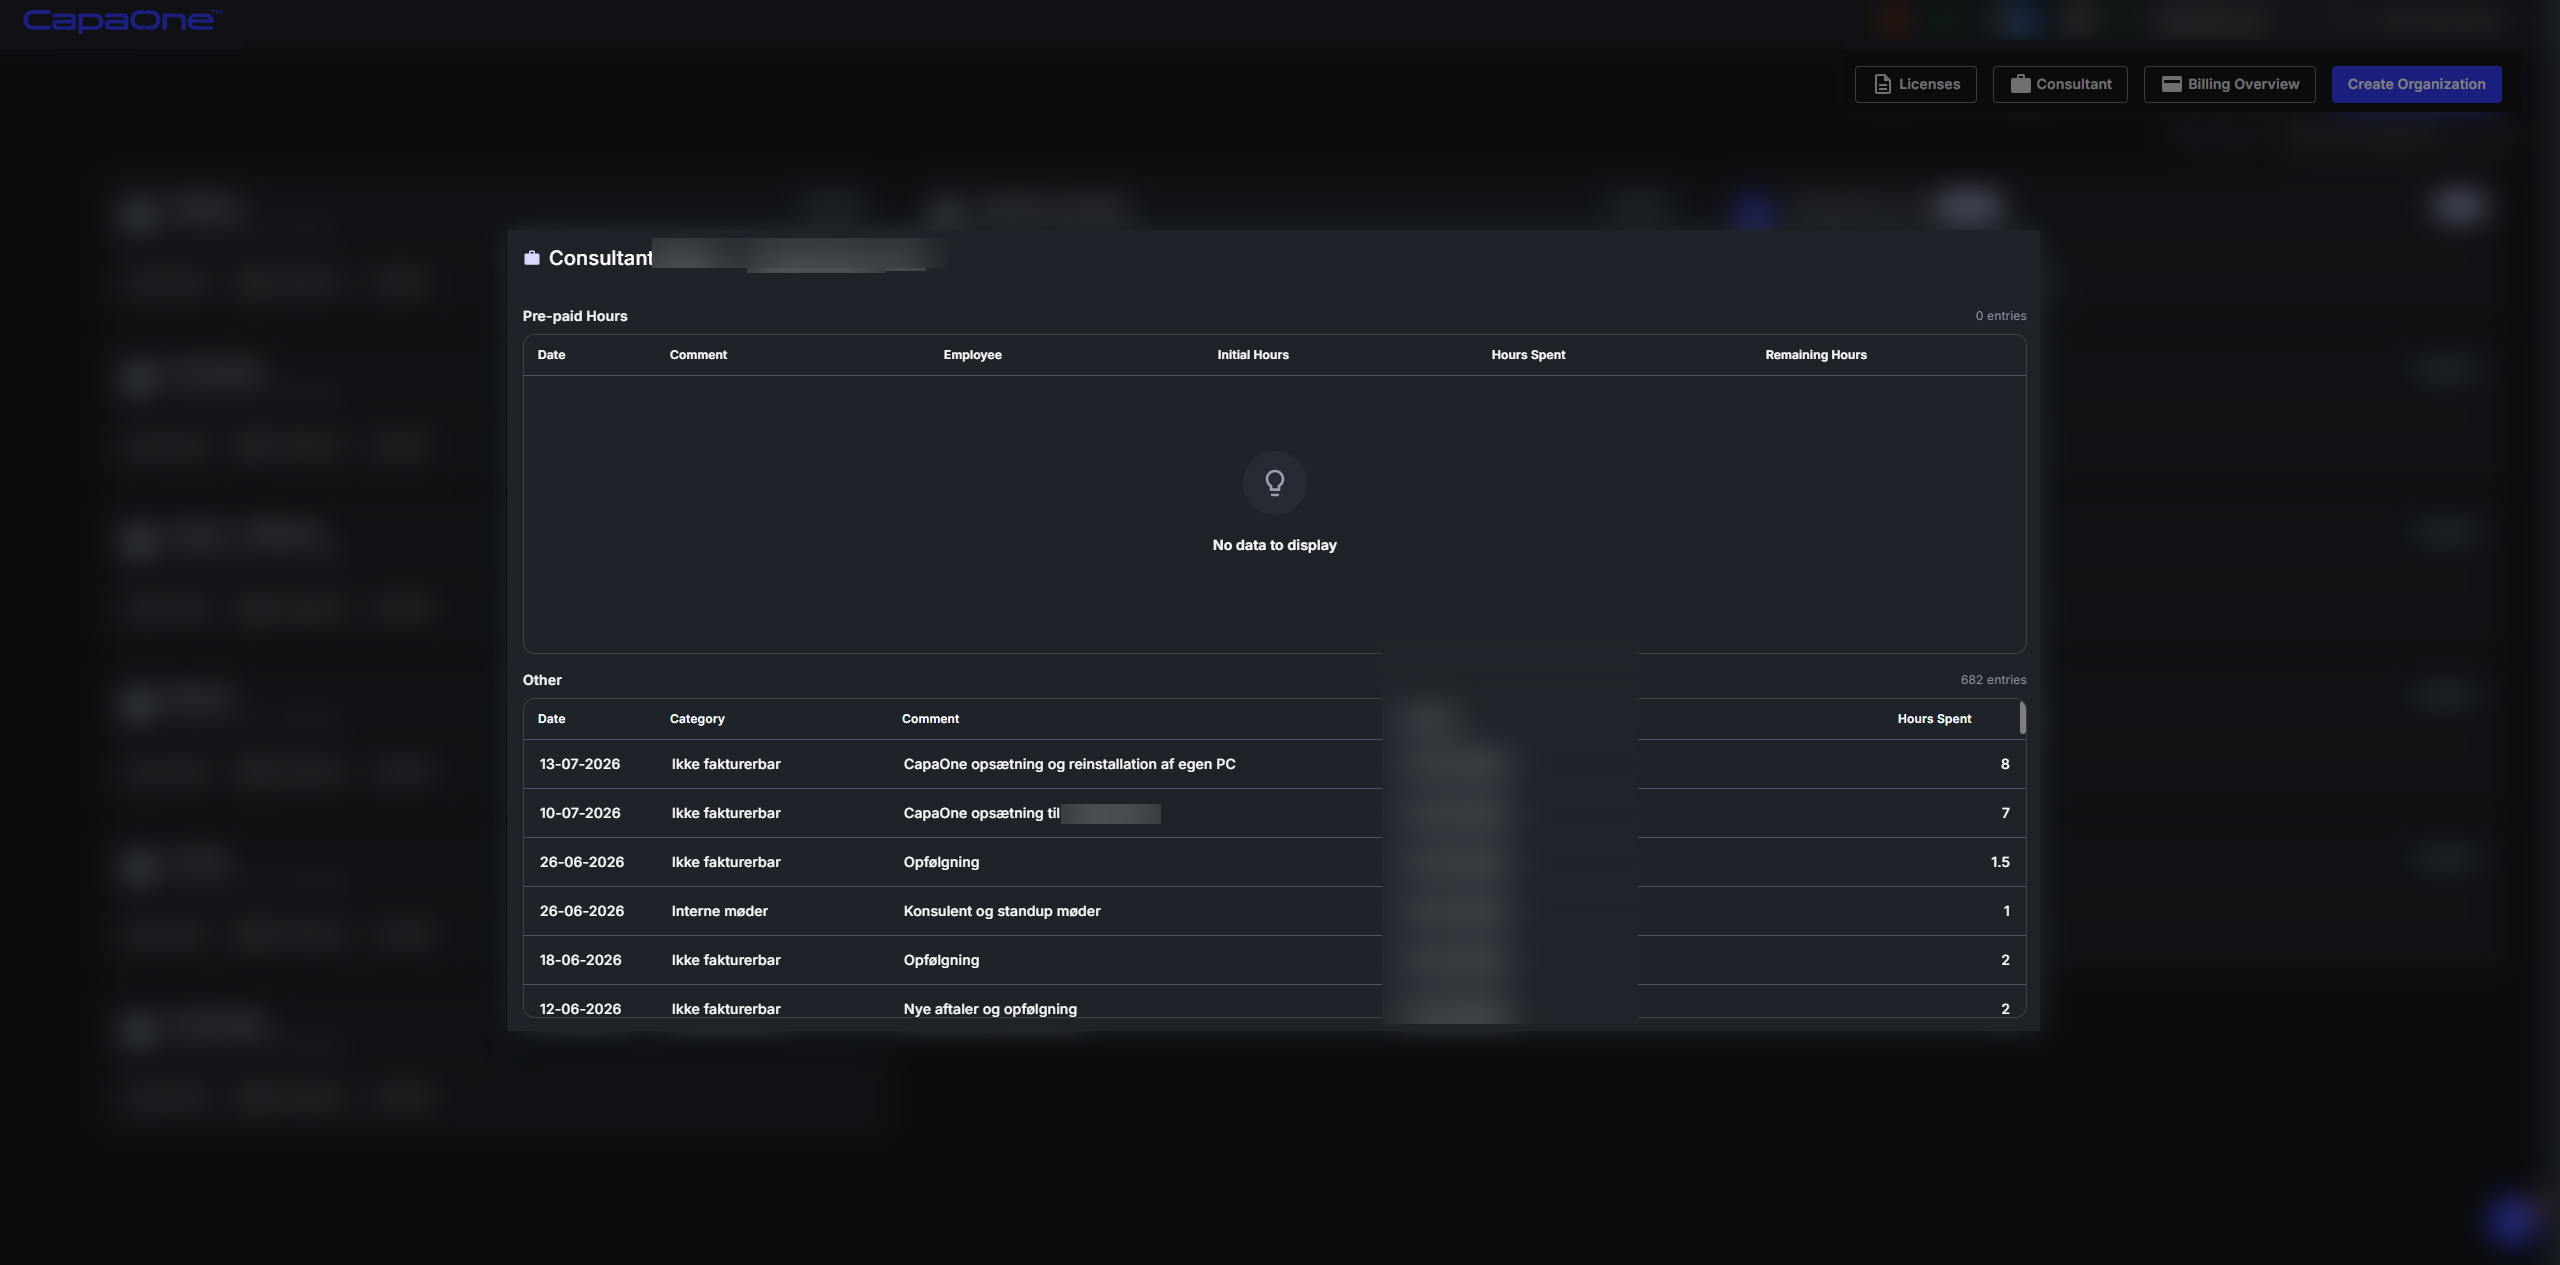
Section titled “Consultant”Click Consultant in the top toolbar to view consultant hours for your primary organization. The page is split into two sections:
- Pre-paid Hours — shows any prepaid consultant hour packages, including the date, comment, employee, initial hours purchased, hours spent, and remaining hours.
- Other — shows a history of all other consultant hours logged against your organization, with the date, category, comment, employee, and hours spent.