
Migrate Apple devices to CapaOne
- Tips before migrating
- Step 1: Plan Your Migration
- Step 2: Get CapaOne ready for migration
- Step 3: Migrate devices to CapaOne
- Step 4: Verify migration in CapaOne
In this step-by-step guide, we’ll walk you through migrating your Apple devices from CapaInstaller or another MDM provider to your CapaOne environment.
Tips before migrating
Section titled “Tips before migrating”- Start the migration by migrating a single device and ensuring that your setup in CapaOne matches your desired requirements before migrating a large number of devices.
- All configurations and apps will stay on the device after migration. They will only be overwritten when new configurations and apps of the same type are applied in CapaOne.
- For a guide on DEP setup, see: How to - CapaOne MDM - DEP enrollment
Step 1: Plan Your Migration
Section titled “Step 1: Plan Your Migration”-
Inventory devices – From your current MDM solution, note the following:
- Enrolled device models
- OS versions running on your devices
- Which devices are Supervised or unsupervised
Since Apple’s migration feature requires specific OS versions and more, checking eligibility now helps set clear expectations and prevents problems later.
-
Communicate with your users – Inform your users about the prompts that will appear during the migration process.
-
Apple Business Manager access – Ensure you have access to an Apple Business Manager that connects to servers for your current MDM supplier’s solution and your CapaOne environment.
-
Test with a single device – Start by testing a single device in CapaOne to confirm that configurations work as intended after migration.
- Migrate one device to CapaOne or enroll a single device directly to test configurations.
Step 2: Get CapaOne ready for migration
Section titled “Step 2: Get CapaOne ready for migration”- Setup assets in CapaOne – Note all configurations and applied applications in your current MDM setup and recreate them in CapaOne.
-
Setup a default enrollment configuration (Recommended)
-
Create an enrollment configuration in CapaOne
-
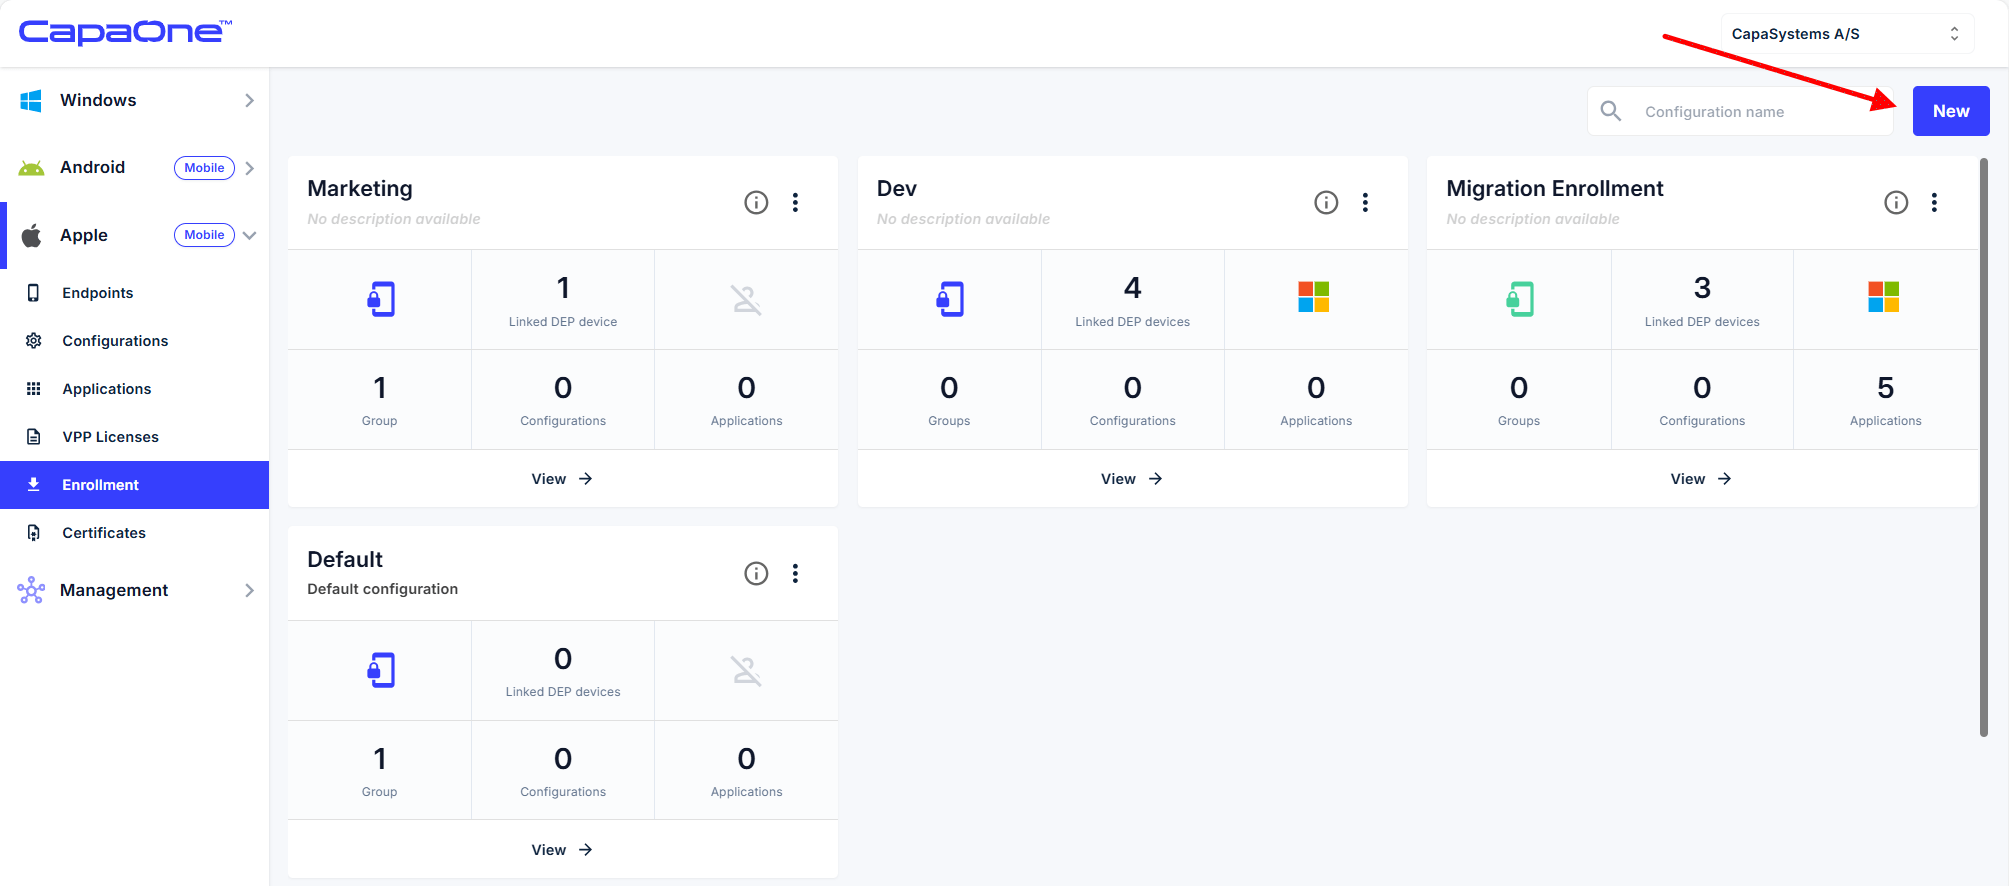
Navigate to Enrollment.
-
Start a new enrollment configuration.
-
-
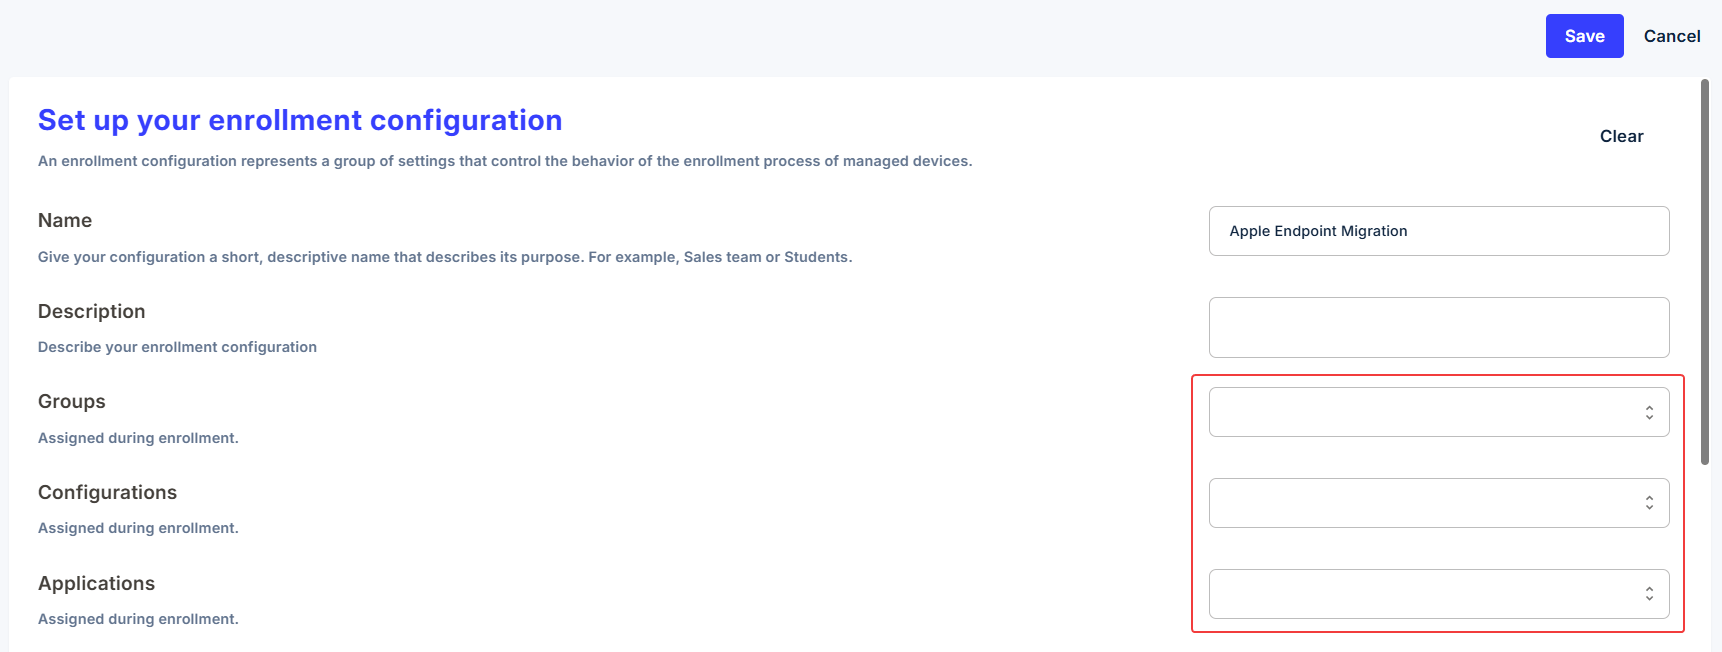
Add required applications
- Select the apps for automatic installation on devices after enrollment.
-
Add required configurations
- Select Wi-Fi profiles, VPN, email settings, restrictions, or other configurations needed after installation.
-
Assign groups
-
Link appropriate groups to the enrollment for immediate policy and app deployment after enrollment.
-
-
Save and verify.
-
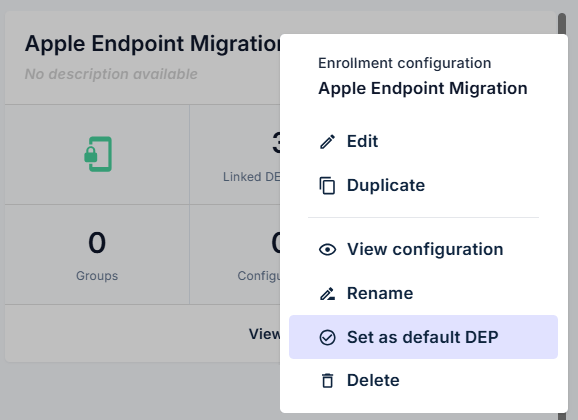
Set as default DEP enrollment configuration
- Mark this configuration as the default for Device Enrollment Program (DEP) devices in CapaOne. This can be done in the action button on the enrollment profile.
-
Step 3: Migrate devices to CapaOne
Section titled “Step 3: Migrate devices to CapaOne”- Login to Apple Business Manager and navigate to Devices.
- Search and select the devices you want to migrate.
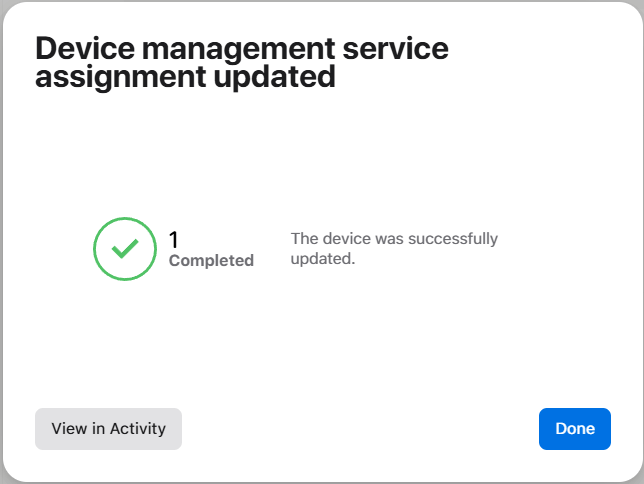
- Click on the action button in the top right corner → Choose Assign Device Management → Select the new MDM server.
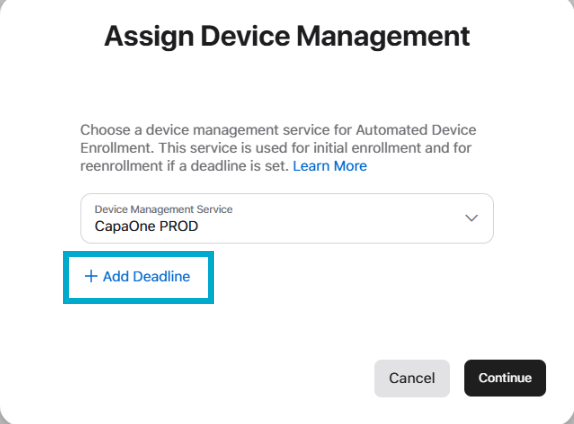
- Set a deadline – Click on + Add Deadline and set up an enrollment deadline → Click Continue through the steps.
Step 4: Verify migration in CapaOne
Section titled “Step 4: Verify migration in CapaOne”-
Verify DEP migration in CapaOne – Navigate to CapaOne Apple → Endpoints → DEP and confirm that the device serial number appears on the list.
- If the device does not sync automatically, manually activate the sync at the bottom of the list.
-
If a default DEP enrollment profile is set in CapaOne, the device will automatically enroll when the user initiates enrollment or when the ABM admin’s deadline arrives.
- Once the device receives the new enrollment, the user will be prompted to start the migration. If the user declines, the device will migrate by the set deadline in ABM.